In this pattern
- My yarn basket
- Granny squares — 3 of them — step by step spaces
- Joining into a triangle
- Pink border
- Tiny strawberries
- Ties and finishing
- Finished bandana
My yarn basket
For this one I used worsted cotton — soft pink, cream, strawberry red, leaf green, and a bit of yellow for the little seeds. I use a 4.5mm hook for the bandana so it's drapey, and a 3.5mm for the strawberries so they stay tight. I work on my white table with my pink yarn ball next to me.
Granny squares — 3 of them
We need three squares, 4 rounds each. I alternate pink and cream — pink outside, cream inside — just like in my photo.
Each round adds one more cluster per side. After each round you get one more chain-1 space per side than before — that's what makes the next round possible.
R1 in pink: magic ring, ch 3 (counts as dc), 2 dc in ring, ch 2, [3 dc in ring, ch 2] 3 times — 4 clusters, 4 corners — join with sl st to top of ch 3 — (12 dc total)
R2 in cream: sl st into ch-2 corner, ch 3, 2 dc, ch 2, 3 dc in same corner — first corner done, ch 1 — [3 dc, ch 2, 3 dc in next corner, ch 1] 3 times — join — You have 8 clusters total: 4 corners + 1 side cluster per side — and 1 ch-1 space per side
R3 in pink: sl st into ch-2 corner, ch 3, 2 dc, ch 2, 3 dc in same corner, ch 1, 3 dc in ch-1 space, ch 1 — [3 dc, ch 2, 3 dc in next corner, ch 1, 3 dc in next ch-1 space, ch 1] 3 times — join — You have 12 clusters total: 4 corners + 2 side clusters per side — and now 2 ch-1 spaces per side (one on each side of the side cluster)
R4 in pink: sl st into ch-2 corner, ch 3, 2 dc, ch 2, 3 dc in same corner, ch 1, [3 dc in next ch-1 space, ch 1] 2 times — [3 dc, ch 2, 3 dc in next corner, ch 1, [3 dc in next ch-1 space, ch 1] 2 times] 3 times — join — You have 16 clusters total: 4 corners + 3 side clusters per side — 3 ch-1 spaces per side for border — Square ~5" — fasten off
How I check: after R2, 1 cluster per side. After R3, 2 clusters per side. After R4, 3 clusters per side — that's what we want, and you should have 3 little gaps per side ready for the border. If you don't, you missed a ch-1 between clusters.

One of my squares after 4 rounds — 3 clusters per side, just like we counted.
Joining into a triangle
I lay two squares side by side on top, and one centered below them — it makes a triangle with the point at the bottom. I join them with single crochet through both edges — I like the little ridge it makes.
Sc through both squares — 16 sc per seam including corners — 3 seams total
Now it looks like a triangle — about 20 inches wide at the top, 11 inches tall. There will be a little hole in the middle where the three meet — we cover it with the border.
Pink border
For the border I use pink — two rounds of single crochet. It frames everything and covers that little hole.
R1: attach pink in top left corner, sc, ch 1, sc in same corner, sc in each dc and each ch-1 space around — 3 sc in each corner and 3 sc in the bottom point — join
R2: sc around again, 3 sc in the point and 3 sc in top corners — join — fasten off
I do 3 stitches in the point every round so it stays sharp, not rounded.
Tiny strawberries
Each one is about an inch tall — quick little red berries with green leaves.
R1: magic ring, 6 sc (6)
R2: [sc 1, inc] 3 times (9)
R3: [sc 2, inc] 3 times (12)
R4-5: sc 12 — 2 rounds
R6: [sc 2, dec] 3 times (9) — stuff a tiny bit
R7: [sc 1, dec] 3 times (6) — close
Leaves — green: at top, *ch 3, sc in 2nd ch, sc in next, sl st back to center* 3 times — plus ch 2 for stem
Seeds — yellow: 6 little V stitches scattered on the red

My little strawberry — red with green leaves and yellow seeds.
Ties and finishing
Left corner: ch 50, sc in 2nd ch and each across — 49 sc — sl st to corner
Right corner: same — ch 50, sc 49
These ties are about 12 inches long and they don't curl because we single crochet back. If you want longer ties, chain 70.
I weave in all my tails inside the squares and steam the bandana lightly. I wash mine cold and lay it flat. I sew one strawberry in the center of each square with red yarn — just a few stitches — and tack the green leaves down with one green stitch.
Finished bandana
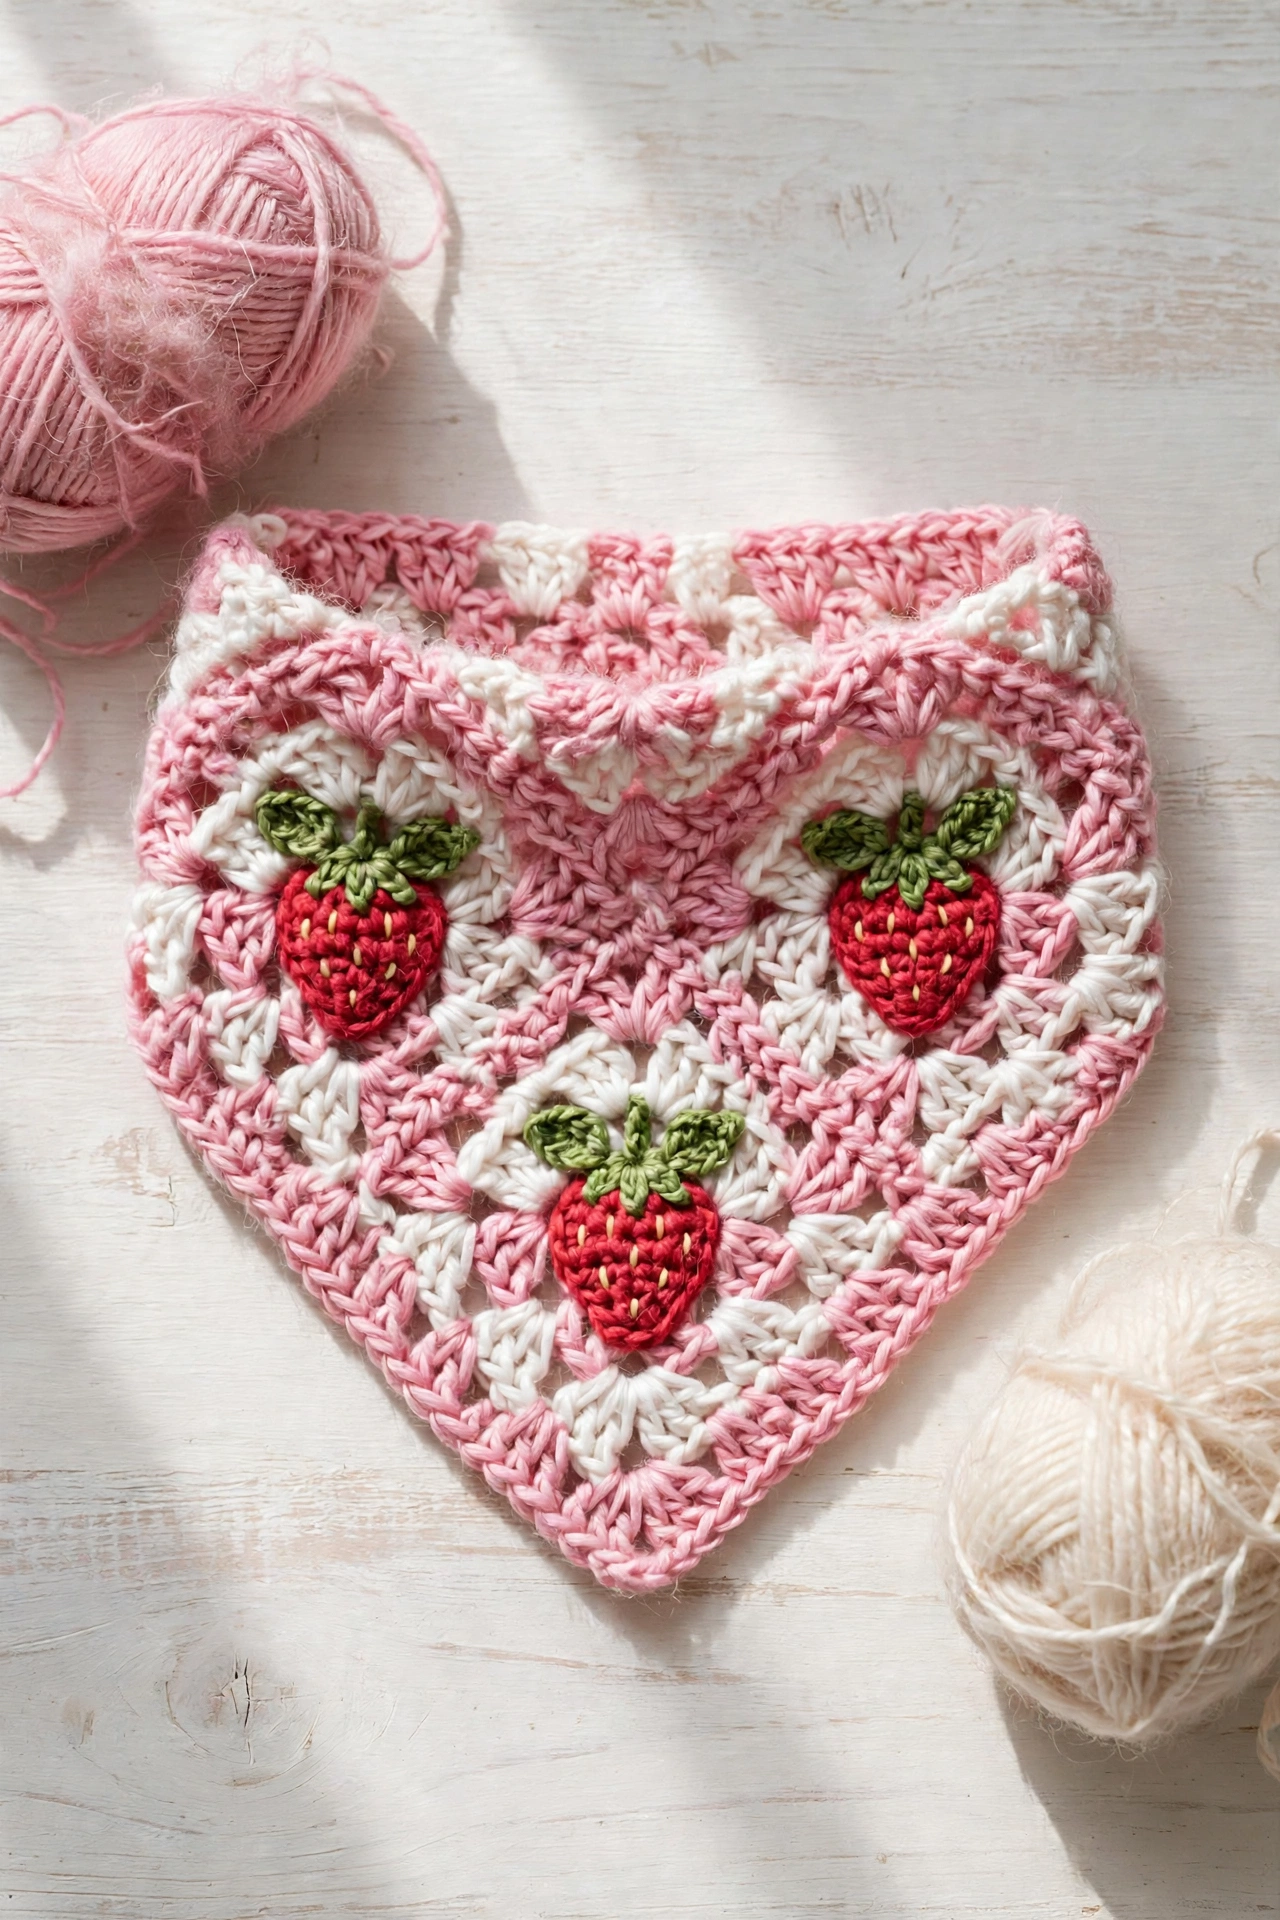
Here she is — my strawberry bandana finished. Pink and cream with three strawberries. I wear mine with two braids or with my hair up.

Finished — pink and cream granny bandana with three strawberries.

This is my sweetest summer make. I made it with tea and sunshine, and my niece wears hers every day. I hope you love making yours too. 🍓💕