In this pattern — long version
- My yarn basket
- How a chevron triangle grows
- Stripe math — 2 rows per color
- Row by row — from point to top — precise
- Where I change colors
- Ties that don't curl
- Finishing and washing
- Finished bandana
My yarn basket
For this one I used worsted cotton — burnt orange and cream. Orange is 80 grams, cream is 80 grams — I used almost the same amount of each because stripes are even.
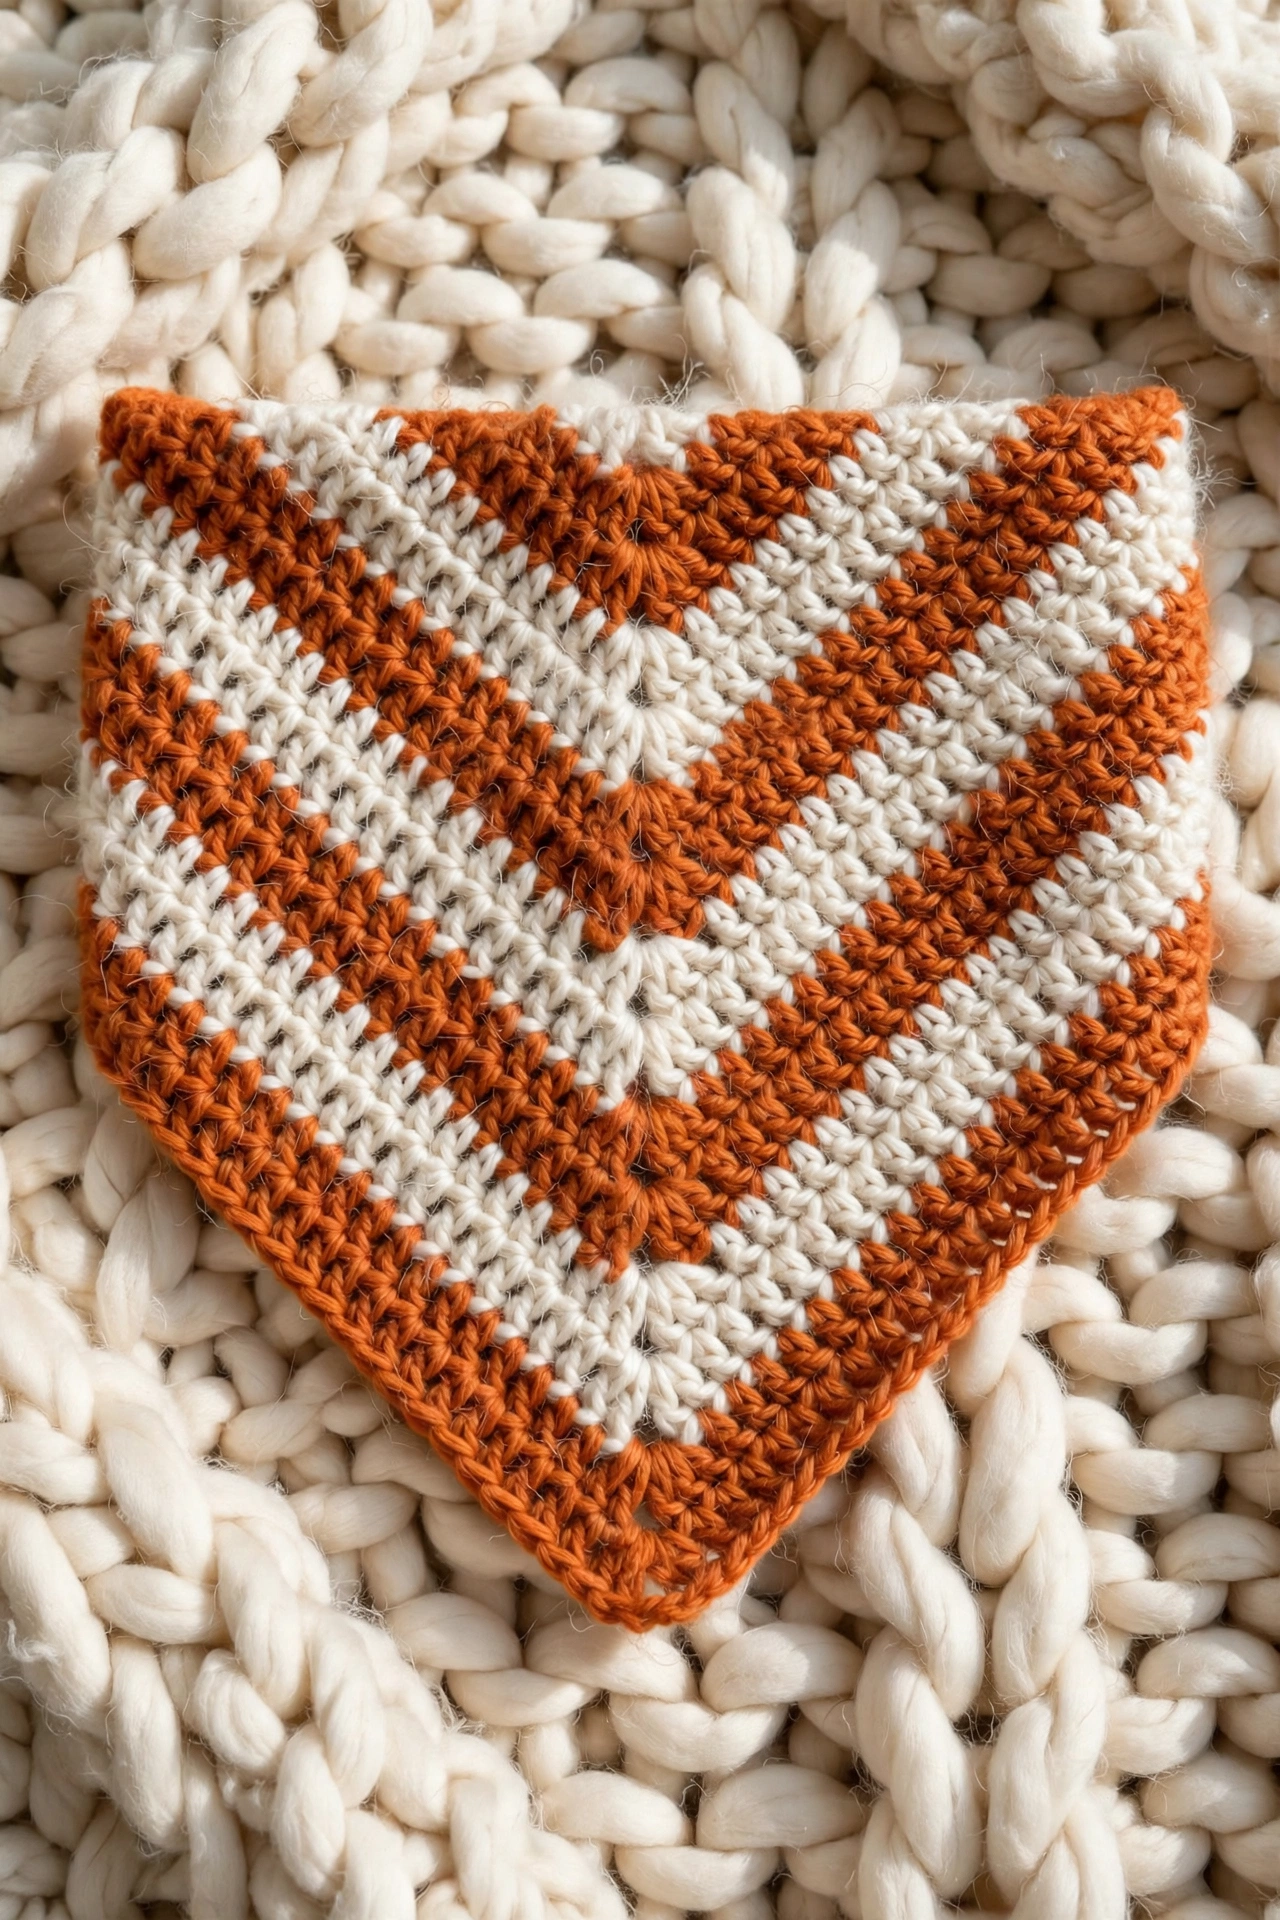
I used a 5.0mm hook so it's drapey and soft — not stiff. The photo I took is on my chunky cream knit blanket — I love that texture with the chevron — cozy on cozy.
I like cotton for bandanas because it breathes — it doesn't get too hot.

My yarn basket — burnt orange and cream — 5.0mm hook and gold scissors — real photo on my linen table.
How a chevron triangle grows
This bandana starts at the bottom point and gets wider every row. Each row I add one more stitch group on each side of the center V. The center is always where the chevron points — it's what makes the point sharp and the V stripes line up.
For this chevron I use the same center I use on my other triangle bandanas — 3 double crochet, chain 2, 3 double crochet in the center chain-2 space every row. That chain 2 is the point that stays sharp and makes the V stripes point down. Just like my orange bat and black pumpkin bandanas.
Between side stitches I always do chain 1 — that chain 1 makes little holes that make it airy and drapey.
After each row, count your chain-1 spaces per side — that's your checkpoint. After row 2 you have 1 space per side, after row 3 you have 2, after row 4 you have 3. So after row n, spaces per side = n - 1. I write it on paper: R2=1, R3=2, R4=3. After row 18, I should have 17 spaces per side — about 12 inches tall, 22 inches wide at top.

My chevron growing — orange and cream V stripes — starting at point — 5.0mm hook — each stripe 2 rows.
Stripe math — 2 rows per color
In my photo each color stripe is 2 rows thick — 2 rows orange, 2 rows cream, 2 rows orange — that makes the chevron look even and balanced.
I change color after 2 rows — cut, join new color, continue. I don't carry yarn up the side — I cut and weave later so no color shows through.
For 18 rows total, I have 9 stripes — 5 orange, 4 cream — or 4 orange, 5 cream depending where you start — I started with orange at point like in photo — so orange at point and at bottom edge — looks framed.
Row by row — from point to top — precise
I start at bottom point with burnt orange. Every row I turn.
R1: ch 4, 3 dc in 4th ch from hook, ch 2, 3 dc in same ch — 2 clusters + center ch-2 point — turn — 2 clusters
R2: ch 3, 2 dc in first space, ch 1, (3 dc, ch 2, 3 dc) in center ch-2 space, ch 1, 3 dc in last space — 4 clusters — turn — checkpoint: 1 ch-1 space per side
R3: ch 3, 2 dc in first space, ch 1, 3 dc in next ch-1 space, ch 1, (3 dc, ch 2, 3 dc) in center, ch 1, 3 dc in next ch-1 space, ch 1, 3 dc in last space — 6 clusters — turn — 2 spaces per side
R4: ch 3, 2 dc in first space, [ch 1, 3 dc in next space] 2 times, ch 1, (3 dc, ch 2, 3 dc) center, ch 1, [3 dc in next space, ch 1] 2 times, 3 dc last — 8 clusters — turn — 3 spaces per side
R5: ch 3, 2 dc first, [ch 1, 3 dc] 3 times, ch 1, (3 dc, ch 2, 3 dc) center, ch 1, [3 dc, ch 1] 3 times, 3 dc last — 10 clusters — turn — 4 spaces per side
Continue — each row adds 2 clusters (one per side) and one more space per side — formula: clusters = 2 × row, spaces per side = row - 1
R6: 12 clusters — 5 spaces per side — end of third stripe — (R5-6 orange)
Color change: Work 2 rows orange, cut, join cream, work 2 rows cream, cut, join orange, etc — always join new color in first space with sl st
Work until R18: 36 clusters total, 17 spaces per side, about 12" tall, 22" wide at top — 9 stripes — 5 orange, 4 cream if starting orange — matches photo — about 18 rows is size in photo
This is exactly how I made mine in the photo — 18 rows, 36 clusters at end, 17 spaces per side, 9 stripes — orange, cream, orange, cream — V shape pointing down — about 22 inches wide at top edge, 12 inches tall to point.
If your triangle curls, you forgot chain 1 between clusters. If point is rounded, you forgot chain 2 in center. If stripes don't make V, you forgot to put (3 dc, ch 2, 3 dc) in center every row.
Where I change colors
For this chevron I change after 2 rows — so each stripe is 2 rows thick — like in my photo where orange and cream are even.
I start with orange at point — R1-2 orange, R3-4 cream, R5-6 orange, R7-8 cream, and so on until R18. I cut yarn after 2 rows, leaving 4 inch tail, join new color with slip stitch in first space.
I weave tails inside same-color clusters so they hide — orange tails inside orange, cream inside cream.
Ties that don't curl
Left top corner: attach cream, ch 60, sc in 2nd ch and each ch across — 59 sc — sl st to corner — fasten off — about 14" tie
Right top corner: same — ch 60, sc 59 — fasten off
I make ties 14 inches so I can tie around my bun. Single crochet back keeps them from curling — if you just chain, they curl and look messy. I use cream for ties so they match the last stripe.
Finishing and washing
I weave in all tails inside same-color stitches — orange inside orange, cream inside cream — so they don't peek through.
I steam lightly with iron not touching — just steam over — so triangle lays flat. I don't press hard — I want chevron texture to stay.
I wash mine cold and lay flat to dry — cotton stretches if hung. My cream chunky blanket in photo is where I lay it to dry — cozy.
Finished bandana
Here she is — my orange cream chevron bandana finished — burnt orange and cream V stripes — just like in my photo on my chunky knit blanket.
I wear mine with my cream sweaters and orange socks — it goes with fall. When I wear it to market, people always ask about the V stripes — I tell them it's just granny triangle with stripes.

Finished — orange and cream chevron triangle — 22" wide × 12" tall — 9 stripes, 36 clusters at top — my cozy chevron bandana.

This chevron bandana is my coziest fall make. I made it with my chunky blanket around me and tea, and I wear it whenever the air gets crisp. I hope you love making yours too — orange and cream Vs, one by one. 🧡🤍🍂