In this pattern
- My yarn basket
- How a triangle grows
- The bat stitch — my favorite part
- Orange bandana — row by row
- Ties
- Finishing
- Finished bandana
My yarn basket
For this one I used worsted cotton — pumpkin orange and little bat black. I use a 4.5mm hook so it's drapey, not stiff. I work on my linen table with fallen maple leaves around — just like when I first made it.
I like cotton for bandanas because it doesn't get too hot, and the orange in my photo is a warm pumpkin — not neon, more like autumn leaves.
How a triangle grows
A triangle bandana starts at the bottom point and gets wider each row. Each row you add one more granny cluster on each side of the center. So row 1 has 2 clusters, row 2 has 3, row 3 has 4 — it grows evenly. The center is always 3 dc, ch 2, 3 dc — that's the point that makes it sharp.
The trick I learned: after each row, count your chain-1 spaces. You should have one more space per side than last row. That way you always know where to put the next clusters.

My triangle growing — I started at the bottom point and it gets wider each row. Orange yarn, 4.5mm hook.
The bat stitch — my favorite part
The little bats are just 5 stitches in black worked into an orange cluster space. I make them look like bats by how I place them — two wings and a little body in the middle. It's not a complicated tapestry — I just switch to black for one cluster, then back to orange.
Bat = [dc 1, ch 1, dc 2, ch 1, dc 1] all in same ch-1 space — looks like a tiny bat with wings — then continue with orange
I place a bat every other row, staggered like in my photo — so bats don't line up straight, they fly around. That's what makes it look like real bats.

One of my little bats — 5 stitches in black — wings open, just like in the bandana.
Orange bandana — row by row
I start at the bottom point with orange. Every row I turn.
R1: ch 4, join to first ch with sl st to make ring, ch 3 (counts as dc), 2 dc in ring, ch 2, 3 dc in ring — 2 clusters + center point — turn
R2: ch 3, 2 dc in first space, ch 1, (3 dc, ch 2, 3 dc) in ch-2 center point, ch 1, 3 dc in last space — 4 clusters — turn — you have 1 space per side now (one ch-1 gap between edge and center on each side)
R3: ch 3, 2 dc in first space, ch 1, 3 dc in next ch-1 space, ch 1, (3 dc, ch 2, 3 dc) in center, ch 1, 3 dc in next space, ch 1, 3 dc in last space — 6 clusters — turn — 2 spaces per side now
R4: ch 3, 2 dc in first space, [ch 1, 3 dc in next space] 2 times, ch 1, (3 dc, ch 2, 3 dc) in center, ch 1, [3 dc in next space, ch 1] 2 times, 3 dc in last space — 8 clusters — turn — 3 spaces per side now
Continue growing — same idea:
Each new row: ch 3, 2 dc in first space, [ch 1, 3 dc in next ch-1 space] across to center, ch 1, (3 dc, ch 2, 3 dc) in center, ch 1, [3 dc in next space, ch 1] across, 3 dc in last space — turn — each row adds 2 clusters (one per side) and one more space per side (so after R5 you have 4 spaces per side, after R6 you have 5, etc)
Work until R13 — you should have 26 clusters total, 12 spaces per side (R13 minus 1), about 12" tall — about 22" wide at top
Bats — switch to black for bat clusters:
R5, R7, R9, R11, R13 — in these rows, work bats in black: every other ch-1 space, work [dc 1, ch 1, dc 2, ch 1, dc 1] in black instead of 3 dc in orange — stagger bats so they don't line up — I do: R5 bats in spaces 1 and 3 per side, R7 in spaces 2 and 4, R9 in 1,3,5, etc — like flying bats
All other rows and spaces stay orange — carry orange behind black, or cut and join — I cut and weave later so no floats
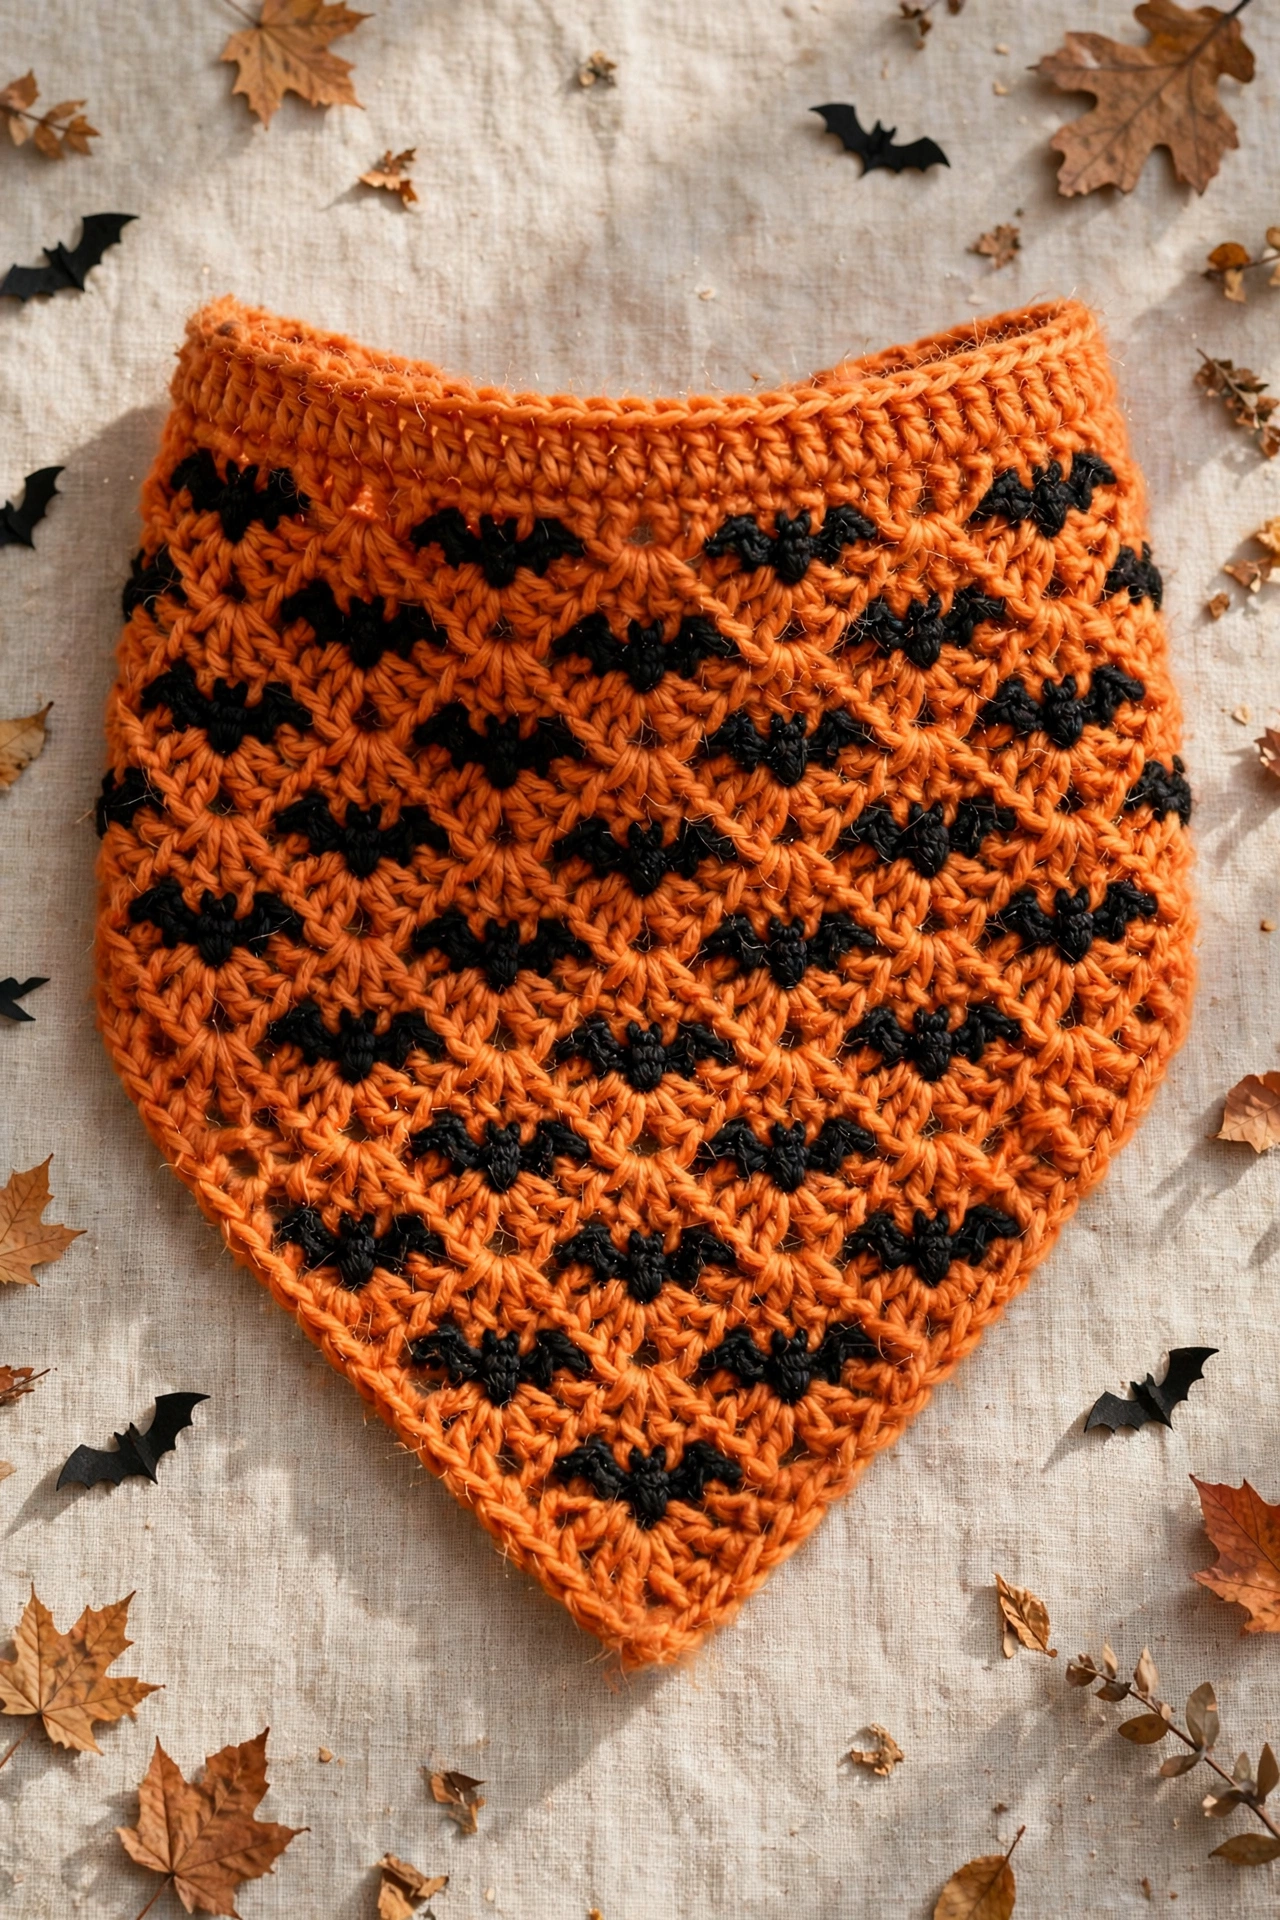
This is how I made mine in the photo — orange triangle growing from the point, black bats every other row, staggered. After R13 it looks just like your photo — lots of little bats flying.
If your triangle curls, you forgot a ch-1 between clusters. If the point is rounded, you forgot ch 2 in the center.
Ties
Left corner: attach orange in top left corner, ch 50, sc in 2nd ch and each across — 49 sc — sl st to corner — fasten off — about 12"
Right corner: same — ch 50, sc 49 — fasten off
I like ties that don't curl, so I single crochet back along the chain. If you want longer ties to wrap around a bun, chain 70 and sc 69 — about 17 inches.
Finishing
I weave in all my tails inside the clusters — I hide black tails inside orange clusters so they don't show. I steam it lightly so the triangle lays flat. I wash mine cold and lay flat to dry — cotton stretches if you hang it.
The border in my photo is just one round of single crochet in orange around the top edge — sc in each stitch and 3 sc in the bottom point to keep it sharp. I do it after the triangle is done.
Finished bandana
Here she is — my orange bat bandana finished. Pumpkin orange with little black bats flying all over. I wear mine in October with a sweater, and it makes me smile every time I put it on.

Finished — orange triangle with black bats, just like I made on my linen table with maple leaves.

This bat bandana is my October favorite. I made it with falling leaves outside my window, and now I wear it every time I get my pumpkin coffee. I hope you love yours too. 🦇🧡🍂