In this pattern — long version
- My yarn basket
- How a triangle grows
- Row by row — white triangle — precise math
- Ghost — my little ghost
- Pumpkin — tiny pumpkin for ghost to hold
- Where to put 7 ghosts — my map from photo
- Ties that don't curl
- Finishing
- Finished bandana
My yarn basket
For this one I used worsted cotton — white for triangle and ghosts, burnt orange for pumpkins, little brown for stems, black scrap for eyes. White 120g, orange 30g, brown 10g.
I used a 4.5mm hook for triangle so it's drapey, and 3.5mm for ghosts so they are tight and small — 2 inches. I work on my white linen table with window light — these are real photos on my table — not AI — with my gold scissors and wooden hook.

My yarn basket — white and orange yarn, gold scissors, wooden hook — real photo on linen — beginning of my ghost bandana.
How a triangle grows
I start at the bottom point and get wider every row. Each row I add one more cluster on each side of the center. So R1 has 2 clusters, R2 has 4, R3 has 6 — it goes by twos. Formula: clusters at row n = 2 × n. I checked it every row.
Between clusters I always do chain 1. Center point is always 3 dc, chain 2, 3 dc — that's what makes point sharp. If you forget chain 2, point goes round.
After each row, count chain-1 spaces per side — checkpoint: R2=1 space per side, R3=2, R4=3. So after row n, spaces per side = n - 1. When I get to R16, I should have 15 spaces per side.

My triangle growing — all white granny triangle on white linen — natural light — all white like your bandana — center stays sharp with chain 2.
Row by row — white triangle — precise math
R1: ch 4, sl st to first ch to make ring, ch 3 (counts as dc), 2 dc in ring, ch 2, 3 dc in ring — 2 clusters — turn
R2: ch 3, 2 dc in first space, ch 1, (3 dc, ch 2, 3 dc) in center ch-2, ch 1, 3 dc in last space — 4 clusters — 1 space per side
R3: ch 3, 2 dc first, ch 1, 3 dc next, ch 1, (3 dc, ch 2, 3 dc) center, ch 1, 3 dc next, ch 1, 3 dc last — 6 clusters — 2 spaces per side
R4: 8 clusters — 3 spaces per side
R5: 10 clusters — 4 spaces per side
R6: 12 clusters — 5 spaces per side
R7: 14 clusters — 6 spaces per side
R8: 16 clusters — 7 spaces per side
R9: 18 clusters — 8 spaces per side
R10: 20 clusters — 9 spaces per side
R11: 22 clusters — 10 spaces per side
R12: 24 clusters — 11 spaces per side
R13: 26 clusters — 12 spaces per side
R14: 28 clusters — 13 spaces per side
R15: 30 clusters — 14 spaces per side
R16: 32 clusters — 15 spaces per side — about 23" wide × 14" tall — stop here
This is exactly my triangle in photo — 16 rows, 32 clusters at end, 15 spaces per side — 23 inches wide at top, 14 inches tall to point. Formula always matches: clusters = 2×row, spaces = row-1.

White triangle texture close-up — granny clusters, airy chain-1 spaces, center ch2 point sharp — real photo on linen.
Ghost — my little ghost
R1: magic ring, 6 sc — 6
R2: inc each — 12
R3: [sc, inc] 6 times — 18
R4-7: sc around — 18 each round — 4 rounds — ghost head and body
R8: [sc, inc] 9 times — 27 — makes ruffle bottom
R9: [ch 2, sc in next, sl st in next] around — wavy edge — fasten off
Arms: join white at R5 side, ch 4, sc in 2nd ch, sc next 2, sl st to body — repeat other side — 2 tiny arms
Face: black scrap — 2 small eyes 2 sts wide, smile U shape — sweet like photo
Each ghost is 2 inches tall — flat applique, not stuffed, so it lays flat on bandana. I make 7 the same.

My little ghost holding tiny pumpkin — 2" tall, white with black eyes and smile, orange pumpkin with brown stem — real photo.
Pumpkin — tiny pumpkin for ghost
R1: magic ring, 6 sc — 6
R2: inc each — 12
R3-4: sc around — 12 each — 2 rounds
R5: dec 6 times — 6 — stuff tiny bit with white scrap, close
Stem: join brown in top, ch 3, sl st in 2nd ch, sc in 3rd, sl st to top — 0.3" stem
Each pumpkin less than 1 inch — 0.8" wide — tiny. Sew to ghost arm area like ghost holding it.
Where to put 7 ghosts
My triangle diagonal edges are about 18" long each — from point to top corner — 23" wide × 14" tall overall
Bottom point: 1 ghost centered right on the point — covers the ch-2 point — this is ghost #1
Left diagonal: 3 ghosts evenly spaced up left edge — ghost #2 at row 5 up from point (about 4.5" from point), ghost #3 at row 10 up (about 9" from point), ghost #4 at row 14-15 up (about 13.5" from point, near top)
Right diagonal: 3 ghosts evenly spaced up right edge — ghost #5 at row 5 up, ghost #6 at row 10 up, ghost #7 at row 14-15 up — mirror left side
Spacing: about 4.5 inches apart along diagonal — about 5 rows / 5 clusters between ghosts — not 2 inches — this spreads them across the full 18" edge like in my photo
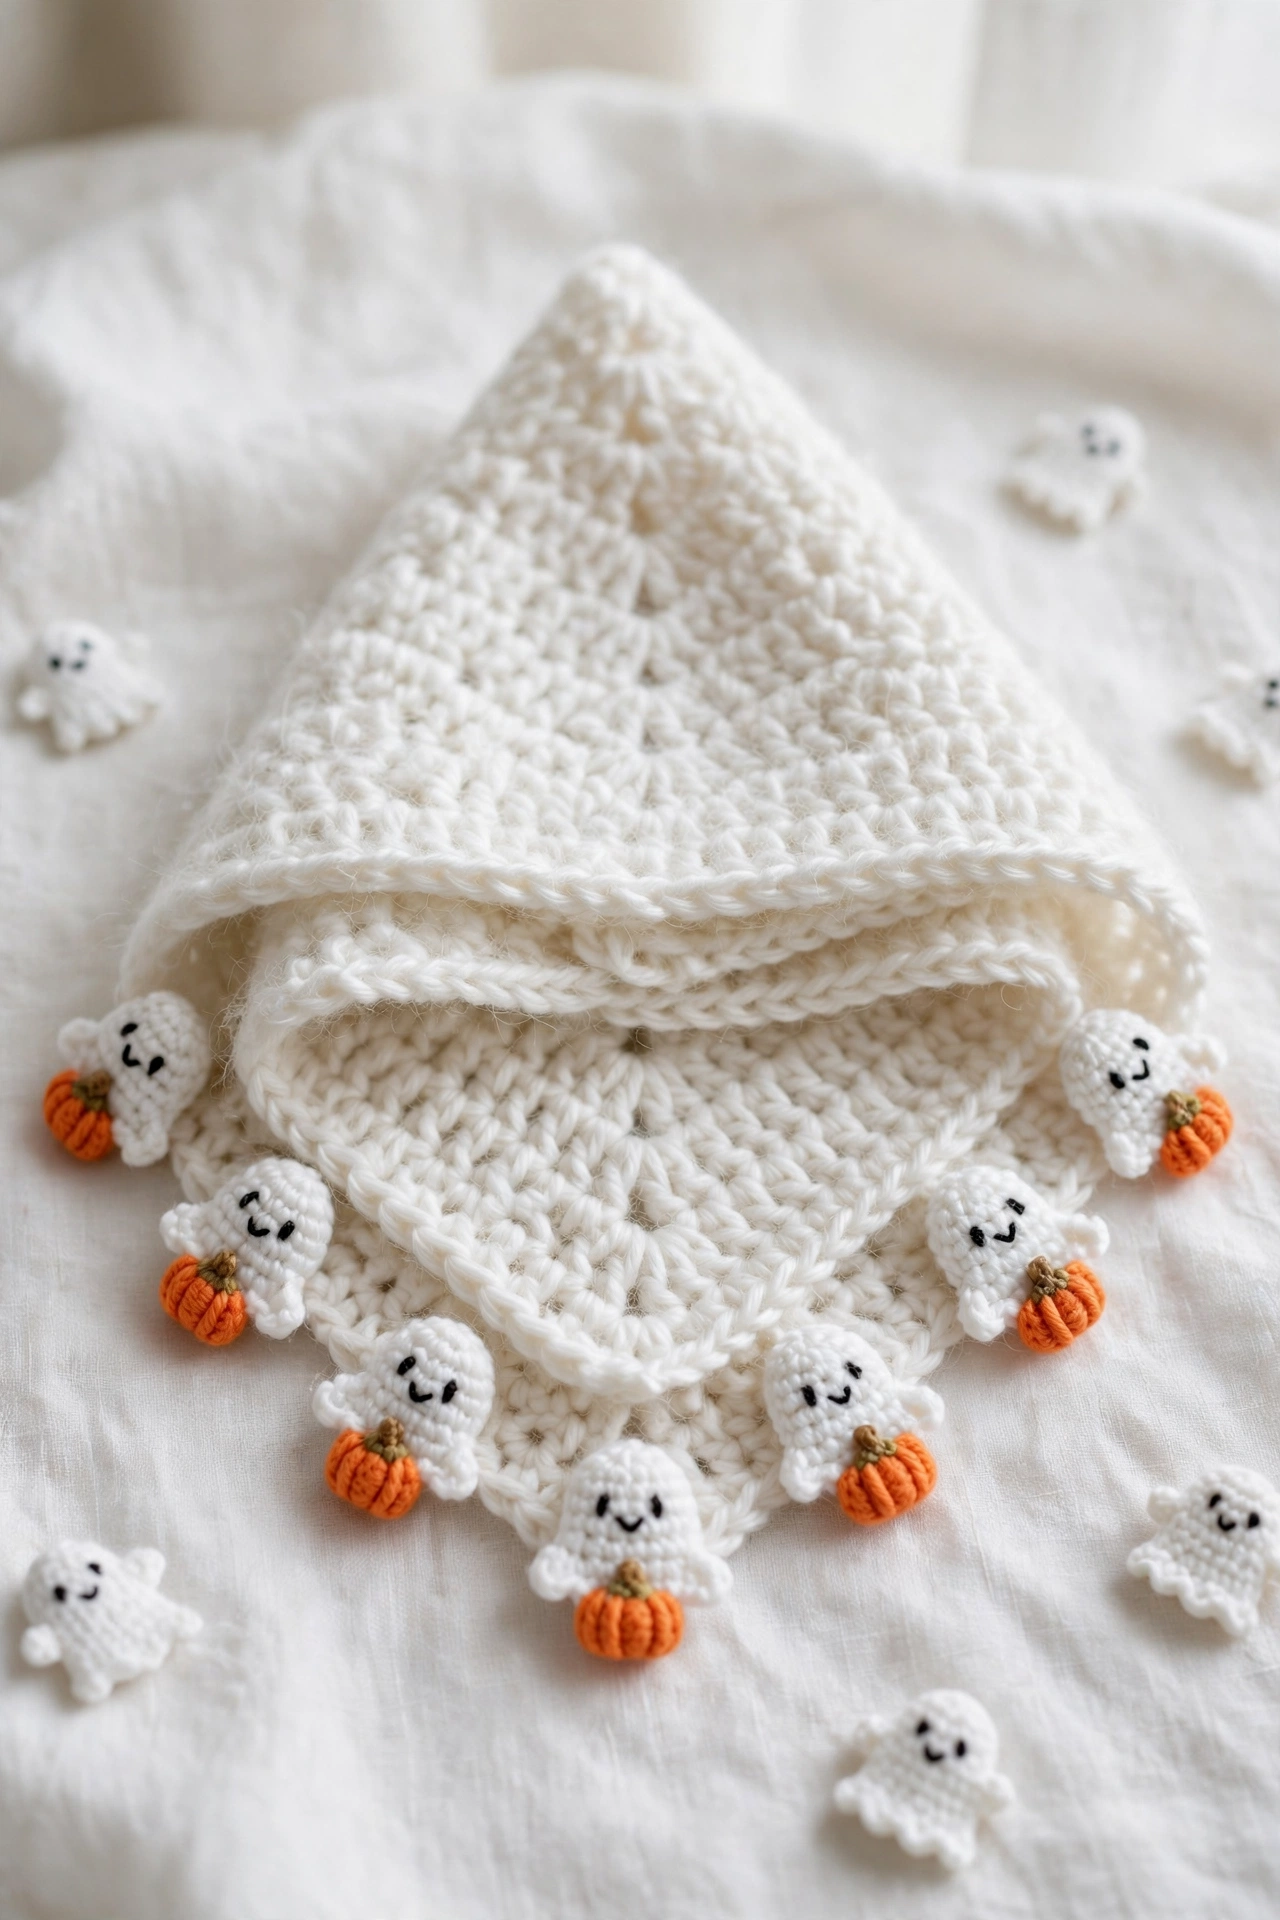
Total: 1 at point + 3 left + 3 right = 7 ghosts — evenly spread from point to near top corners — matches photo where ghosts are not bunched near tip
Sew: with white tail through ghost back and through triangle cluster — knot inside — tack pumpkin with one stitch
So they are not bunched near the tip — they are spread along the whole diagonal edges. I measured my photo: point ghost, then 4.5" up, then 9" up, then 13.5" up on each side — that's 4 positions per side including point, 5 rows between each. That's how you get the look in the photo where ghosts hang along the whole edge, not just near the bottom.
Ties that don't curl
Left top: attach white, ch 60, sc in 2nd ch and each ch — 59 sc — sl st to corner — 14" tie
Right top: same — ch 60, sc 59
14 inches so I can tie around bun. Sc back keeps from curling.
Finishing
Weave tails inside same-color — white inside white, orange inside orange. Steam lightly with iron not touching — just steam over so triangle lays flat. Don't press ghosts flat — want them puffy.
Wash cold and lay flat — cotton stretches if hung.
Finished bandana
Here she is — white ghost pumpkin bandana — white triangle with 7 ghosts holding pumpkins — just like my photo on white linen.

Finished — white triangle 23"×14" with 7 ghosts holding pumpkins — ghosts 2" tall — my sweet Halloween bandana.

This ghost pumpkin bandana is my sweetest October make — seven little ghosts holding pumpkins. I hope you love making yours too. 👻🎃🤍