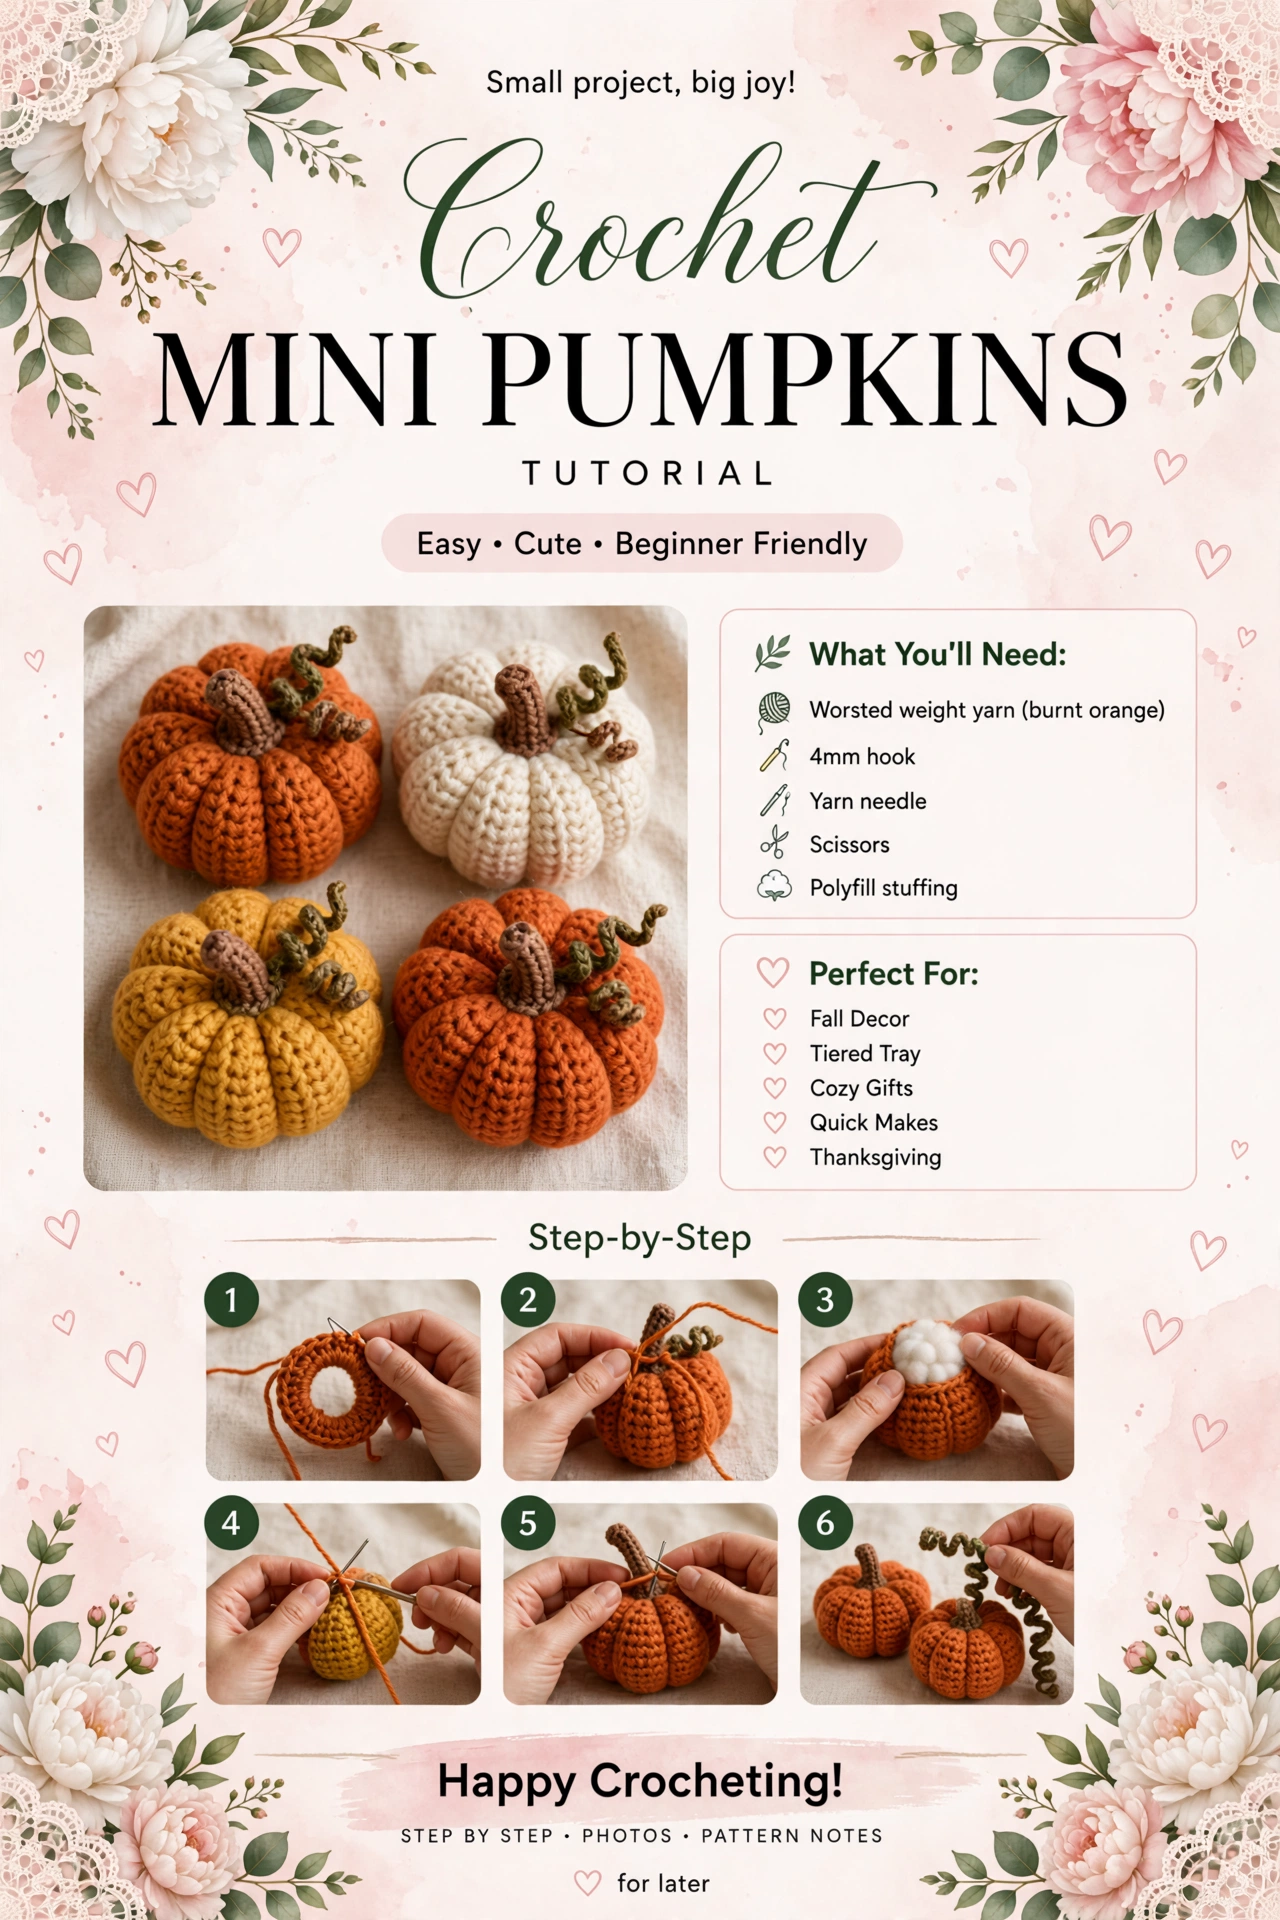
Inside this pattern — 6 steps
- Before you begin
- Materials I used
- Sizing & how to measure
- Abbreviations
- Full roadmap — 6 steps
- Step 1 Magic ring to widest — 6→36
- Step 2 Body — straight 6 rounds
- Step 3 Closing and stuffing
- Step 4 Ridges — 6 sections
- Step 5 Brown stem
- Step 6 Green curly vine
- Finished — styling and caring
Before you begin
I've been wanting mini pumpkins that feel like a warm hug for fall, and these four turned out exactly like that. The burnt orange, cream, mustard, and rust remind me of leaves and pumpkins at the farm, and the worsted stitches make them cozy without being too heavy.
What I love about this pattern is how fast it works up. Because we are using worsted yarn and a 4mm hook, the fabric grows quickly — perfect if you want to make a set today and style them tomorrow morning with your tea.
Materials I used
Worsted / medium weight yarn: About 36g total for 4 pumpkins — about 9g per pumpkin — I used burnt orange, cream, mustard, and rust — each from a 50g / 100m skein — roughly 9m per pumpkin
Brown yarn for stems: About 6g total — roughly 1.5g per stem — 4 stems
Green yarn for vines: About 6g total — roughly 1.5g per vine — 4 vines
4mm crochet hook — keeps fabric tight so polyfill doesn't show
Polyfill: About 18g total — 4 to 5g per pumpkin — light stuffing
Yarn needle, scissors, stitch marker, tape measure
Optional for photos: cinnamon sticks, pinecones, dried leaves, wooden crate
Sizing & how to measure
Finished pumpkin: About 2.5" wide ×1.5" tall without stem — stem 0.8" tall — vine 3" curled
At a gauge of 18 sc = 4", 36 stitches gives about 8" around, which is about 2.5" across — that matches the size stated.
To check, measure across the widest point — it should be about 2.5". If yours is 2", try a 4.5mm hook. If it's 3", try a 3.5mm hook.
Abbreviations
ch = chain, sc = single crochet, inc = increase — 2 sc in same stitch, dec = decrease — sc2tog, MR = magic ring, st(s) = stitch(es), sl st = slip stitch
Full roadmap — 6 steps
1. Magic ring to widest — 6 to 36 stitches — about 2.5" wide
2. Body — straight rounds at 36 stitches — 6 rounds — about 1.2" tall
3. Closing — 36 down to 6 — stuff with 4 to 5g — leave a 24" tail for ridges
4. Ridges — wrap 6 times — 6 sections like a real pumpkin
5. Stem — brown tube — 0.8" tall
6. Vine — green curly vine — chain 20, 2 sc in each chain — 38 sc — about 3" curled
Step 1 — Magic ring to widest — 6 to 36 — 2.5" wide
We are starting your pumpkin with a magic ring because it closes with no hole. We grow from 6 stitches to 36 over six rounds. This sets the width of the whole pumpkin — about 2.5 inches. Place a marker in the first stitch of each round and count out loud — I do — and sip your tea as you go.

R1: MR, 6 sc — 6
R2: inc ×6 — 12
R3: (sc, inc) ×6 — 18
R4: (sc 2, inc) ×6 — 24 — about 1.5" wide
R5: (sc 3, inc) ×6 — 30 — about 2" wide
R6: (sc 4, inc) ×6 — 36 — about 2.5" wide — 36 stitches
Step 2 — Body — straight — 36 stitches ×6 rounds — 1.2" tall
Now we stop increasing and go straight up. 36 stitches around for six rounds — no increases, no decreases. This builds the height — about 1.2 inches. It will start to look like a little bowl. This is the coziest part because it grows fast and you can see the pumpkin shape coming. Keep your tension even.

R7-12: sc 36 around ×6 rounds — 36 sc each round — about 1.2" tall — straight sides
Step 3 — Closing — 36 down to 6 — stuff lightly
We close the pumpkin. We go from 36 down to 6 with gentle decreases. At 18 stitches, stuff with about 4 to 5 grams of polyfill — just enough to hold shape, not rock hard. Keep decreasing to 6, close with a needle, pull tight, and leave a long 24-inch tail for the ridges.

R13: (sc 4, dec) ×6 — 30
R14: (sc 3, dec) ×6 — 24
R15: (sc 2, dec) ×6 — 18 — stuff with 4 to 5g polyfill now
R16: (sc, dec) ×6 — 12
R17: dec ×6 — 6 — close — pull yarn through remaining 6 stitches — leave a 24" tail for ridges
Step 4 — Ridges — 6 sections like a real pumpkin
This is where a plain ball becomes a pumpkin. Thread the long tail in your yarn needle, go from bottom center to top center, wrap around the outside, back through bottom to top, and pull gently for a ridge. Repeat six times around — six wraps makes six sections, just like a real pumpkin. Pull gently — if you pull too hard the pumpkin flattens.

Thread the 24" tail in needle — go from bottom center to top center — wrap around outside — back through bottom to top — pull gently — repeat 6 times around — 6 sections — tie at bottom — weave in — pumpkin about 2.5" wide ×1.5" tall with 6 ridges
Step 5 — Stem — brown — 0.8" tall
Now the little brown stem — a tiny tube. Magic ring 6, then three rounds of 6 sc — about 0.8 inches tall. Sew it on top center where all the ridges meet — three or four stitches. Brown yarn looks like a real stem.
R1: MR, 6 sc — 6
R2-4: sc 6 around ×3 rounds — 6 sc — about 0.8" tall tube
Fasten off, leave an 8" tail — sew on top center — 3 to 4 stitches
Step 6 — Vine — green curly — 3" curled
Last little touch — a curly vine. Chain 20, then 2 sc in each chain — that's 38 sc — it curls by itself to about 3 inches. Sew it next to the stem with one stitch. If you want it longer, chain 25 for about 4 inches curled, but 20 is perfect for mini.

Ch 20
Row 1: 2 sc in 2nd ch from hook and in each ch across — 38 sc — curls naturally — about 3" curled
Fasten off, leave a 6" tail — sew next to stem — 1 stitch
How I finish mine, ways to make it your own, and caring
I weave ends in with a yarn needle, going through the bottom a couple times so they don't pop out. Worsted can be a little slippery, so I go an extra inch or two. For photos I like to place pumpkins on a wooden crate with pinecones, cinnamon sticks, and fall leaves.
Color play: Cream with brown stem, mustard with rust, oatmeal, pumpkin, rust, mustard, chocolate — warm fall palette — mixed set of four looks cozy
No vine: Leave the vine off for a minimal look — just the stem — still cute
Bigger pumpkin — about 3" wide: To make a slightly larger pumpkin, add one more increase round: (sc 5, inc) ×6 — 42 stitches — then work 8 rounds straight at 42 — then close 42 to 36 to 30 to 24 to 18 to 12 to 6 — about 3" wide at same gauge — not 3.5"
Smaller pumpkin — about 1.5" wide: Stop at 24 stitches — (sc 2, inc) ×6 =24 — work 3 rounds straight at 24 — then close 24→18→12→6 — cute for tiered trays
Add a leaf: Crochet a small leaf in green and sew near the stem for extra fall
I spot clean mine gently with a little cool water and pat dry, then lay flat. Fluff with fingers after — keeps shape nice. Store in a basket, not squished, so ridges keep their shape.

Thank you for making these mini pumpkins with me — I made mine on a golden October afternoon with real pumpkins on my table and tea steaming beside me. I hope they make your table feel cozy all fall. If you make a set, tag me — I love seeing your pumpkin colors.