Inside this pattern
- Before you begin
- Materials I used
- Sizing & what you'll need
- Abbreviations
- Full roadmap - 5 steps
- Step 1: Crochet the bat body
- Step 2: Crochet the wings
- Step 3: Ears, red heart & tiny fangs
- Step 4: Assemble your kawaii bat
- Step 5: Styling on scarf & porch
- How I finish mine
- Ways to make it your own
Before you begin
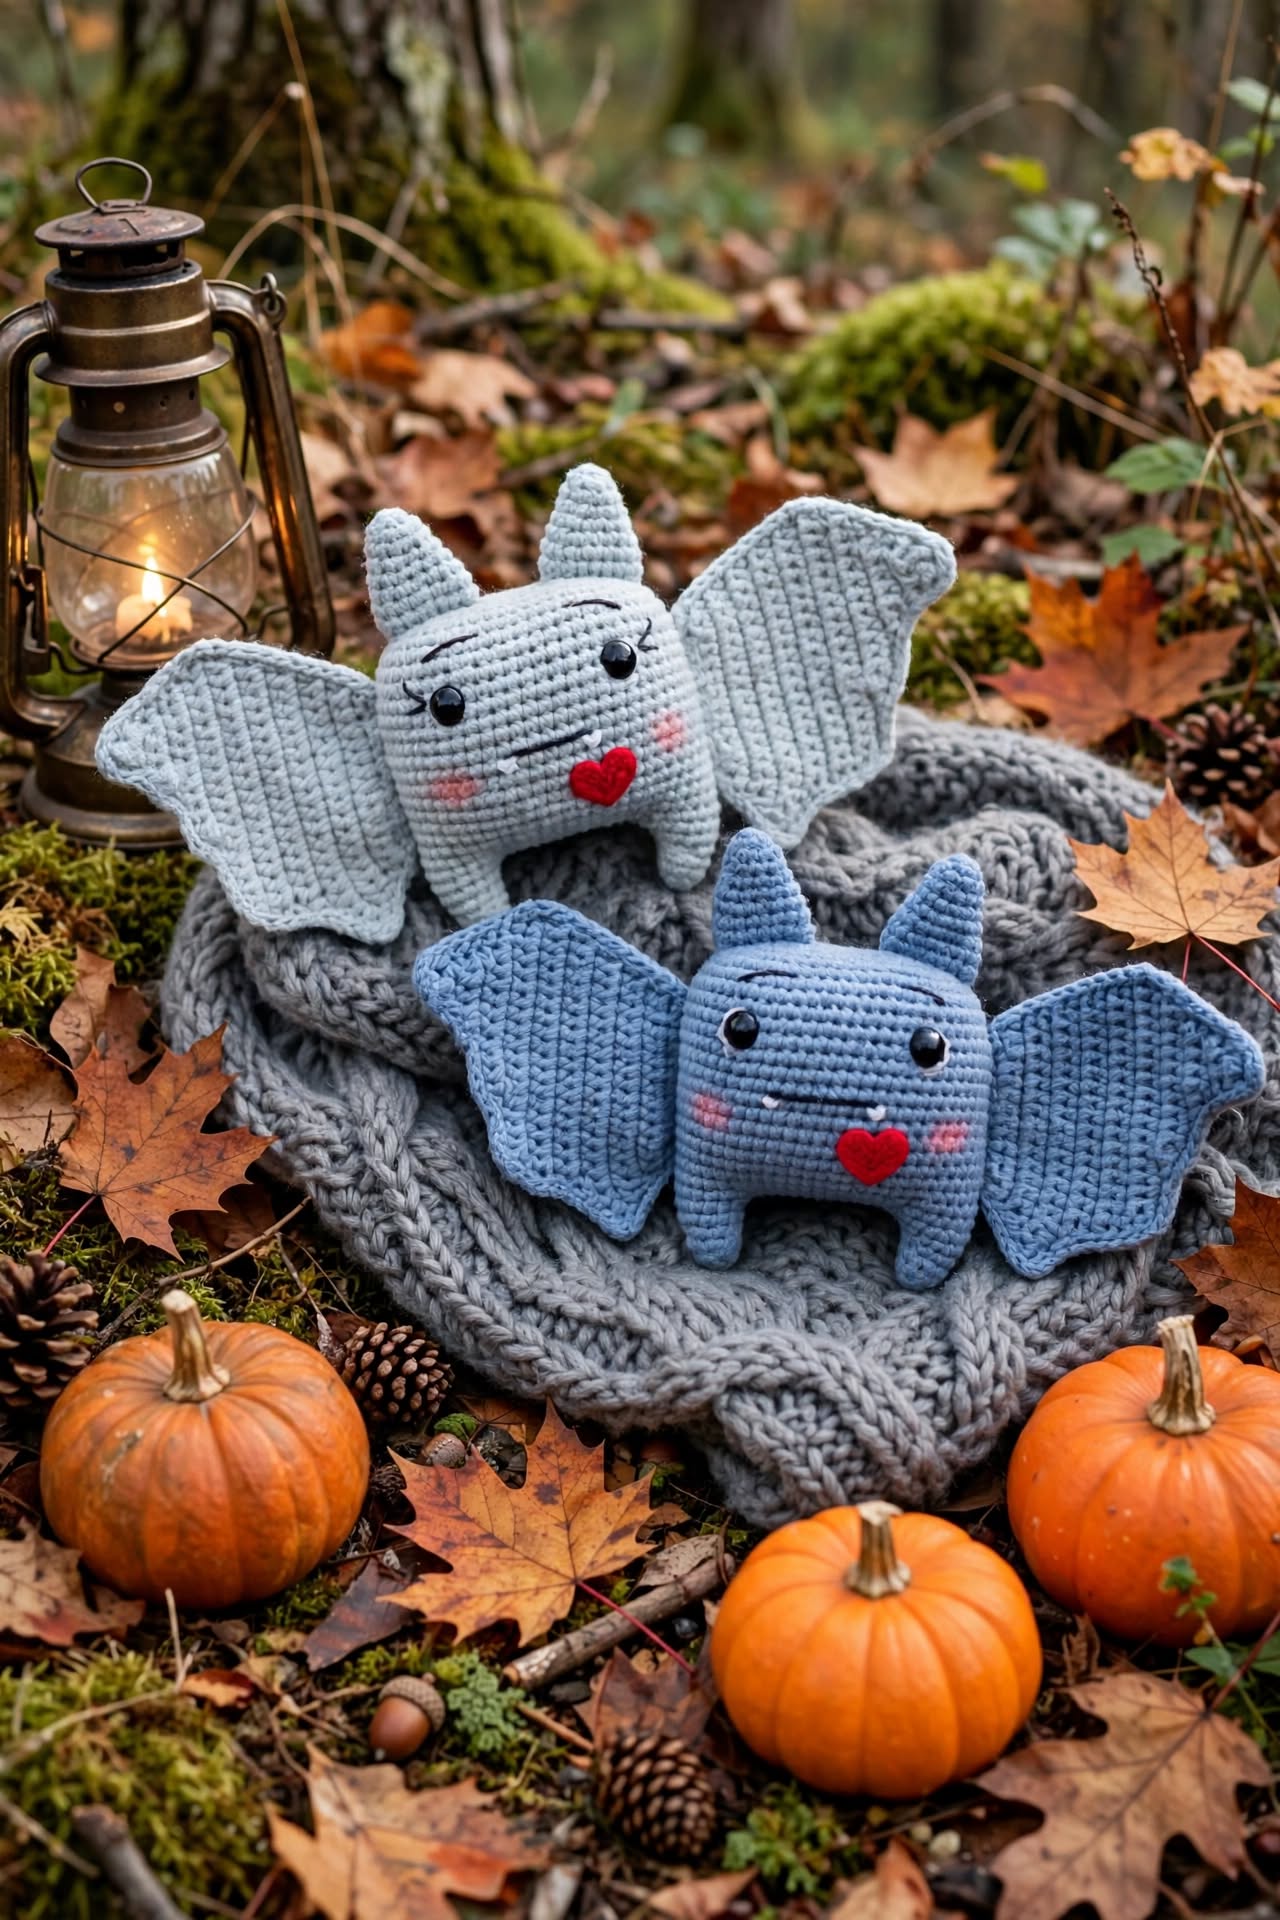
I've been wanting kawaii bats for my fall porch for a while — not scary bats, but those soft chubby ones with big eyes and a tiny heart on their chest. I saw that pin with bats on a gray scarf in the forest with pumpkins and a lantern, and I knew I had to recreate it in yarn.
What I love about this version is it's truly low sew. The body and head are one piece, crocheted top-down. The wings are the only big flat pieces, and they sew on with two little stitches. The heart, ears, and fangs are super fast — I made my first bat while my coffee was still warm, then made the second in dusty blue for a pair.
If you can do magic ring and single crochet, you can make this. I keep my tension a little tight so the stuffing doesn't show through the gray yarn — that's important for light colors. I count out loud and use a stitch marker for the start of each round.
Materials I used
- Light gray yarn: Worsted cotton — I used Lily Sugar'n Cream light gray, about 30 yards for one bat. This is the main color you see in the pin on the scarf.
- Dusty blue yarn: Same weight — about 30 yards if you want the blue pair like my second one. I love them together for photos.
- Red yarn: Tiny amount — about 2 yards for heart. I used a true cherry red, not orange-red.
- Black + white yarn: Tiny bits for fangs and eye shine — embroidery floss works too.
- 3.5mm crochet hook: Keeps stitches tight so white stuffing doesn't peek through gray.
- Safety eyes: 8mm black (2 per bat) — I add them between rounds 9-10, about 7 stitches apart. Bigger eyes = more kawaii.
- Stuffing: Polyfill — a small handful per bat.
- Tapeystry needle, scissors, stitch marker.
- Props for styling (optional): My gray knit scarf, tiny orange pumpkins, orange maple leaves, pine cones, and that little black lantern — exactly like the pin you loved for fall photos.
Sizing & what you'll need
Bat is 3.5" tall (head to feet, ears add 0.6"), 2.5" wide. Wingspan about 5" when laid flat. With 3.5mm hook and worsted yarn you get a tight plush that hides stuffing. If you use DK, bat will be about 2.8" — cute for keychains.
I used cotton for decor because it stays crisp on the scarf and doesn't pill. Acrylic is softer and fluffier if you want a cuddly version for kids.
Abbreviations
MR = magic ring, sc = single crochet, inc = increase (2 sc in same st), dec = invisible decrease, hdc = half double crochet, dc = double crochet, sl st = slip stitch, ch = chain, BLO = back loop only, FLO = front loop only, FO = fasten off. We work in continuous rounds unless noted.
Full roadmap - 5 steps
1. Bat body + head (22 rounds, one piece, top-down)
2. Wings x2 (flat, 8 rows, dusty or gray)
3. Ears x2 + red heart + tiny fangs
4. Assemble — eyes, ears, wings, heart
5. Style on gray scarf with pumpkins, leaves, lantern — cozy porch photos
Step 1: Crochet the bat body
I start from the top of the head with light gray (or dusty blue). This is all one piece so you don't have to sew head to body. I keep it slightly tight for that plush kawaii look.
R1: MR, 6 sc (6)
R2: inc x6 (12)
R3: [sc, inc] x6 (18)
R4: [2 sc, inc] x6 (24)
R5: [3 sc, inc] x6 (30)
R6-9: sc around (30) — 4 rounds straight, this is the chubby head
R10: [3 sc, dec] x6 (24) — start shaping neck slightly
R11: [2 sc, dec] x6 (18)
R12: [4 sc, dec] x3 (15) — this is the little neck, stuff head firmly here
R13: [4 sc, inc] x3 (18) — start body, getting wider again
R14: [2 sc, inc] x6 (24)
R15-19: sc around (24) — 5 rounds straight for chubby tummy
R20: [2 sc, dec] x6 (18) — stuff body, I use tip of hook to push to sides
R21: [sc, dec] x6 (12)
R22: dec x6 (6), FO, close with needle. Weave in tail.
How I get it kawaii: I place my 8mm eyes a little lower than you think — about rounds 9-10, not high on head. That gives that sweet baby bat look like in your pin. Add a tiny white stitch with white yarn near each eye for shine after you're done.
Step 2: Crochet the wings
Wings are crocheted flat, not in the round. I use same gray or I mix — gray body with dusty blue wings looks so cozy on the scarf. They take about 8 minutes each.
Row 1: Ch 10, sc in 2nd ch from hook and across (9)
Row 2: Ch 1, turn, inc, 7 sc, inc (11)
Row 3: Ch 1, turn, sc across (11)
Row 4: Ch 1, turn, inc, 9 sc, inc (13)
Row 5: Ch 1, turn, sc across (13)
Row 6: Ch 1, turn, dec, 9 sc, dec (11)
Row 7: Ch 1, turn, sc across (11) — now make scallop edge
Row 8: (Scallop edge) *Skip 1, 4 dc in next st, skip 1, sl st in next* repeat 3 times across curved edge — gives wavy bat wing.
FO, leave long tail for sewing to body at Row 1 edge.
Second wing: Repeat same, but don't flip — so you have mirrored pair.
When you lay them flat they should look like little rounded triangles with wavy bottom. If yours curl a bit, I steam lightly with my hand over kettle — don't iron cotton directly.
Step 3: Ears, red heart & tiny fangs
The red heart is what everyone asks about from the photo — it's just 3 rounds and sewn on front center. Ears are tiny and pointy, and the fangs are two white V stitches.
R1: MR, 4 sc (4)
R2: [sc, inc] x2 (6)
R3: [2 sc, inc] x2 (8)
R4: sc around (8)
Row 5: Flatten, sc through both layers across (4), FO leave tail.
Red Heart - Cherry Red:
R1: MR, 6 sc (6)
R2: (dc, hdc, sc) in first st, sc, hdc, dc in next, (sc, hdc) in next, hdc, sc in last — shape heart. Or simpler:
Easy heart I use: MR, ch 2, 3 dc, 3 hdc, ch 2, sl st, ch 2, 3 hdc, 3 dc, ch 2, sl st — pull tight, FO leave tail. About 1 inch.
Fangs - White:
Embroider with white yarn: two tiny V shapes under eyes, about 2 sts wide, 1 st tall — just like vampire but cute. I do: insert needle, pull small loop, make tiny straight stitch down 1 row.
Step 4: Assemble your kawaii bat
This is quick. I lay everything out on my table first — body, two wings, two ears, heart — like a little bat kit.
Assembly:
1. Eyes: Already in? Add white shine stitch if you like.
2. Ears: Sew to top of head, R2-R4, about 6 sts apart — pointy up. I tilt slightly outward.
3. Wings: Pin wings to sides of body, Row 1 edge against body at R14-16. Sew with tail, 4-5 stitches only. Wings should stick out like airplane.
4. Heart: Sew to front belly, slightly left.
5. Fangs: Embroider white V's, center under eyes, 2 sts apart.
6. Smile (optional): Tiny black V between fangs — I sometimes skip for extra kawaii.
I don't sew wings too tight — I like them a little floppy so they drape on the scarf naturally for photos. For the pin look, I bend one wing slightly forward.
Step 5: Styling on scarf & porch
Styling is half the magic for Halloween 2026. In the photo you loved, they are on a gray chunky knit scarf right on the forest floor — damp leaves, tiny orange pumpkins, maple leaves, and that little black lantern glow.
My setup for photos (copy my pin):
- Gray knit scarf, rumpled, on forest floor or porch wood
- 2 bats: one light gray, one dusty blue — facing each other, wings touching
- 3 mini orange pumpkins (I use real ones + crochet ones)
- Scatter: orange maple leaves, pine cones, acorns
- Black lantern with LED candle, slightly behind
- Shot from low angle, soft morning light through trees
For shelf styling inside, I sit them on my coffee table books with a pumpkin. They are perfect for tiered trays, too — tuck them between pumpkins and eucalyptus. For gifts, I add a little tag "handmade with love" and put in kraft box with dried leaves.
How I finish mine
I weave all tails inside with tapestry needle, then I give the bat a little roll in my hands to even out stuffing. I like to brush gray yarn lightly with a soft toothbrush — makes it extra fluffy like the pin.
For the scarf photo, I actually sprayed a little water mist on the forest leaves — makes colors deeper and more autumn. My lantern is battery LED, so I leave it on for warm glow behind bats. I took photos at 9am when light comes through trees sideways — that's the cozy fall light you see in viral pins.
My kitchen table moment: I made my pair on Sunday with cinnamon coffee and rain on window. 1 hour total — 35 min body, 15 min wings, 10 min details and sewing. Put on some fall playlist, it's so cozy.
Thanks for making with me
This kawaii bat is exactly the viral Halloween fall decor trend for 2026 — soft, chubby, kawaii, quick to make and perfect for your porch, tiered tray and cozy scarf photos. I hope you love seeing it sit on your gray knit scarf with pumpkins and lantern glow.
If you make one, I'd love to see it on your scarf or porch — tag me, I keep all your photos in a little folder on my phone.
Happy crocheting!

Ways to make it your own
- Color swap: Try cream + mustard heart for vintage fall, or black + pink heart for spooky cute.
- Smaller hook: 3mm gives tighter, smaller bat — about 2.8 inches, great for keychains.
- No sew wings: You can crochet wings directly onto body at R14 — sc through wing + body together.
- Big eyes: Use 10mm eyes for extra kawaii — my daughter loves that version.
- Heart variations: Red heart is classic, but dusty pink or mustard yellow also look adorable for fall decor.