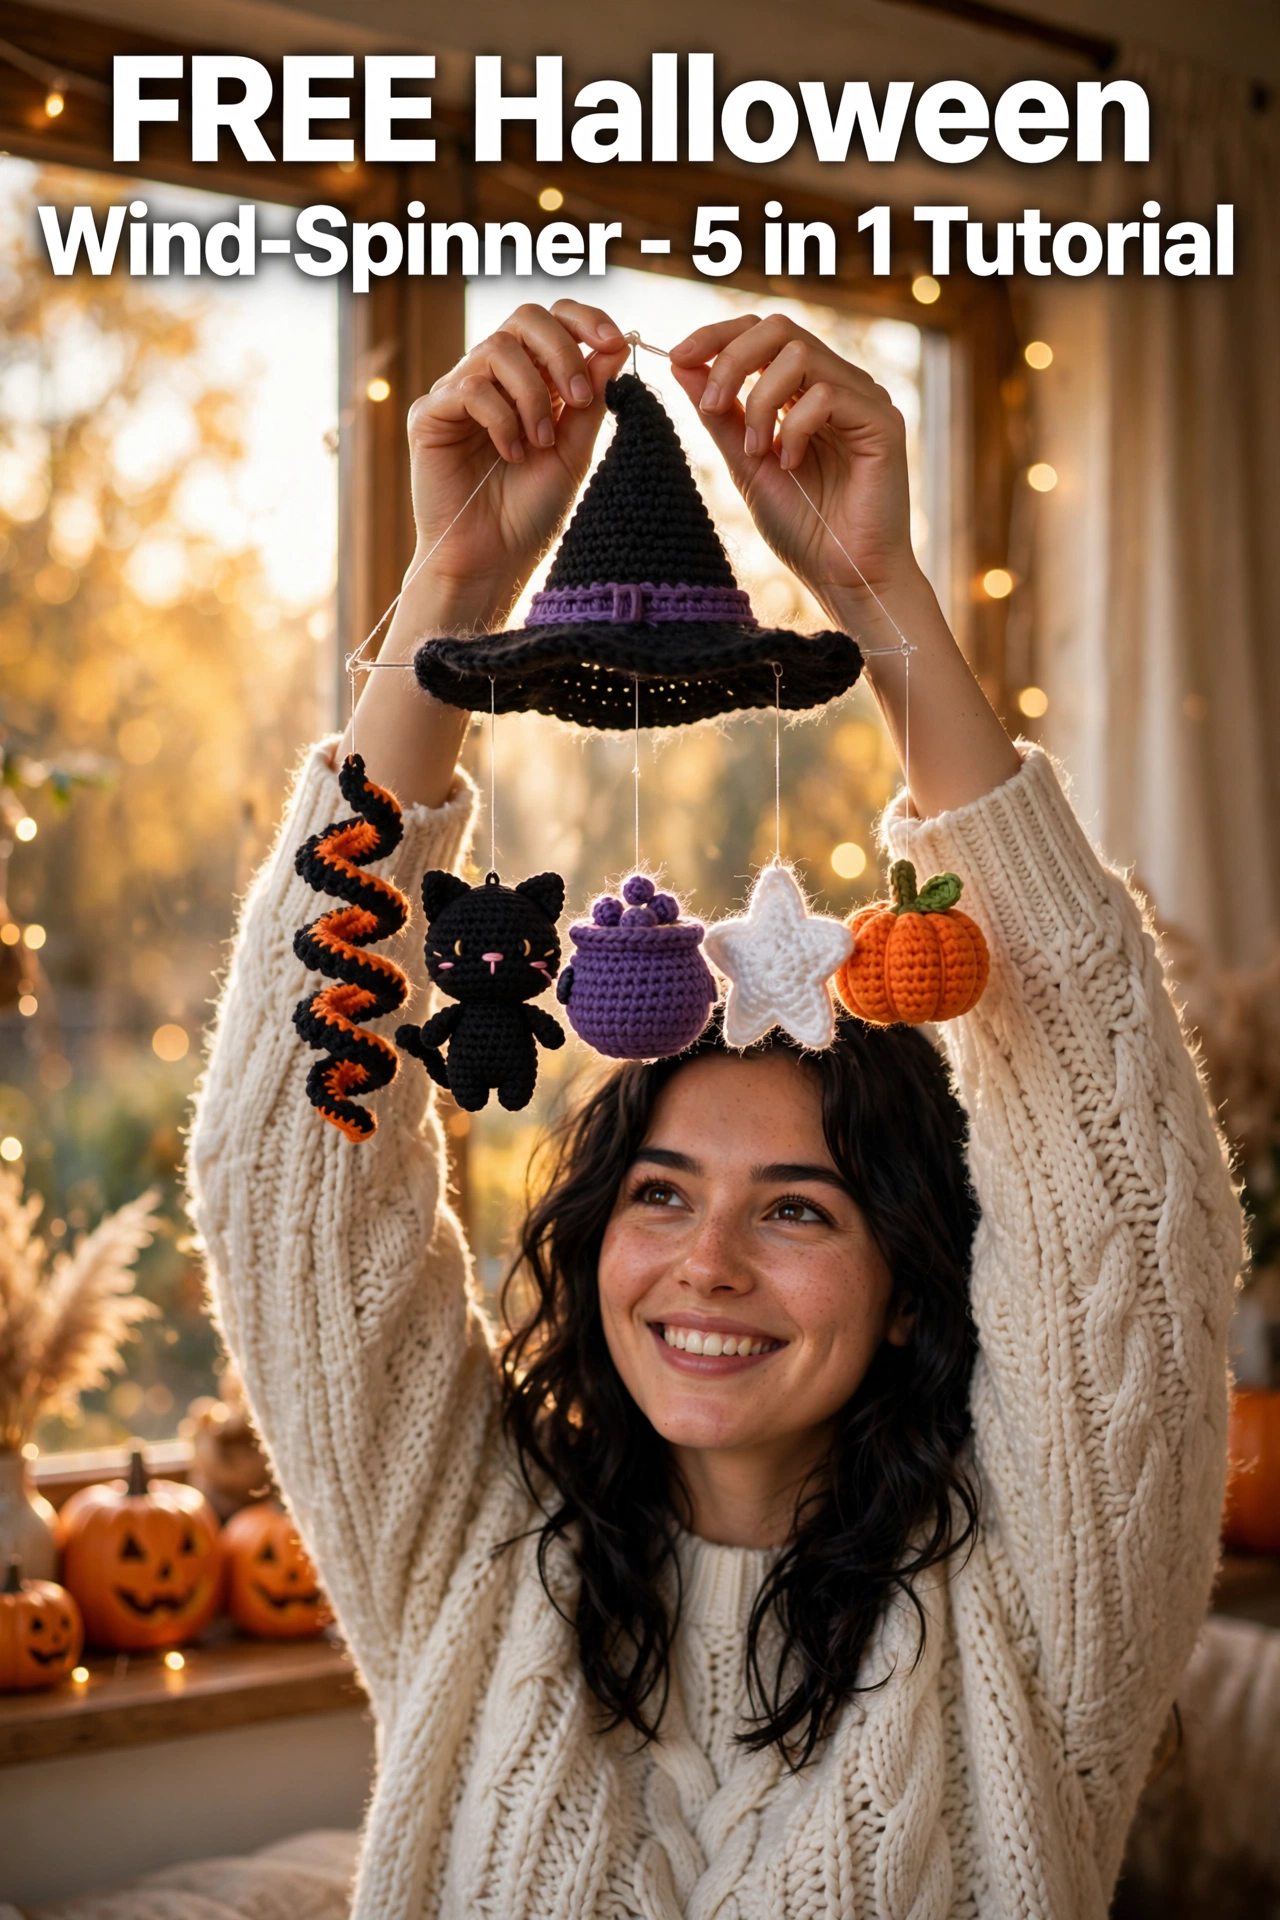
In this 5-in-1 tutorial
- Why a spinner and not just charms
- What you need — my Halloween yarn basket
- Sizing and how it spins
- Roadmap — hat, then 5 charms
- Step 1: Witch hat — black with purple band
- Step 2: Spiral — orange & black double spiral
- Step 3: Black cat — with pink nose like yours
- Step 4: Cauldron — purple pot with green bubbles
- Step 5: Star — white 5-point
- Step 6: Pumpkin — ridged with stem
- Step 7: Assembly — stringing it so it spins balanced
- Finishing and hanging
- Troubleshooting
- Make it yours
Why a spinner and not just charms
Single charms are cute, but when you hang 5 from a hat and the wind catches them, they dance. The secret is the hat acts as a little parachute — it catches air and slowly turns, and the charms underneath spin opposite. My first version was just a flat circle and it didn't spin — the cone shape is what makes it work.
I tried 3 charms first — looked empty. 7 was too heavy and tangled. 5 is perfect — odd number keeps it balanced, and you get one spiral that really catches wind plus 4 solid shapes.
I hang mine on my porch with fishing line so it looks like it's floating. In the window it spins even with just the heater on.
What you need — my Halloween yarn basket
- Yarn: DK — Black 60g, Purple 20g, Orange 20g, White 15g, Green scrap, Yellow scrap for cat eyes if embroidered
- Hook: 4.0mm for hat (so it's a bit bigger and stiff), 3.5mm for charms (tight, no stuffing show)
- String: Clear fishing line or white crochet thread — 1m, plus small stick or embroidery hoop 5" for inside brim if you want it stiffer (optional)
- Extras: Polyfill small amount, tapestry needle, scissors, stitch markers

Witch hat — black cone with purple band, I add purple border too for pop like in your photo.
Step 1: Witch hat — black with purple band
R1: mr, 4 sc (4)
R2: [sc 1, inc] x2 (6)
R3: sc 6
R4: [sc 2, inc] x2 (8)
R5: sc 8
R6: [sc 3, inc] x2 (10)
R7: sc 10
R8: [sc 4, inc] x2 (12)
R9: sc 12
R10: [sc 5, inc] x2 (14)
R11: sc 14
R12: [sc 6, inc] x2 (16)
R13: sc 16
R14: [sc 7, inc] x2 (18)
R15: sc 18
R16: [sc 8, inc] x2 (20)
R17: sc 20
R18: [sc 4, inc] x4 (24)
R19: [sc 5, inc] x4 (28)
R20: [sc 6, inc] x4 (32)
R21: [sc 7, inc] x4 (36)
Brim: FLO — [sc 1, inc] x18 (54)
R22: [sc 2, inc] x18 (72)
R23: [sc 3, inc] x18 (90)
R24: sc 90, sl st, FO
Purple band: In purple, ch 40, sc 40 — 2 rows, sew around base of cone at R18-R19. Purple border: sc 90 around brim edge in purple for that double color in your photo.
This is the same hat as my frog witch but bigger brim — 90 stitches gives it that wide witch look that catches wind. I don't stuff it — I leave it hollow so it's light. If you want it to hold shape perfectly, cut a 5" circle of cardboard and slip inside brim.
Step 2: Spiral — orange & black double spiral
Ch 41 in orange
Row 1 (orange): 3 sc in 2nd ch from hook, 3 sc in each ch across — 120 sc — FO orange
Row 2 (black): Join black in first st of spiral, sc 1 in each sc around — but alternate 2 orange showing, 2 black? Simpler: after orange spiral, with black yarn, surface sl st every 2nd row along spiral edge — gives orange/black stripe like in photo
Even simpler for beginners: Make 2 spirals — one orange (ch 25, 3 sc per ch), one black (ch 25, 3 sc per ch), twist together and sew at top — looks striped and spins better
The photo you sent has that orange/black twisted spiral — I do it by making two separate small spirals (ch 25 each) and twisting them together. Faster than color changing and it spins twice as fast because it's double weight. Length ~6".
Step 3: Black cat — with pink nose like yours
R1: mr, 6 (6)
R2: inc x6 (12)
R3: [sc 1, inc] x6 (18)
R4-R6: sc 18 — 3 rounds
R7: [sc 1, dec] x6 (12) — stuff lightly
R8: dec x6 (6) — close for head
Body: mr 6, inc x6 (12), sc 12 — 3 rounds, [sc 1, dec] x4 (8) — stuff lightly, FO, sew to head
Ears x2: mr 3, sc 3, [sc 1, inc] x1 (4) — FO, sew on head top, 4 sts apart
Tail: ch 8, sc 7 — curl — sew to body back
Face: Yellow eyes embroidered between R4-R5, 4 sts apart, pink nose and whiskers like your photo
Same cat as your hair clips but 1.5x bigger — 2" tall. Yellow eyes make it pop against black. I use pink yarn for nose, not black, so it's cuter from far.

My 5 charms before stringing — cat, cauldron, star, pumpkin, and double spiral. All under 3 inches.
Step 4: Cauldron — purple pot with green bubbles
R1: mr, 6 (6)
R2: inc x6 (12)
R3: [sc 1, inc] x6 (18)
R4: [sc 2, inc] x6 (24)
R5-R9: sc 24 — 5 rounds — pot walls
R10: [sc 2, dec] x6 (18)
R11: FLO sc 18 — rim — FO
Bubbles: Green — make 4 tiny balls: mr 6, inc x6 (12), sc 12 — 1 round, [sc 1, dec] x4 (8), stuff tiny, close — different sizes: 2 small (R1-2 only), 2 medium (as written). Sew popping out top of cauldron + 2 small curly vines — ch 12, 2 sc per ch for curl.
This is the cutest one — purple cauldron with green bubbly brew. The bubbles are just tiny balls, I make 2 small and 2 medium so it looks bubbling over. Add little green spirals for steam — ch 12, 3 sc per ch.
Step 5: Star — white 5-point
R1: mr, 10 sc (10)
R2: [sc 1, inc] x5 (15)
*Make 2 panels*
For points: With both panels together, *ch 3, sc in 2nd ch, hdc in next ch, sc 3 on star edge, sl st* — repeat 5 times — forms 5 points — stuff lightly before closing last point
Simpler flat version: mr 5, [ch 3, sc in 2nd ch, hdc in next, sl st in mr] x5 — flat star ~2" — FO
I do flat version for spinner — lighter and spins faster. About 2.5" across. White stands out against black hat.
Step 6: Pumpkin — ridged with stem
R1: mr, 6 (6)
R2: inc x6 (12)
R3: [sc 1, inc] x6 (18)
R4-R6: sc 18 — 3 rounds
R7: [sc 1, dec] x6 (12) — stuff
R8: dec x6 (6) — close
Ridge: Wrap orange yarn 6 times top to bottom, pull tight — makes segments
Stem: Green — mr 4, sc 4 — 2 rounds, FO, sew on top + leaf ch 4, sc, hdc
Same pumpkin as hair clips — 1.5". Ridge wraps are key.

Hat top — leave small loop at tip for hanging string. Brim wide so it catches wind.
Step 7: Assembly — stringing it so it spins balanced
This is important for it to spin and not tangle:
- Cut 5 pieces fishing line: 8", 10", 12", 10", 8" — shortest on outsides (spiral and pumpkin), longest in middle (cauldron).
- Attach lines to brim of hat: at 12 o'clock, 2, 5, 7, 10 o'clock positions — sew through brim, knot inside.
- Top hanging loop: 10" fishing line through tip of hat, knot to form loop for hanging.
- Tie charms to bottom of each line: spiral on left outside, black cat next, cauldron center longest, star next, pumpkin right outside — like your photo.
- Balance check: hold by top loop — if one side dips, shorten that line 0.5".
I add a small clear bead above each charm knot so knot doesn't slip through stitch.
Finishing and hanging
Weave all tails. Steam hat lightly if curling. Hang by window or porch — needs just a little breeze. If indoor, near vent or doorway works. Fishing line invisible so charms look floating.
Troubleshooting
Hat flops: Brim needs 90 sts — if you stopped at 72 it's too small and floppy. Add R23 to 90. Optional cardboard inside brim.
Charms tangle: Lines too long or too close. Keep 2" between attachment points on brim, shortest lines on outside.
Doesn't spin: Hat too heavy stuffed — leave hollow. Or fishing line too thick — use thin clear.
Spiral not striped orange/black: Make two small spirals one orange one black and twist together — easiest way to get stripe in photo.
Make it yours
I made a pastel version — white hat with pink charms — for a baby nursery, and a Christmas version — red hat with snowman, tree, star, gingerbread, candy cane. Same hat base, different charms. If you make it, send me a photo of where you hung it — I love seeing them in windows.

This spinner is my favorite porch make — it spins every time someone opens the door and my kids say the cat is flying. I hope yours brings a little floating Halloween magic to your window too. 🎃👻🖤