Inside this pattern
- Before you begin
- Materials I used
- Sizing & what you'll need
- Abbreviations
- Full roadmap - 5 steps
- Step 1: Crochet the pumpkin with ridges
- Step 2: Ghost face - kawaii ghost
- Step 3: Pop surprise mechanism
- Step 4: Stem & leaf details
- Step 5: Assembly & golden hour styling
- How I finish mine
- Ways to make it your own
Before you begin
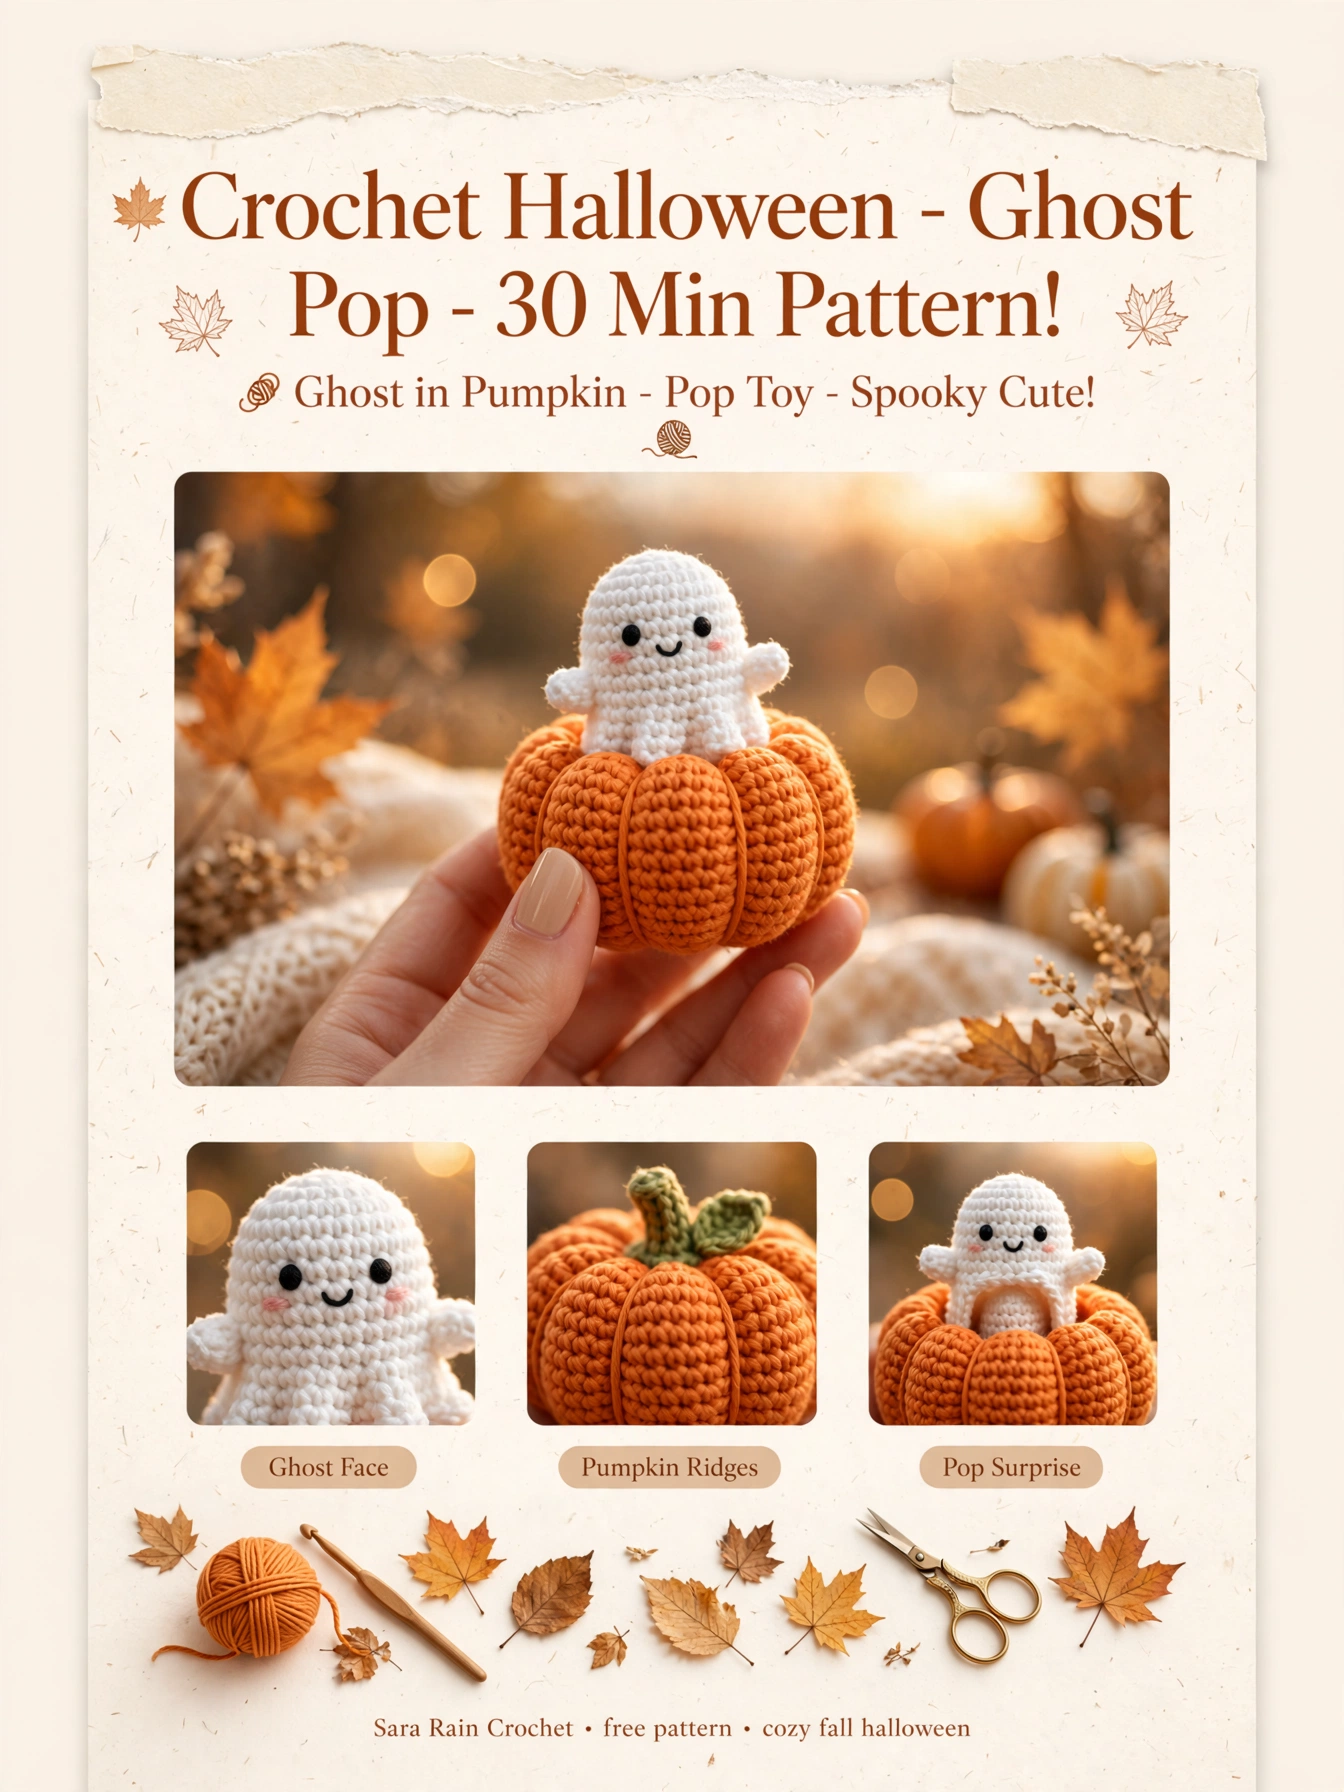
I've been seeing these pop toys everywhere for Halloween — a little ghost that hides inside a pumpkin and then pops out — boo! I saw that pin with the hand holding the orange pumpkin and white ghost popping out in golden light with fall leaves, and my daughter said "Mama, make it!" so I did.
What I love is it's 30 minutes and so satisfying. The pumpkin is one piece with easy ridges made with surface slip stitches — like a real pumpkin — and the ghost is a tiny dome with little arms, no legs, so it sits perfectly inside. Pull it up and it pops, push it down and it hides. My daughter pops it 100 times a day.
If you can do magic ring and single crochet, you can make this. I keep my tension a little loose for the pumpkin so it's chubby, and tighter for the ghost so it holds shape. I use stitch markers for the pumpkin ridges — they help me keep them even like in your pin.
Materials I used
- Pumpkin orange yarn: Worsted cotton — Lily Sugar'n Cream pumpkin orange, about 40 yards. This is the cozy orange you see in your pin.
- White yarn: Same weight white — about 25 yards for ghost. I use white cotton so ghost is bright.
- Moss green: Small amount — 5 yards for stem and tiny leaf.
- 3.5mm hook: My go-to for worsted — not too tight, chubby look.
- Eyes: 6mm safety eyes (2) for ghost — small and sweet like in pin. Add pink blush.
- Stuffing: Polyfill — small handful for pumpkin walls, tiny for ghost top only (bottom stays flat for pop).
- Tapestry needle, scissors, stitch marker.
- Props for styling: Fall maple leaves, cream knit blanket, golden hour backlight — exactly like your pin with bokeh.
Sizing & what you'll need
Pumpkin: 3" diameter, 2" tall with deep ridges made by surface slip stitch. Ghost: 2" tall, 1.5" wide — fits snugly inside pumpkin opening 1.75". Pop mechanism: ghost base is slightly weighted with a tiny bean bag? I just stuff top only so bottom is flat and ghost pops up easily.
Cotton is best — holds shape for pop toy. Acrylic pumpkin sags after a few pops.
Abbreviations
MR = magic ring, sc = single crochet, inc = increase (2 sc), dec = invisible decrease, hdc = half double crochet, sl st = slip stitch, BLO = back loop only, FO = fasten off. Work in continuous rounds for ghost and pumpkin, then surface slip for ridges.
Full roadmap - 5 steps
1. Pumpkin with ridges - one piece (16 rounds) + 6 surface ridges
2. Ghost face - kawaii dome with arms (12 rounds)
3. Pop surprise - how ghost sits inside
4. Stem & leaf - tiny green topper
5. Assembly & photos - golden hour styling like pin
Step 1: Crochet the pumpkin with ridges
One piece, bottom up, with an open top for ghost to pop from. Then we add ridges with surface slip stitches — that's the secret to the pumpkin look in your pin.
R1: MR, 6 sc (6)
R2: inc x6 (12)
R3: [sc, inc] x6 (18)
R4: [2 sc, inc] x6 (24)
R5: [3 sc, inc] x6 (30)
R6: [4 sc, inc] x6 (36)
R7-12: sc around (36) — 6 rounds straight, chubby wall — stuff lightly at bottom
R13: [4 sc, dec] x6 (30) — start closing slightly but leave opening
R14: [3 sc, dec] x6 (24) — opening for ghost pop — about 2" opening
FO, leave tail. Do NOT close top — this is ghost door.
Pumpkin Ridges - Orange yarn + hook:
With pumpkin in hand, find 6 even vertical lines from top to bottom.
Surface sl st from top opening down to bottom and back up in same line, pull tight slightly to indent — creates 6 deep ridges like real pumpkin in pin.
I do: insert hook from outside to inside at top edge, pull loop through, sl st down following a column of sts, to bottom MR, then back up same column. Repeat 6 times evenly spaced.
This puckers pumpkin into lobes — exactly like your pin's 3rd image.
Step 2: Ghost face - kawaii ghost
Small, round, with little wavy bottom and tiny arms like in the pin. Kawaii face with smile and pink cheeks.
R1: MR, 6 sc (6)
R2: inc x6 (12)
R3: [sc, inc] x6 (18)
R4: [2 sc, inc] x6 (24)
R5-8: sc around (24) — 4 rounds dome
R9: [2 sc, dec] x6 (18)
R10: sc around (18) — add eyes between R6-7, 5 sts apart, smile between
R11: [sc, dec] x6 (12) — stuff only top dome lightly
R12: [sc, dec] x4 (8) — leave bottom flat, do NOT stuff bottom — flat base helps pop
FO, leave tail. Bottom should be open-ish flat so ghost sits inside pumpkin.
Ghost arms - Make 2 - White:
Ch 4, sc in 2nd ch, hdc, sc, FO, sew to sides at R7-8, tiny wings like pin — little arms out saying boo!
Face: 6mm safety eyes, embroider smile with black (tiny U), pink blush with pink yarn — 1 st under each eye.
Step 3: Pop surprise mechanism
No elastic, just size. Ghost base (8 sts) is slightly smaller than pumpkin opening (24 sts) so it slides up and down. I sew a tiny loop of orange yarn inside pumpkin bottom to ghost bottom — acts as anchor so ghost doesn't fall out, but still pops.
Cut 6" orange yarn, thread through bottom MR of pumpkin inside, up through ghost bottom, tie with small knot — leave 1" slack so ghost can pop up 1" above pumpkin rim like in pin, then drop back in. Trim.
Optional: Add tiny glass bead to ghost bottom for slight weight so it drops nicely.
Test: Pull ghost up — it should sit with bottom still inside pumpkin, arms on rim, smiling like in your main pin photo. Push down — it hides inside pumpkin like 3rd small image "Pop Surprise". My daughter loves hiding it.
Step 4: Stem & leaf details
Ch 4, sl st in 2nd ch, sc, hdc, FO leave tail. Curl slightly — sew to back edge of pumpkin opening, not center — so ghost can still pop front.
Leaf - Moss Green (tiny):
Ch 5, sc, hdc, dc, hdc in last, FO. Sew next to stem. Optional — I sometimes skip leaf for cleaner look like pin.
Step 5: Assembly & golden hour styling
1. Pumpkin ridges done? Weave all tails inside.
2. Ghost face done? Stuff top only.
3. Anchor ghost inside pumpkin with loop.
4. Sew stem to back rim.
5. Test pop — up for photo 1, down for surprise photo 3 like your pin collage.
My styling for photos (copy your pin exactly):
- Hand holding pumpkin from below, ghost popping up — palm under, nails natural beige
- Background: golden hour sunset through autumn trees, bokeh circles, scattered maple leaves orange/brown
- Underneath: cream chunky knit blanket like in pin
- 3 small detail shots like your pin: Ghost face close-up, Pumpkin ridges top, Pop surprise half-in
- Bottom flat lay: orange yarn ball, 3.5mm wooden hook, fall leaves, gold scissors
- Light: 6pm golden hour, warm glow on ghost's face
How I finish mine
I weave orange tails inside pumpkin walls, then I give pumpkin a squeeze to even out ridges — push between ridges with fingers. I brush orange yarn lightly with toothbrush for softness.
For ghost, I steam white yarn very lightly so it stays bright white — not yellow. My pumpkin I lightly spray with water and shape ridges deeper while damp — they hold after drying like real pumpkin.
My kitchen table moment: I made this ghost pop on Sunday with cinnamon apple tea and leaves falling outside my window. 30 min total — 15 min pumpkin, 10 min ghost, 5 min assembly. My daughter popped it 50 times before I could even take a photo.
Thanks for making with me
This ghost in pumpkin pop toy is exactly the viral Halloween interactive trend for 2026 — spooky cute, kawaii, quick to make and perfect for kids, tiered trays and cozy golden hour photos. I hope you love watching it pop up and say boo!
If you make one, I'd love to see your pop surprise video — tag me, I keep all your pop videos in a little folder on my phone.
Happy crocheting!

Ways to make it your own
- Color swap: White ghost + white pumpkin for boho, or black pumpkin + white ghost for spooky.
- No pop: Sew ghost permanently sitting on top of pumpkin — still cute as decor like main pin.
- Smaller: 3mm hook gives 2" pumpkin — perfect for keychain version.
- Big eyes: Use 8mm eyes for extra kawaii — my daughter loves big eyes.
- Rattle: Add tiny rattle insert inside ghost — pops and rattles for baby toy.