Inside this pattern
- Before you begin
- Materials I used
- Sizing & what you'll need
- Abbreviations
- Full roadmap - 5 steps
- Step 1: Crochet the chubby frog body
- Step 2: Eyes bumps & face
- Step 3: Tiny arms & chubby legs
- Step 4: Witch hat with orange trim
- Step 5: Assembly & hand styling
- How I finish mine
- Ways to make it your own
Before you begin
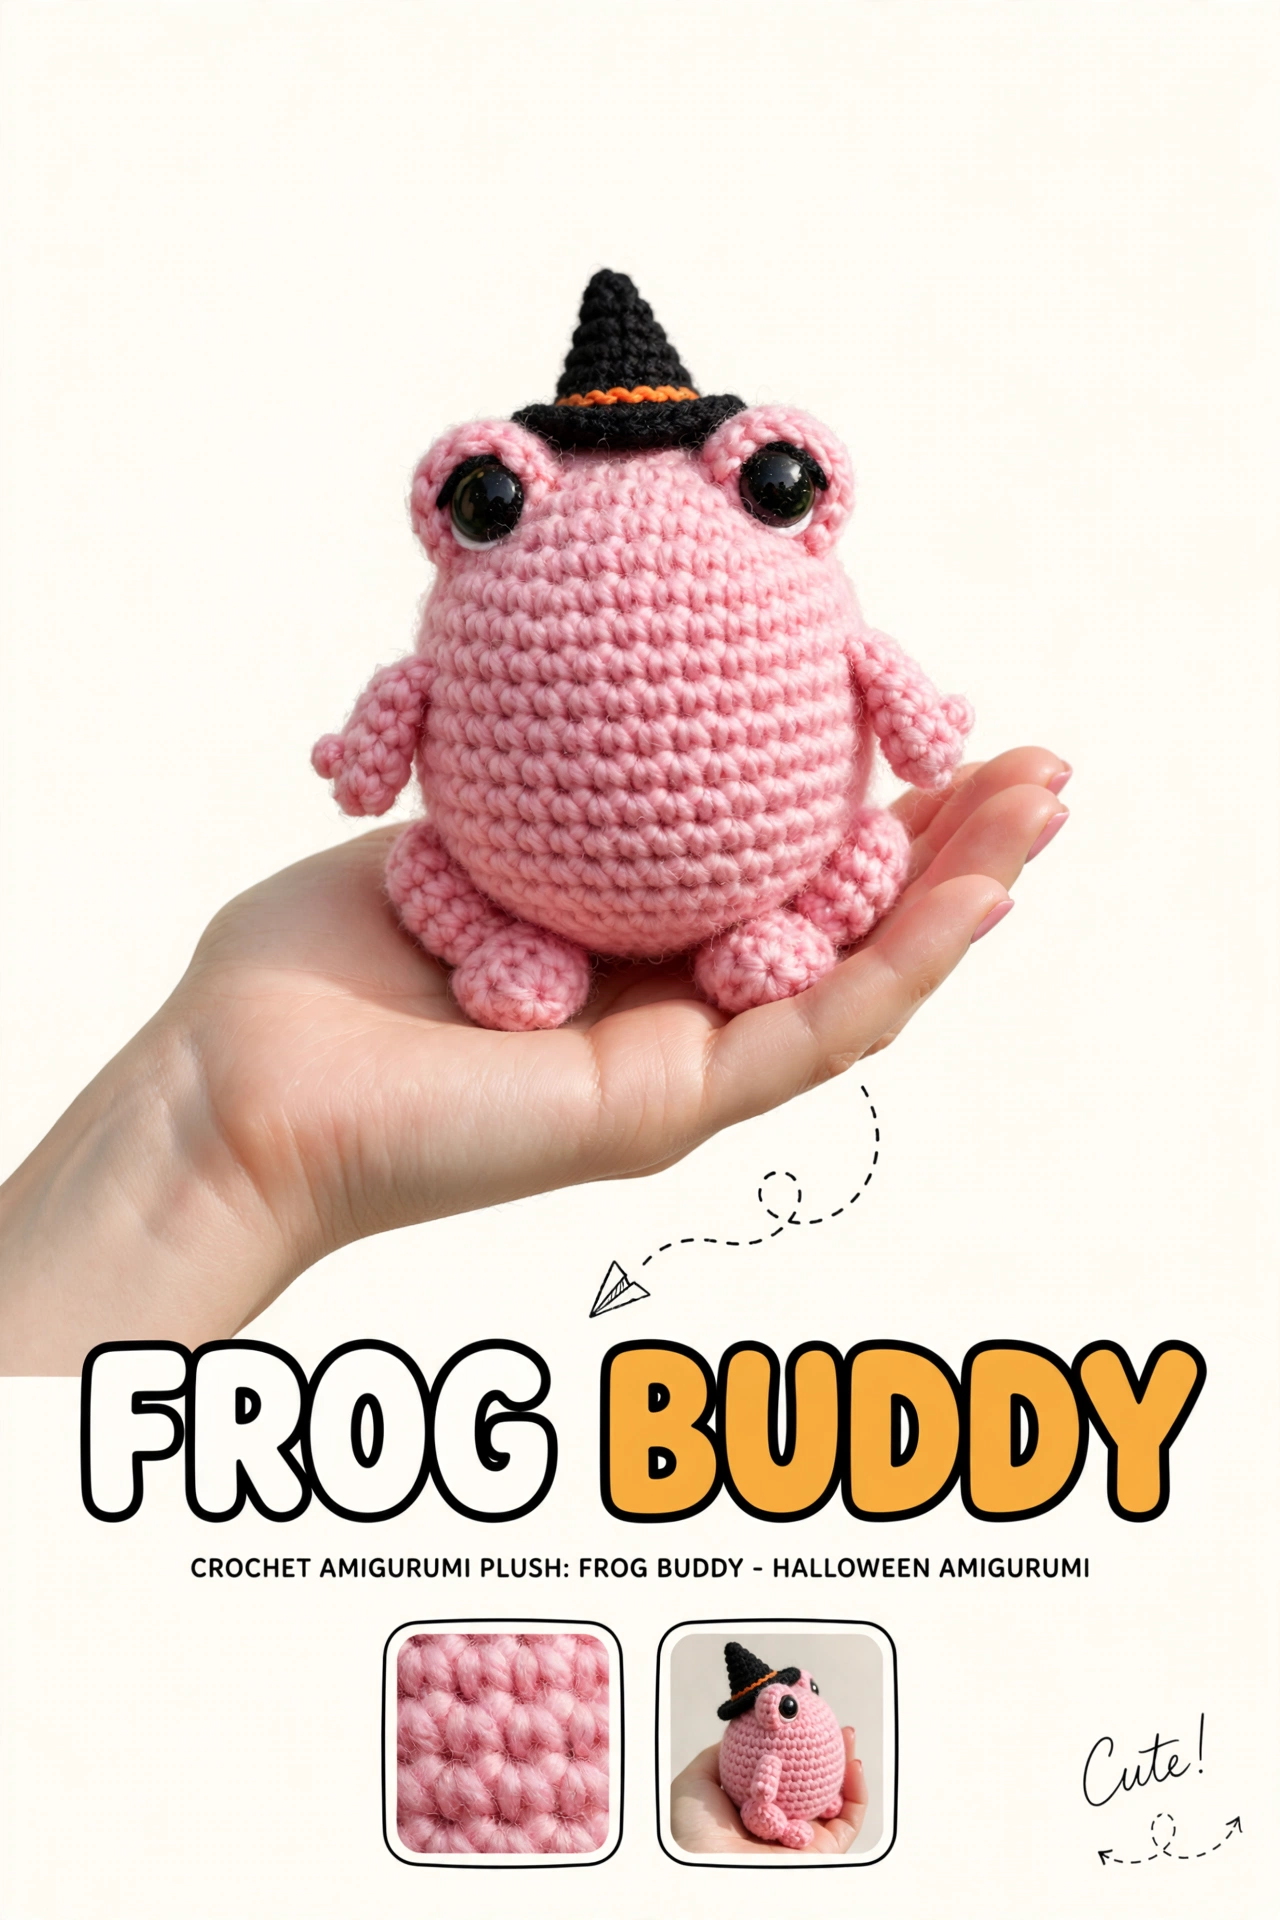
I've been wanting a frog buddy for my Halloween shelf for a while — not a green frog, but that chubby pink frog with big eyes and a little witch hat that looks so cute in a hand. I saw that pin with the pink frog in a palm with "FROG BUDDY" text and texture close-up, and I knew I had to make my own yarn version.
What I love about this one is it's truly a one-piece body. Head and belly are one chubby sphere, no neck seam. Eyes sit on little bumps that pop up — that's what gives it that cute frog look from your pin. Arms and legs are tiny and sew on with one stitch each.
If you can do magic ring and single crochet, you can make this. I keep my tension a little loose with pink yarn so it's squishy and soft like the texture close-up in your pin. I count out loud and use a stitch marker for the belly rounds.
Materials I used
- Baby pink yarn: Worsted — I used soft pink acrylic, about 60 yards for one frog. This is the fluffy pink you see in the texture close-up of your pin.
- Black yarn: Same weight — about 15 yards for witch hat. Small amount for lashes too.
- Pumpkin orange: Tiny amount — 3 yards for hat trim.
- 3.5mm hook: Keeps stitches soft and squishy.
- Eyes: 12mm safety eyes (2) — big and shiny with white bottom like pin. Black lash detail with black thread.
- Stuffing: Polyfill — generous for chubby body.
- Tapestry needle, scissors, stitch marker, straight pins.
- Props for styling: Hand palm photos, natural light, white background — exactly like your cute pin with "Cute!" handwritten.
Sizing & what you'll need
Frog is 4" tall, 3.5" wide belly, sitting 2.5" tall. With 3.5mm hook and worsted, you get soft bobble texture like in your close-up. If you use plush chenille, frog will be 5" — extra squishy desk buddy.
Pink is best for Halloween kawaii — not scary, just sweet with witch hat. Cotton keeps stitches defined for that bobble texture, acrylic is softer.
Abbreviations
MR = magic ring, sc = single crochet, inc = increase (2 sc), dec = invisible decrease, hdc = half double, sl st = slip stitch, FO = fasten off. Work in continuous rounds for body.
Full roadmap - 5 steps
1. Chubby frog body - one piece, top-down with eye bumps (20 rounds)
2. Eye bumps & face - big eyes with lashes
3. Arms x2 & legs x4 - tiny and chubby
4. Witch hat - black cone with orange trim (7 rounds)
5. Assembly - hand photo styling
Step 1: Crochet the chubby frog body
Start from top of head, all pink. Head and belly are one piece. We make eye bumps as we go — they're just increases that pop out.
R1: MR, 6 sc (6)
R2: inc x6 (12)
R3: [sc, inc] x6 (18)
R4: [2 sc, inc] x6 (24)
R5: [3 sc, inc] x6 (30)
R6: [4 sc, inc] x6 (36) — top of head wide
R7-9: sc around (36) — 3 rounds, head
R10: Eye bump round: sc 8, (inc x4) for right eye bump, sc 10, (inc x4) for left eye bump, sc 10 (44) — bumps pop out
R11-12: sc around (44) — 2 rounds over bumps
R13: sc 8, dec x4, sc 10, dec x4, sc 10 (36) — back to normal
R14-16: sc around (36) — belly starts
R17: [4 sc, dec] x6 (30)
R18: [3 sc, dec] x6 (24) — stuff firmly, very chubby
R19: [2 sc, dec] x6 (18)
R20: [sc, dec] x6 (12)
R21: dec x6 (6), FO, close, weave tail. Bottom flat so it sits like in pin.
Step 2: Eyes bumps & face
- Insert 12mm safety eyes into center of each eye bump (R10-11), 10 sts apart
- For shiny look like pin: eyes should have white at bottom — rotate eye so white shows down
- Lashes: With black thread, 2 tiny lashes on top outer edge of each eye — like pin's cute lash detail
- No mouth needed — frog is cuter without, like your pin.
Step 3: Tiny arms & chubby legs
R1: MR, 5 sc (5)
R2: inc x5 (10)
R3-4: sc around (10) — 2 rounds
R5: dec x2, sc 6 (8) — slight shaping
FO leave tail, stuff tiny tip only, flatten top and sew to sides at R13-14.
Front legs / upper legs - Make 2 - Baby Pink:
R1: MR, 6 sc (6)
R2: inc x6 (12)
R3: sc around (12)
R4: dec x3, sc 6 (9)
FO, stuff, sew to bottom front sides — chubby like pin.
Back feet - Make 2 - Baby Pink:
R1: MR, 6 sc (6)
R2: inc x6 (12)
R3-4: sc around (12)
FO, stuff, sew slightly behind front legs so frog sits like in hand photo.
Step 4: Witch hat with orange trim
R1: MR, 4 sc in black (4)
R2: [sc, inc] x2 (6)
R3: sc around (6)
R4: [2 sc, inc] x2 (8)
R5: sc around (8)
R6: [3 sc, inc] x2 (10)
R7: [4 sc, inc] x2 (12)
R8: In BLO, inc x12 (24) — brim starts
R9: [3 sc, inc] x6 (30) — brim
R10: Switch to orange, sc around (30) — one orange ring like pin
R11: Switch to black, sl st around (30) — finish edge
FO, leave tail. Do not stuff — hat sits perched on head between eyes like in pin.
Sew to top of head between eye bumps, tilted slightly.
Step 5: Assembly & hand styling
Lay out body, 2 arms, 4 leg pieces, hat.
Assembly:
1. Eyes already in with lashes.
2. Arms: Sew to sides at R13-14, angled forward slightly like saying hi.
3. Legs: Front chubby legs at bottom front (R16-18), back feet at R19-20, slightly out — so frog sits stable in palm like pin.
4. Hat: Sew between eye bumps, front edge at R4-5. Hat should sit tilted, not straight.
5. Fluff: Roll in hands to even stuffing.
My styling for photos (copy your pin):
- Hold in open palm, natural nails, white background — hand from left, frog facing camera
- Close-up texture shot: pink stitches macro like bottom left small image in pin
- Side view in palm: show chubby belly like bottom right small image
- Add doodle arrow and "FROG BUDDY" text overlay in yellow/black like pin if you like
- Light: bright natural daylight, soft shadows — makes pink pop
How I finish mine
I weave all pink tails inside, then I roll frog in hands to make it extra round and chubby like the texture close-up in your pin. I brush pink yarn lightly with soft toothbrush — makes it fluffy and hides seams.
For photos, I hold in my left hand with palm up in front of white wall at 11am — bright light makes pink glow and black hat contrast. My daughter loves holding hers and making it hop.
My kitchen table moment: I made my frog buddy Thursday with strawberry tea and window open. 1 hour total — 25 min body, 10 min limbs, 10 min hat, 15 min face & assembly. Put on some cozy playlist, so cute and quick.
Thanks for making with me
This pink frog buddy with witch hat is exactly the viral Halloween kawaii plush trend for 2026 — chubby, soft, squishy and perfect for palm photos, desk buddy and Halloween gifts. I hope you love seeing it sit in your hand with its tiny witch hat.
If you make one, I'd love to see it in your hand — tag me, I keep all your frog photos in a little folder on my phone.
Happy crocheting!

Ways to make it your own
- Color swap: Light green frog + black hat for classic, or white frog + pink hat for spooky cute.
- No hat: Frog buddy without hat is cute year-round — my daughter has a pink one on her shelf.
- Smaller hook: 3mm gives tighter 3" frog — perfect for keychain version with keyring on hat.
- Fluffy yarn: Use velvet/chenille for extra squish like texture close-up in your pin — so soft!
- Big hat: Add one more increase round for oversized witch hat — dramatic for photos.