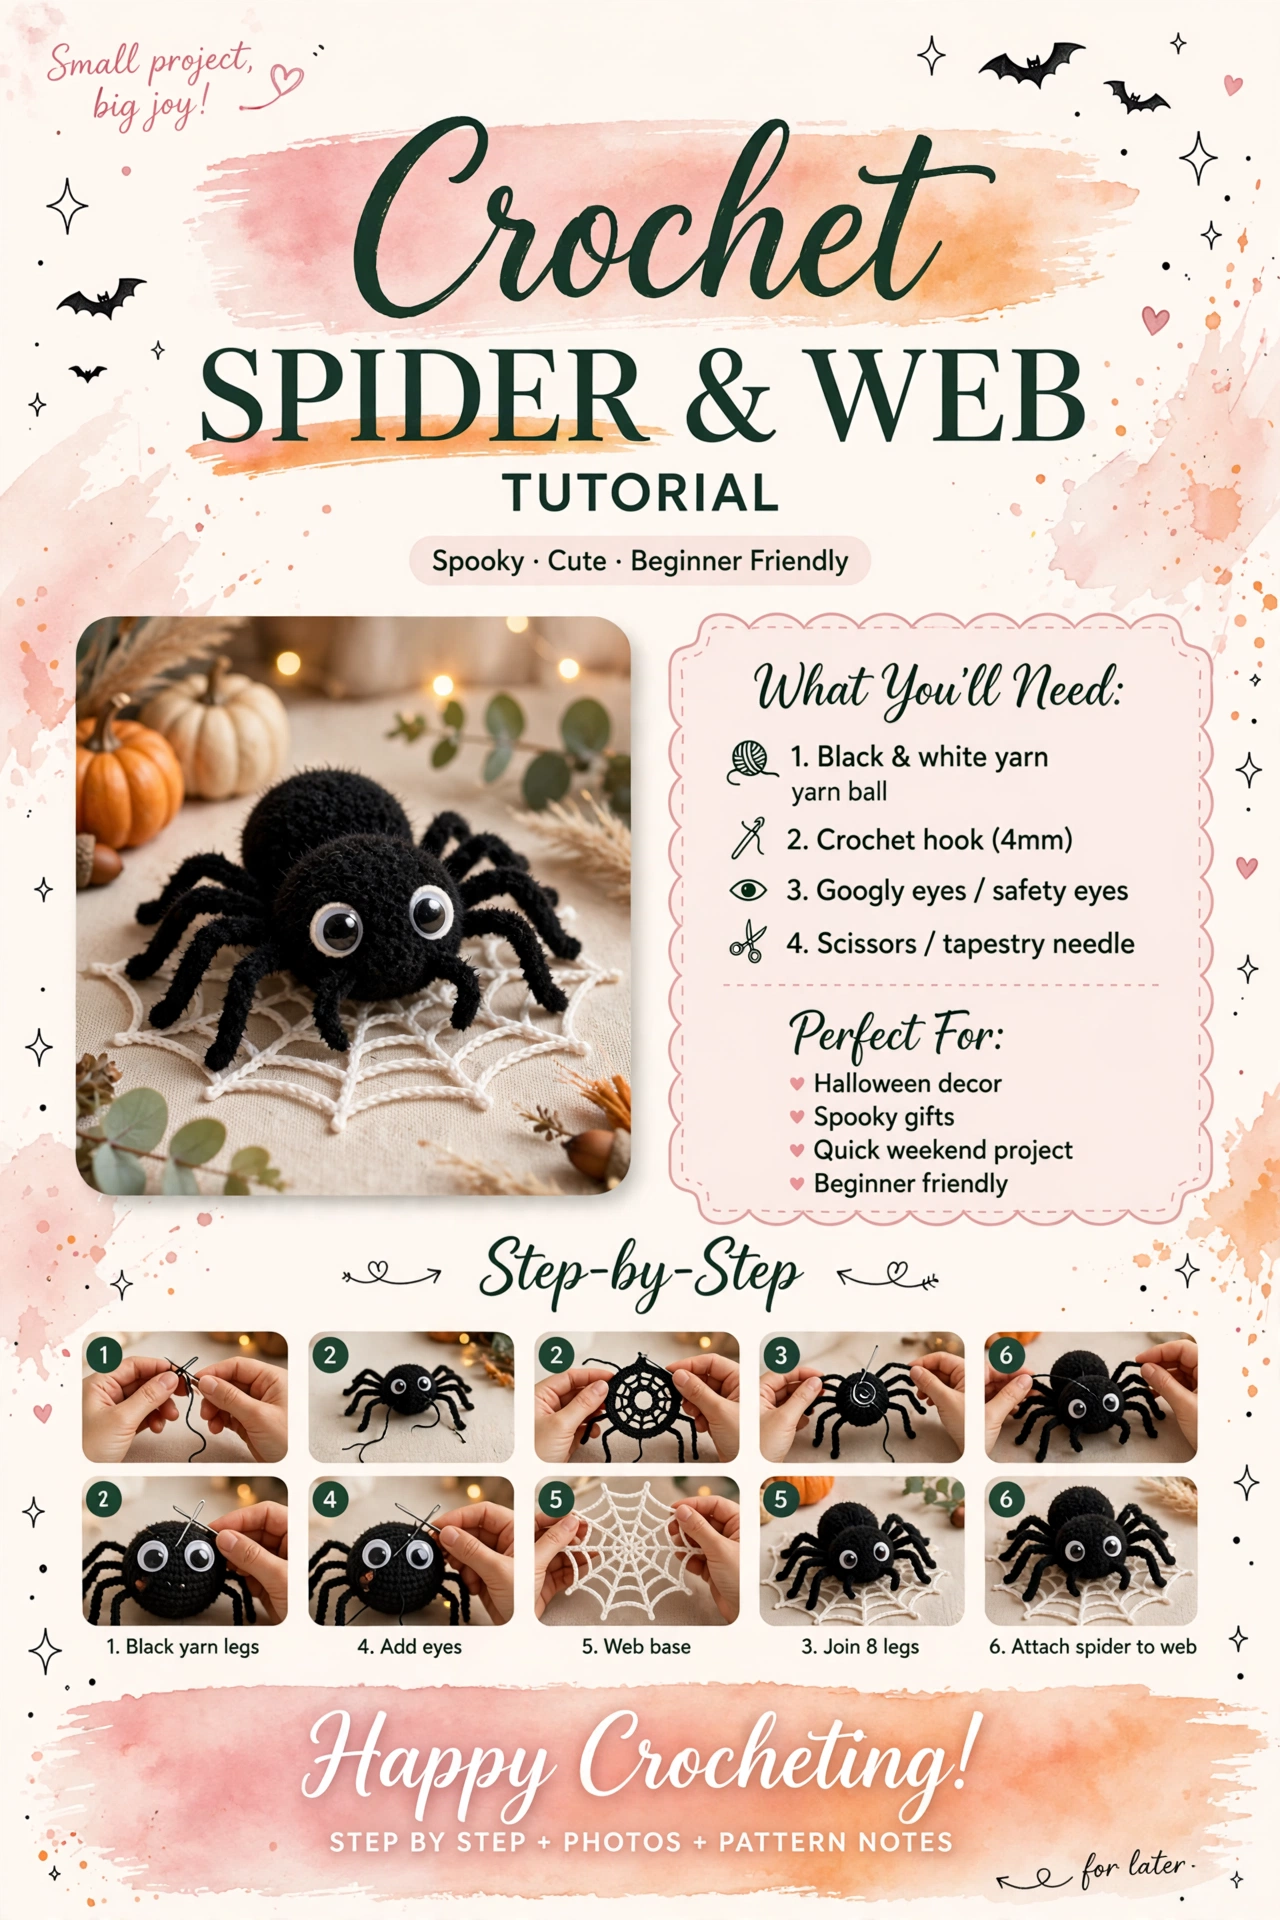
Inside this pattern
- Before you begin
- Materials I used
- Sizing & what you'll need
- Abbreviations
- Full roadmap - 6 steps
- Step 1: Crochet the spider body
- Step 2: Black yarn legs x8
- Step 3: Googly eyes & face
- Step 4: Crochet the web base
- Step 5: Join legs & assemble spider
- Step 6: Styling for Halloween photos
- How I finish mine
- Ways to make it your own
Before you begin
I've been seeing fuzzy spiders everywhere for Halloween 2026 — not creepy, but those round chubby ones with giant eyes that sit on a little web. I saw that pin with the black spider on a white web with pumpkins and fairy lights in the back, and I knew I had to make my own yarn version.
What I love about this one is it's truly a small project, big joy. The spider is two little balls crocheted together, the legs are just chained chenille that curls naturally, and the web is one round of simple spokes — no fancy stitches. I made my first one while my tea was still warm, sitting at my kitchen table with fall candles on.
If you can do magic ring and single crochet, you can make this. I keep my tension loose with chenille — it puffs up and hides the stitches, which is exactly what we want for that fuzzy spider look like in your pin. Count out loud and use a stitch marker for the head.
Materials I used
- Black yarn: Fluffy chenille — I used black velvet/blanket yarn, about 40 yards for one spider + legs. Regular worsted black works too but won't be as fuzzy as the pin.
- White yarn: Worsted cotton — Lily Sugar'n Cream white, about 20 yards for the web. Sturdy so web doesn't stretch.
- 4.0mm crochet hook: Bigger than I use for cotton — chenille needs room to stay fluffy.
- Eyes: 16mm googly eyes (2 per spider) — the pin uses googly, I love the wobble. Or 12mm safety eyes for kid-safe version.
- Stuffing: Polyfill — small handful for head + body.
- Tapestry needle, scissors, stitch marker, straight pins.
- Props for styling (optional): Cream linen, mini white & orange pumpkins, eucalyptus, fairy lights, pampas — exactly like the cozy Halloween pin.
Sizing & what you'll need
Finished spider: 2.5" body length, 4" wide with legs curled. Web: 7" diameter — perfect for tiered tray. With 4mm hook and chenille, gauge is loose and fluffy. If you use worsted acrylic, spider will be smaller — about 3" wide — cute for bag charms.
I use chenille for spider because it hides stitches and looks like real fuzzy spider fur. Cotton for web because it stays crisp and flat for photos — acrylic web sags.
Abbreviations
MR = magic ring, sc = single crochet, inc = increase (2 sc in same st), dec = invisible decrease, ch = chain, sl st = slip stitch, FO = fasten off. We work in continuous rounds for spider, in joined rounds for web.
Full roadmap - 6 steps
1. Spider body — head + abdomen (2 balls, 16 rounds total)
2. Legs x8 — curled chenille tubes (chain + sc)
3. Eyes & face — googly eyes + smile
4. Web base — 3 rounds, spokes + rings
5. Join — sew legs, join head to body, attach to web
6. Style — linen, pumpkins, lights — cozy Halloween photos
Step 1: Crochet the spider body
I crochet head first, then a slightly smaller abdomen — both are simple spheres. Chenille hides everything so don't worry about perfect tension.
R1: MR, 6 sc (6)
R2: inc x6 (12)
R3: [sc, inc] x6 (18)
R4: [2 sc, inc] x6 (24)
R5-8: sc around (24) — 4 rounds straight, chubby head
R9: [2 sc, dec] x6 (18)
R10: [sc, dec] x6 (12) — stuff firmly, round
R11: dec x6 (6), FO, close. Leave long tail.
Abdomen - Black Chenille (slightly smaller):
R1: MR, 6 sc (6)
R2: inc x6 (12)
R3: [sc, inc] x6 (18)
R4: [2 sc, inc] x6 (24)
R5-6: sc around (24) — 2 rounds
R7: [2 sc, dec] x6 (18)
R8: [sc, dec] x6 (12) — stuff
R9: dec x6 (6), FO, close. Leave tail for sewing to head.
Step 2: Black yarn legs x8
These are the fun part. No stuffing, just chains that curl naturally because of chenille. Make 8 the same, but 2 front ones slightly shorter for photo.
Ch 12, sc in 2nd ch from hook and across (11). FO, leave 6" tail.
The chain will curl naturally — perfect leg bend.
Front 2 legs: Ch 10, sc across (9) — slightly shorter so they frame face.
Back 6 legs: Ch 12 version.
Tip: If using worsted not chenille, Ch 16 + sc across and wire with pipe cleaner inside for bend.
Lay them out — 4 per side. I pin them before sewing so spacing is even. Front legs point forward like in pin, middle legs out, back legs slightly back — like real spider but cute.
Step 3: Googly eyes & face
The pin uses big googly eyes and that's what makes it spooky-cute not scary. I glue mine, you can sew safety eyes if for kids.
- Glue 16mm googly eyes to head front, between R5-6, 4 sts apart — slightly crossed eyed is cuter!
- With white yarn, add tiny dot near eye if using safety eyes for shine.
- Optional: tiny black smile with embroidery — just a small V under eyes, I sometimes skip for more kawaii.
Step 4: Crochet the web base
Web is crocheted in white cotton, flat. It's just spokes and circles — super fast. This is what makes the photo look like the pin with spider sitting on top.
R1: MR, ch 3 (counts as dc), 11 dc in ring, sl st to top of ch3 (12 dc) — small center
R2: Ch 4 (counts as dc + ch1), [dc in next dc, ch1] x11, sl st (12 spokes with ch1 gaps)
R3: Sl st to ch1 gap, ch3, dc in same gap, ch2, *2 dc in next ch1 gap, ch2* x11, sl st — outer ring with ch2
For bigger web: R4: Ch3, sc around with ch3 between spokes — makes 7" web.
FO, weave tail. Steam lightly to flatten — I pin to cardboard with pins and spray water.
Simplified web I use for photos: Make 8 chains from center MR (ch 8, sl st back) spaced evenly like wheel, then connect with 2 rounds of ch4 loops.
Step 5: Join legs & assemble spider
Lay everything out — head, abdomen, 8 legs, eyes, web — like a little spider kit from the pin tutorial.
Assembly:
1. Eyes: Glued? Let dry 5 min. Add shine dot if you like.
2. Abdomen to head: Sew abdomen to back of head at R9-10, slightly underneath so head is forward — chubby profile like pin.
3. Legs: Pin 4 legs per side to sides of head/abdomen join — front legs to head (R6-7), middle to join, back to abdomen (R3-4). Sew with tail, 2 stitches each. Legs should stick out and curl down.
4. Shape legs: Bend curls with fingers — front forward, others sideways for cute pose.
5. Attach to web: With white yarn, tack 2-3 legs to web with tiny stitches so spider sits on top — don't sew flat, let it hover slightly for shadow in photos.
I don't sew legs too tight — I like them a little floppy so they drape naturally on web for photos. For the pin look, I bend front two legs in like little hands.
Step 6: Styling for Halloween photos
Styling is half the magic for Halloween 2026. In the pin you loved, spider is on a cream linen with pumpkins and fairy lights — cozy, not creepy, with eucalyptus and pampas.
My setup for photos (copy my pin):
- Cream linen or burlap, slightly rumpled, on table
- White web flat, spider centered — front legs forward
- 2 mini pumpkins: one orange, one white — behind spider
- Scatter: eucalyptus leaves, dried wheat, tiny acorns
- Fairy lights blurred in back — bokeh glow
- Shot from low angle, soft morning light
For shelf styling inside, I sit web + spider on coffee table books with a pumpkin. For kids, I add it to Halloween goodie bags — they love the googly wobble. For gifts, kraft box with dried eucalyptus.
How I finish mine
I weave all tails inside with tapestry needle, then I give the spider a little roll to even out stuffing. I brush black chenille lightly with a soft toothbrush — makes it extra fluffy like the pin and hides any seams.
For the web photo, I actually pinned web to cork board and steamed — makes spokes crisp and white pops against linen. My fairy lights are battery LED warm white, I leave them on for glow behind. I took photos at 4pm when light is golden — that's the cozy fall light you see in viral pins.
My kitchen table moment: I made my spider on Tuesday with pumpkin spice coffee and rain on window. 40 min total — 15 min body, 10 min legs, 5 min web, 10 min sewing. Put on some fall playlist, it's so cozy and quick.
Thanks for making with me
This fuzzy spider & web is exactly the viral Halloween decor trend for 2026 — spooky cute, kawaii, quick to make and perfect for tiered trays, shelves and cozy Halloween photos. I hope you love seeing it sit on its little white web with pumpkins and fairy lights.
If you make one, I'd love to see it on your table or shelf — tag me, I keep all your photos in a little folder on my phone.
Happy crocheting!

Ways to make it your own
- Color swap: Try brown + cream web for vintage, or purple + white for spooky cute.
- Safety eyes: Use 12mm safety eyes instead of googly for kids — sew firmly.
- Bigger web: Add R4 with ch4 loops for 10" web — great for table centerpiece.
- Keychain: Use DK + 3mm hook, spider 2" wide — attach keyring to top of head.
- Glitter web: Use white yarn with metallic thread — sparkles in fairy lights for Halloween photos.