Inside this pattern
- Before you begin
- Materials I used
- Sizing & how to measure
- Abbreviations
- Full roadmap - 6 steps
- Step-by-step with photos
- How I finish mine
- Ways to make it your own
- Caring for your beanie
Before you begin
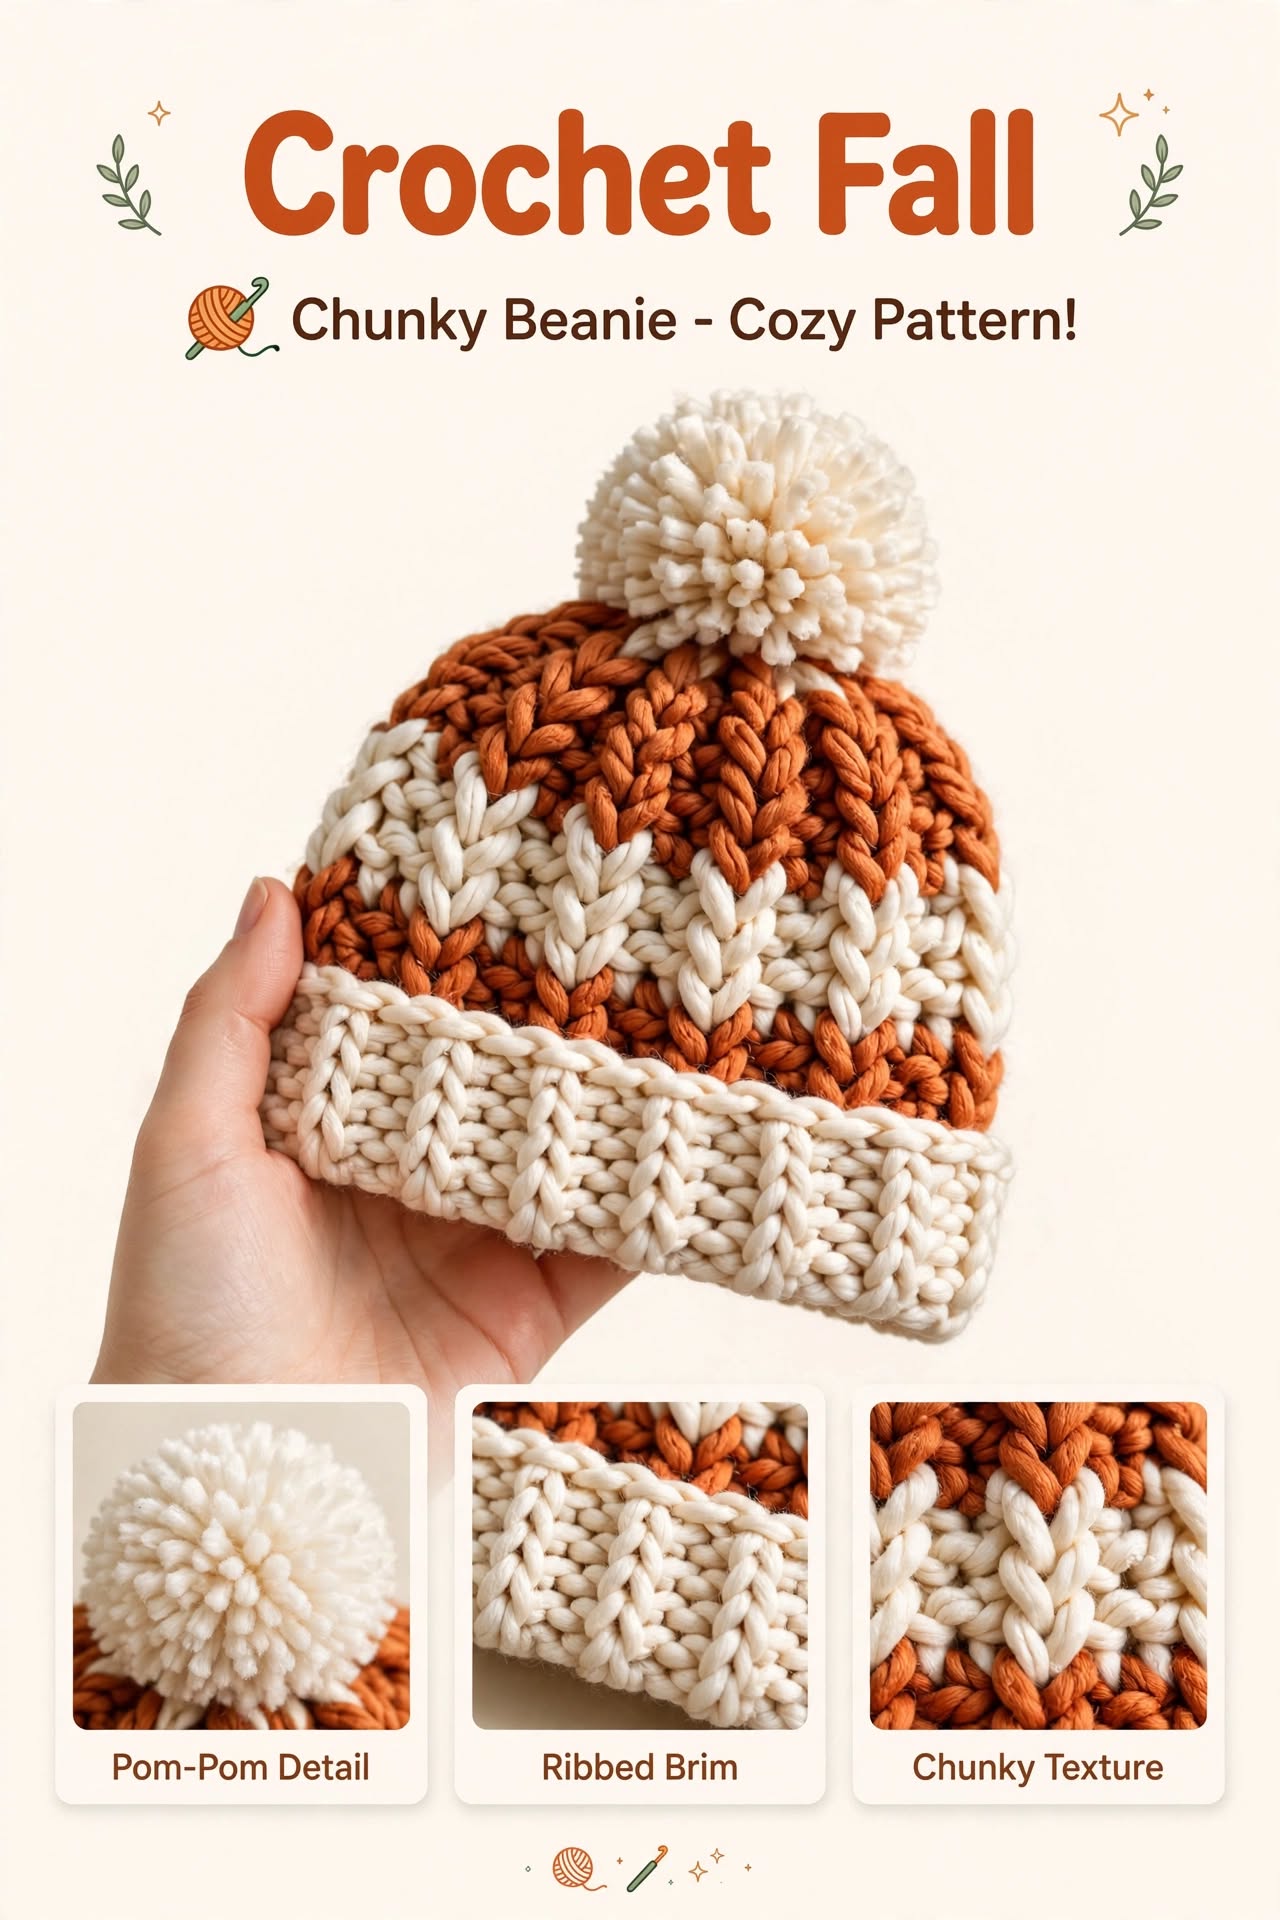
I've been wanting a beanie that feels like a warm hug for fall, and this one turned out exactly like that. The mustard and rust colors remind me of leaves and pumpkins, and the chunky stitches make it extra cozy without being too heavy.
What I love about this pattern is how fast it works up. Because we are using super chunky yarn and an 8mm hook, the fabric grows quickly — perfect if you want to make one today and wear it tomorrow morning with your coffee.
If you are new to beanies, don't worry — this one starts with a simple ribbed brim that stretches, then we work straight up for the body, and close the top with a few easy decreases. No complicated shaping.
Materials I used
- Super chunky yarn: About 120 yards total — I used mustard for the body (about 80 yards) and rust for the brim (about 40 yards). Look for something soft — acrylic or a wool blend both work lovely.
- 8mm crochet hook: My favorite for chunky beanies — it keeps the fabric soft and not too stiff.
- Pom-pom maker or cardboard: For that big fluffy mustard pom-pom on top. You can also make one by wrapping yarn around your hand.
- Yarn needle and scissors: For weaving in ends.
- Optional: A little cinnamon stick or dried leaves for photos — I love styling mine on a wooden crate with pumpkins around it, just like in the pin.
Sizing & how to measure
This pattern is written for an adult size, but it's easy to adjust.
My finished beanie: About 21-22 inches around the brim when relaxed, and about 8.5 inches tall without the pom-pom. The brim folds up about 2.5 inches, which I love — it adds extra warmth around the ears.
To check your size, wrap a measuring tape around your head where you want the brim to sit. If you are between sizes, go a little smaller — the ribbed brim has a lot of stretch.
Abbreviations (US terms)
ch = chain, hdc = half double crochet, dc = double crochet, sc = single crochet, BLO = back loop only, st(s) = stitch(es), dec = decrease, sl st = slip stitch
Full roadmap — 6 steps
1. Ribbed brim in rust: We start with the rust brim, worked flat in rows to make a stretchy band.
2. Body in mustard: Then we join mustard and work up the body in rounds — simple and cozy texture.
3. Crown shaping: A few gentle decreases to close the top.
4. Make the pom-pom: Big and fluffy in mustard — my favorite part.
5. Attach pom-pom: Sew it on securely so it stays fluffy and full.
6. Weave in and wear: Finish up and style it with your favorite fall blanket and pumpkins.
Step-by-step
1Ribbed brim in rust
I always start with the brim — it sets the fit for the whole beanie. For this one I used rust for a nice contrast against the mustard.
Ch 10 (for about 2.5 inch brim).
Row 1: hdc in 2nd ch from hook and across. Ch 1, turn. [9 sts]
Row 2-45: hdc in BLO across. Ch 1, turn. [9 sts] — this creates that nice ribbed stretch. My band measured about 20 inches long when relaxed, which fits 21-22 inch head nicely.
Sl st or whip stitch short ends together to form a loop. Don't fasten off rust yet if you want a seamless join, or FO and join mustard in same place.

2Body in mustard
Now for the fun part — the body in mustard. This is where it grows fast and you start to see the beanie take shape.
Join mustard yarn along the top edge of the brim.
Round 1: Ch 1, hdc evenly around the brim — I put about 1 hdc per row of brim, so about 45 hdc. Join with sl st.
Round 2-12: Ch 1, hdc around. Join. [45 sts] — about 6 inches tall from brim edge. You can add or remove rounds here if you want it more slouchy or more fitted. I like 12 rounds for that slightly slouchy but not too long look.

3Crown shaping
Closing the top is simple — just a few decreases evenly spaced, then pull closed.
Round 13: *hdc 7, dec* around. [40 sts]
Round 14: *hdc 6, dec* around. [35 sts]
Round 15: *hdc 5, dec* around. [30 sts]
Round 16: *hdc 3, dec* around. [24 sts]
Round 17: *hdc 2, dec* around. [18 sts]
Fasten off, leave long tail. Thread tail through remaining sts with yarn needle and pull tight to close. Weave tail inside.

4Make the pom-pom
The pom-pom is what makes this beanie feel so fall and playful. I made mine big and fluffy in mustard to match the body.
Wrap mustard yarn around pom-pom maker or a piece of cardboard about 3.5 inches wide, about 100 wraps for a full pom-pom. Tie tightly in the middle with strong yarn, cut loops, trim into a nice round shape. Don't trim too much at first — you can always trim more.

5Attach the pom-pom
Sewing on the pom-pom is easy, but take a second to make it secure — you don't want it wobbling off in the wind.
Thread the long ties from the pom-pom through the top of the beanie with your yarn needle, one on each side of the closed center. Tie tightly inside, then weave in ends. I go through a couple more times for extra security.

6Weave in and wear
Last little bits — weave in all your ends, fold up the brim, and it's ready to wear. I love styling mine on a wooden crate with pumpkins, leaves, and a cozy blanket underneath, just like in my pin.
Weave in all tails with yarn needle. Fold brim up about 2.5 inches. Give it a little shake to fluff the pom-pom. Try it on — it should sit comfortably over your ears and feel soft and warm.

How I finish mine
I like to weave my ends in with a yarn needle, going back and forth a couple times so they don't pop out with the chunky yarn. Chunky yarn can be a bit slippery, so I always go an extra inch or two.
For photos, I place my beanie on a folded blanket on a wooden crate, with little pumpkins, pinecones, and fall leaves around it — it feels like a little fall market stall. The warm light in the afternoon makes the mustard color glow so nicely.
Ways to make it your own
- Color play: Try cream with rust brim, or olive with mustard — all the warm fall colors look lovely together. Oatmeal, pumpkin, rust, mustard, chocolate are my favorite fall palette.
- No pom-pom: If you prefer a more minimal look, leave the pom-pom off — it looks great both ways.
- Kids size: Make the brim about 16-18 inches long for kids, and work fewer body rounds (about 9-10).
- Add a leaf: Crochet a little leaf in green and sew it near the pom-pom for a pumpkin beanie twist.
Caring for your beanie
I hand wash mine gently in cool water when needed, then lay flat to dry. If you used acrylic, it's pretty forgiving, but laying flat keeps the shape nice. Fluff the pom-pom with your fingers after washing — it comes right back.
Store it folded, not hanging, so the brim keeps its stretch.
Thanks for making with me
This chunky fall beanie is one of those projects that makes me excited for cooler weather. I hope you love making and wearing it as much as I do — maybe with a warm drink in hand and leaves crunching under your feet.
If you make one, I'd love to see it — it's such a cozy make for fall and winter.
Happy crocheting!
— Sara