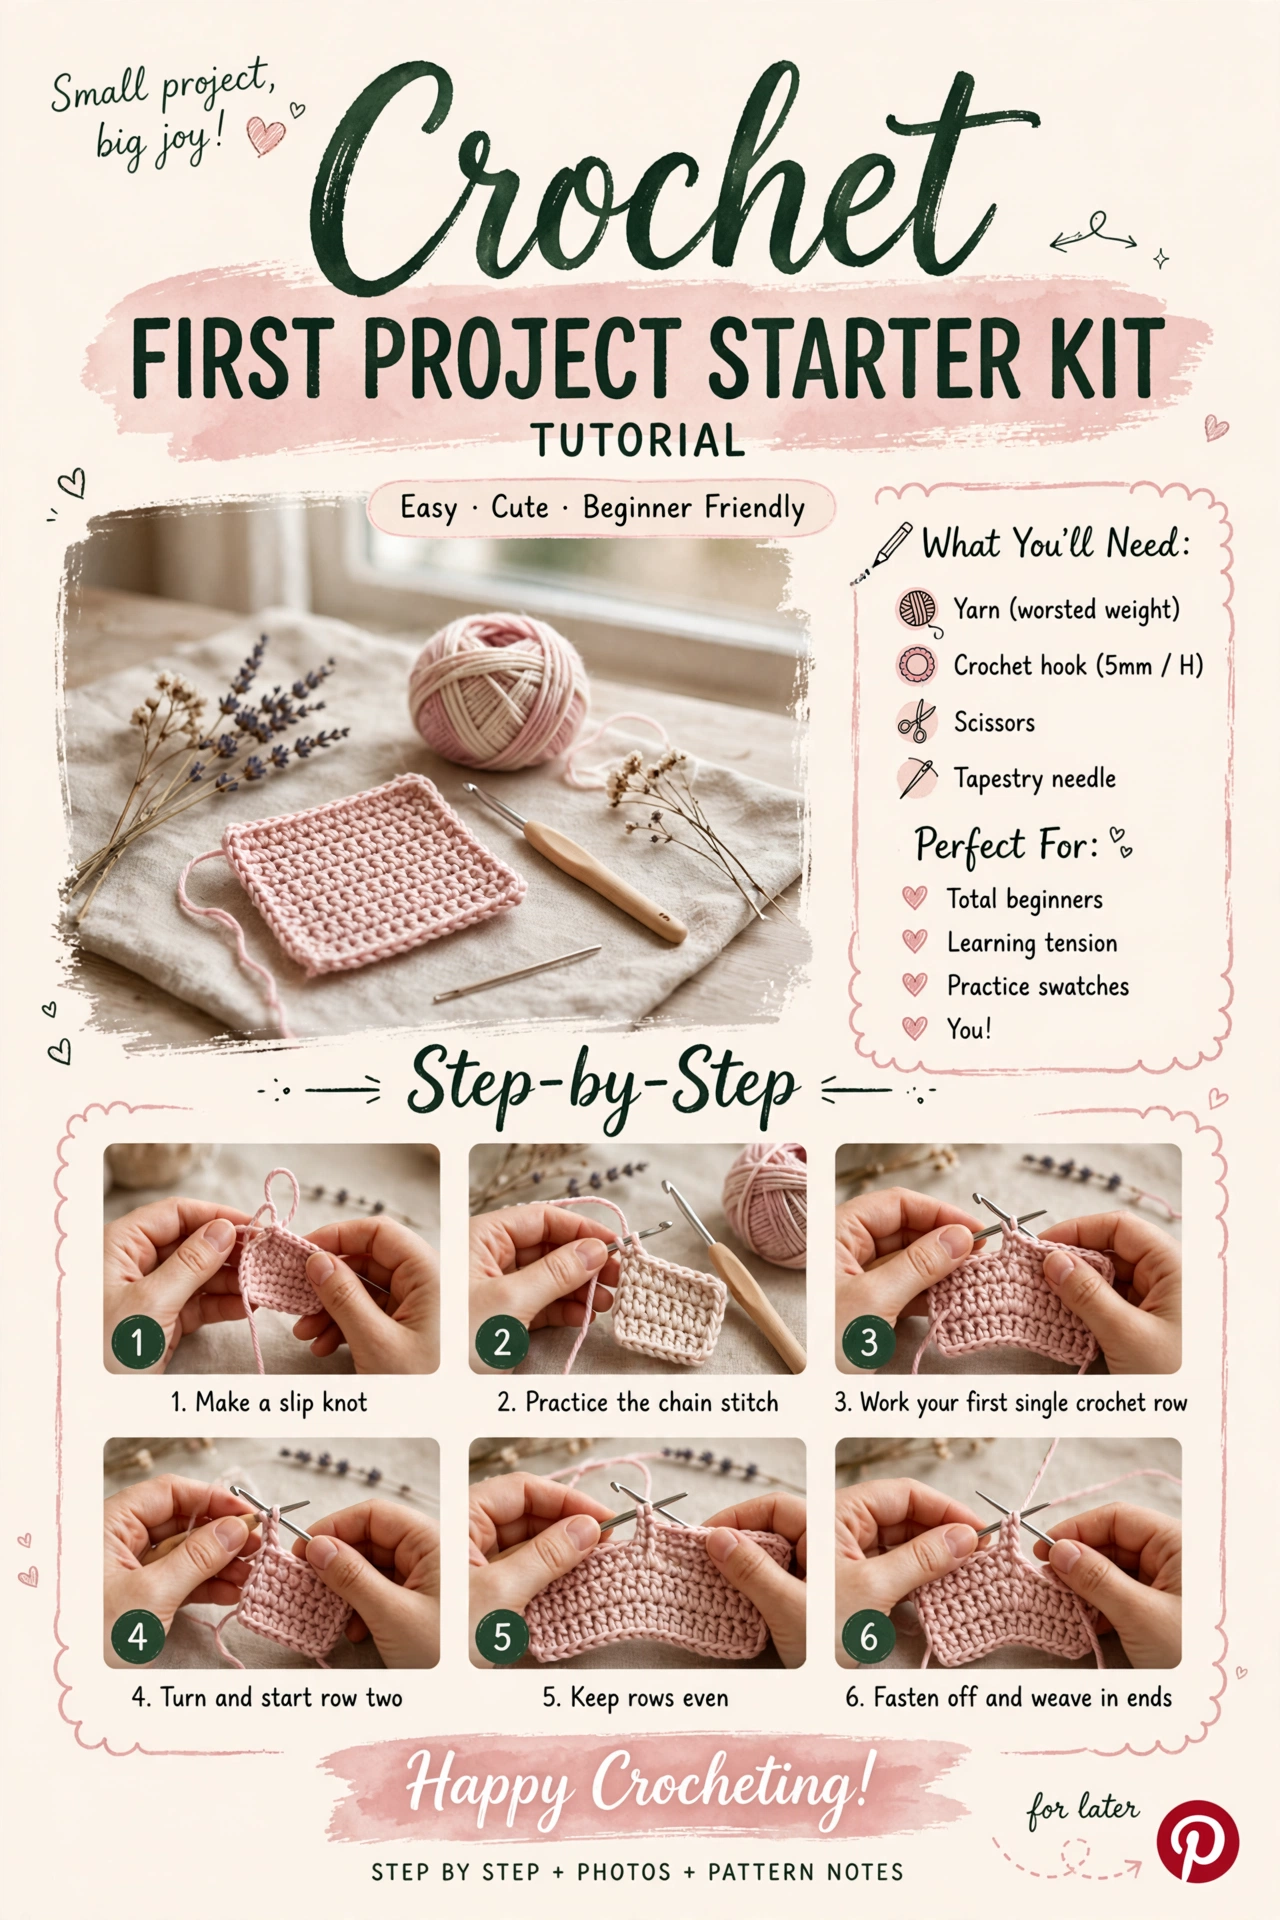
If this is the first thing you have ever crocheted, I want you to finish it. Not perfectly. Just finish it, look at it, and know your hands made it.
The little square I wish I had started with
When crochet is new, it is very easy to make the first project too ambitious. You see a cardigan or a beautiful blanket and think, I want to make that. I understand the feeling. But there is something lovely about starting smaller. A square gives you enough time to find the rhythm without asking you to spend a week wondering whether you are doing everything wrong.
This one is intentionally simple. You will make chains, work single crochet back and forth, count your stitches, and watch a piece of fabric appear. That is the whole lesson. The first few rows may look a little uneven. Mine do sometimes too when I am getting used to a new yarn. Keep going.
What I would put beside you
Use a smooth, light-colored worsted-weight yarn and a 5 mm hook. You will also need scissors and a tapestry needle for the ends. I would avoid black yarn and fuzzy yarn for this first project because you deserve to actually see where the hook is supposed to go.
You only need about 35 yd / 32 m. This is a scraps-on-the-table kind of project, not a shopping trip.
Let’s make it
Foundation: Chain 17. Try not to pull each chain tight against the hook. They should look like a relaxed little braid.
- Row 1: Single crochet in the second chain from the hook and in every chain across. You will have 16 stitches.
- Row 2: Chain 1, turn your work, and single crochet across again. 16 stitches.
- Rows 3–16: Repeat Row 2. Count at the end of each row. This tiny habit will save you from the mysterious triangle that almost every beginner accidentally makes.
- Border: Chain 1 and single crochet around the outside, working 3 single crochets into each corner. Slip stitch to the first stitch.
- Finish: Cut the yarn, pull the tail through, and weave both ends into the back.
If it doesn’t look square yet
If one edge is getting narrower, you are probably missing the last stitch of a row. If it is getting wider, you may be putting two stitches into the same place. Put a marker in the first and last stitch if that helps. There is no prize for making crochet harder than it needs to be.
If your stitches are very tight, loosen your grip before changing hook sizes. I used to think neat crochet meant tight crochet. It does not. The yarn needs a little room to move.
What to do with your first square
Use it as a coaster. Keep it in your yarn basket. Make three more and sew them together. I actually love keeping early pieces because months later you can put a new square beside the old one and see how much your hands have learned without you noticing.
Before you start the next thing
Look at your square and find the row where your stitches began to settle down. That is the moment your hands started understanding the motion. Crochet becomes much less mysterious from here. When you are ready, a granny square is a lovely next step because it adds corners, spaces, and a little more color without becoming overwhelming.
Complete beginner practice pattern
Skill level: Beginner · Sample yarn: worsted-weight #4 · Hook: 5 mm · Finished size: about 10 × 10 cm (4 × 4 in), depending on tension.
Gauge
Target about 15 single crochet stitches × 16 rows = 10 cm (4 in). Gauge is a target, not a guarantee; measure your own swatch before using the size estimate.
Abbreviations
ch = chain · sc = single crochet · st = stitch · rep = repeat · sl st = slip stitch
Numbered instructions
- Chain 17.
- Single crochet in the second chain from the hook and in each chain across: 16 sc.
- Chain 1 and turn. Sc in each stitch across: 16 sc.
- Repeat Row 2 until you have 15 rows of sc.
- Fasten off and leave a 10–15 cm (4–6 in) tail for weaving.
- Weave the tail through several stitches in two directions and trim.
Stitch-count checkpoint
Every completed row should contain 16 sc. If the count changes, stop on that row and find the missing or extra stitch before continuing.
Finishing and care
Lightly shape the square flat. Wash according to the yarn label and allow it to dry flat if the yarn recommends it. This small practice piece is also useful as a future tension swatch.