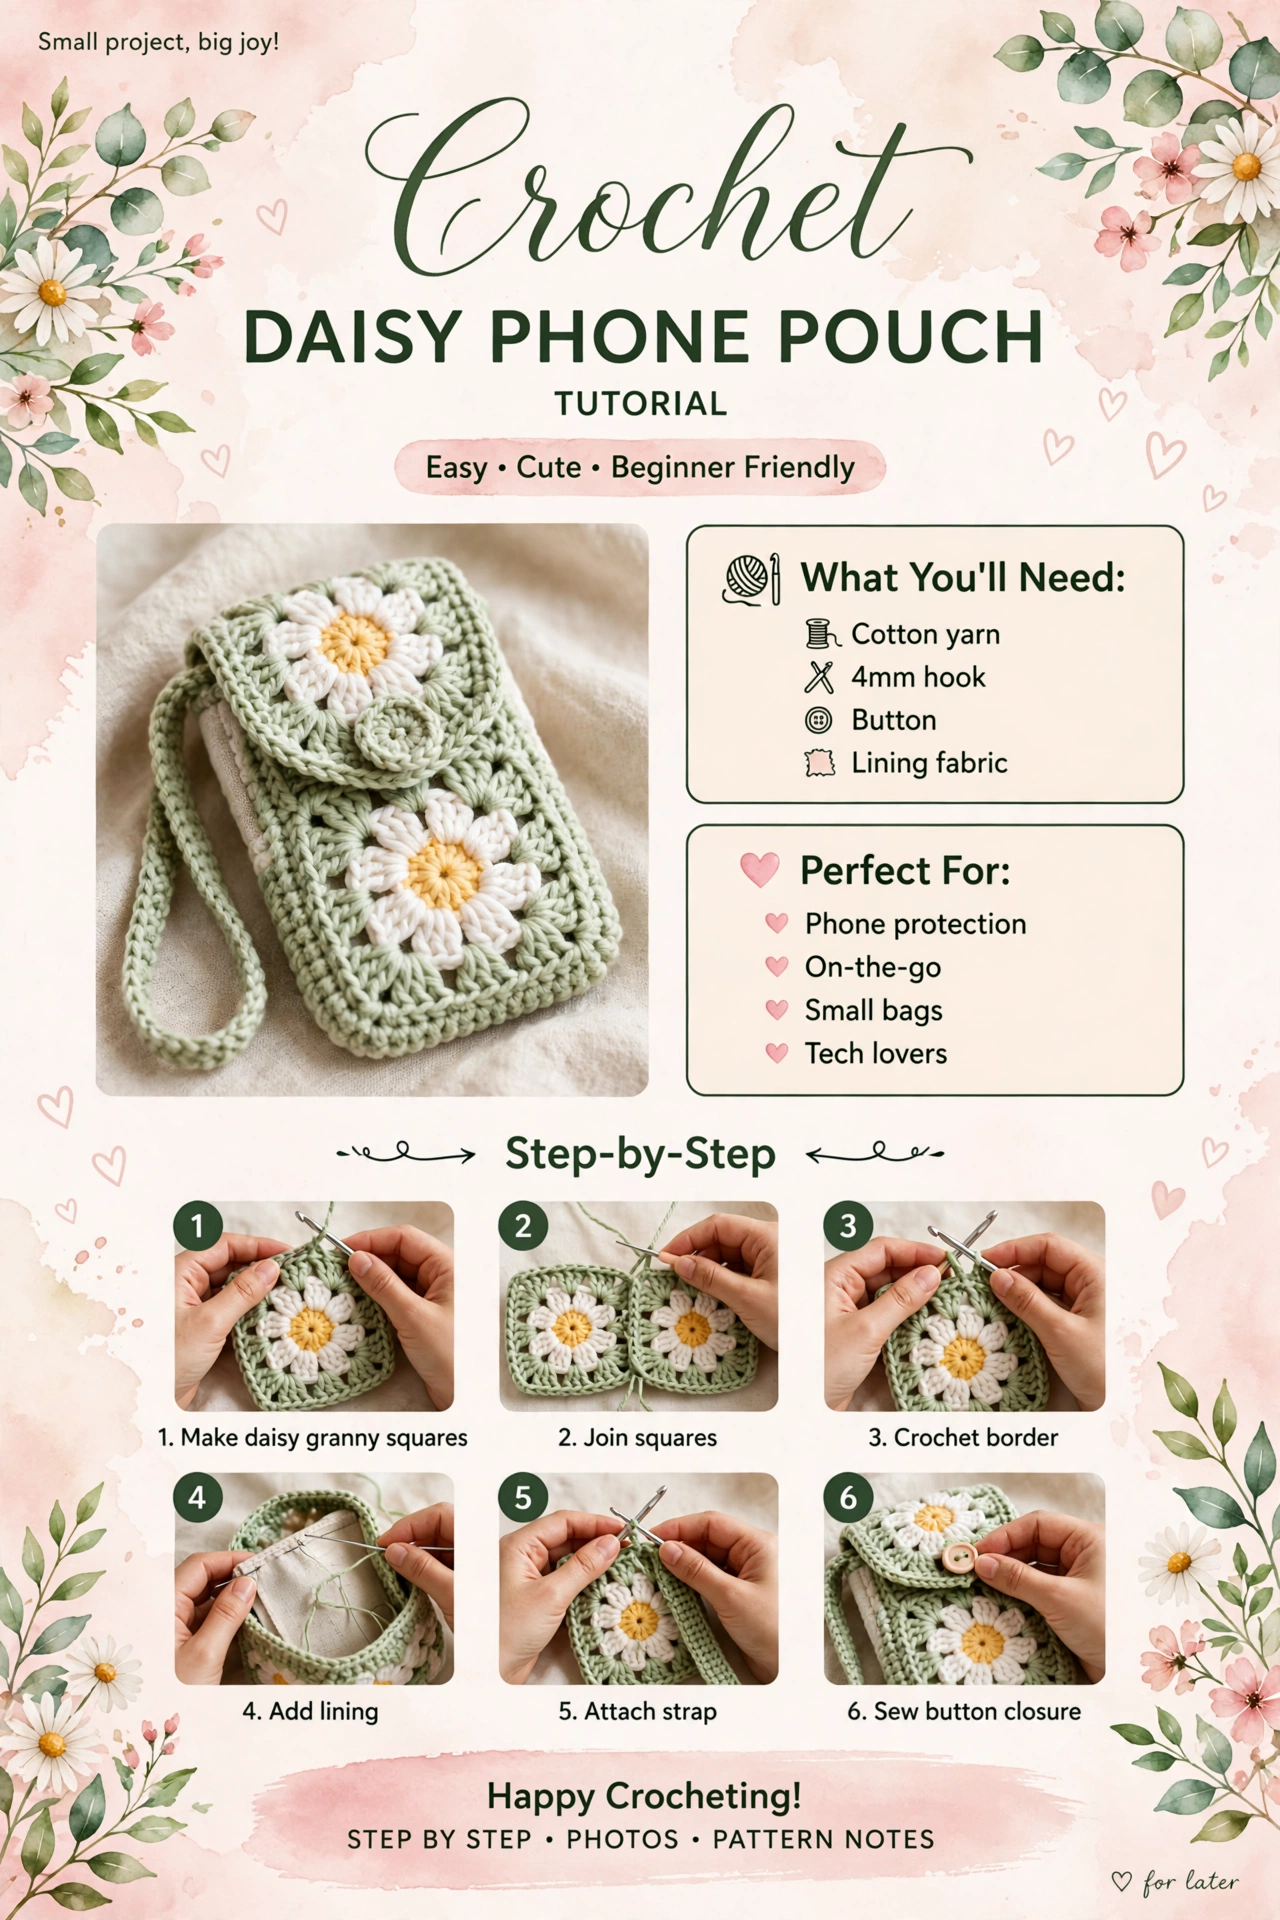
In this pattern
- My yarn basket — sage green, white, yellow with button and lining
- How this daisy phone pouch is made — granny squares + pouch + flap
- Daisy granny squares — make 5 — 4" wide — white daisy yellow center
- Joining squares into pouch body
- Crochet border and flap with button loop
- Lining fabric and wrist strap and button closure
- Finished — daisy phone pouch with phone inside
My yarn basket — sage green, white, yellow with button and lining
For this pouch I used cotton yarn — sage green 80 grams for main color, white 30 grams for daisy petals, yellow 10 grams for daisy centers. I use a 4mm hook so granny squares are soft but sturdy — about 4" wide each — not loose — so pouch holds shape and protects phone. I also had a wooden button 20mm light wood for closure, just like in your photo with round wooden button on flap, lining fabric 8"×12" cream cotton for inside so phone doesn't get scratched, and my phone 3"×6" with case for sizing.

My yarn basket — sage green, white, and yellow cotton yarn balls, crochet hook, wooden button, lining fabric, scissors, and daisies on beige linen table — beginning of daisy phone pouch — real photo.
How this daisy phone pouch is made — granny squares + pouch + flap
This pouch is made from daisy granny squares — 5 squares total — each about 4" wide with white daisy and yellow center — 4 squares for pouch body (2 front, 2 back) and 1 square for flap — you join squares with whip stitch or single crochet join — then crochet border around top edge — add fabric lining inside — add wrist strap 8" long — and wooden button closure on flap — pouch about 4.5" wide ×7" tall — fits standard phone 3"×6" with case — with flap that folds over and button loop holds it closed.
Daisy granny squares — make 5 — 4" wide — white daisy yellow center
Yellow center — yellow, 4mm:
R1: magic ring, 12 dc — 12 — yellow center about 1" wide — 12 dc
White petals — white, 4mm:
R2: *ch 3, dc in same stitch, ch1, sl st in next stitch* repeat 12 times — 12 white petals — each petal about 0.6" long — white daisy petals around yellow center — daisy about 2" wide — 12 petals
Sage green square — sage green, 4mm:
R3: join sage green in any ch1 space between petals — ch3 (counts as dc), 2 dc in same space, ch2, 3 dc in next ch1 space — repeat around — 4 corners with ch2 — 8 sides of 3 dc — square starting — about 3" wide
R4: ch3, 3 dc in next space, * (3 dc, ch2, 3 dc) in corner ch2 space, 3 dc in next space* repeat 3 times, (3 dc, ch2, 3 dc) in last corner — 4 corners ch2 — square about 4" wide — daisy granny square 4" wide
Fasten off weave tail — one daisy granny square — 4" wide — yellow center 1", white petals 2" daisy, sage green square 4"
Make 5 squares — each 4" wide — same daisy — 5 squares total — 4 for body +1 for flap
Each daisy square starts yellow center 12 dc — 1" wide — then white petals — ch3 dc ch1 sl st — 12 petals — each petal 0.6" long — daisy 2" wide — then sage green square — R3 and R4 granny style — 4 corners ch2 — 8 sides 3 dc — square 4" wide — like in your photo with sage green square, white daisy, yellow center — 4" wide — make 5 squares.

Daisy granny square in progress — sage green yarn half square with white daisy yellow center and hook on linen with sage green yarn ball, scissors, and note that says "2nd round - 16 DC? check" — on wooden table — real photo — square 4" wide.
Joining squares into pouch body
Take 4 daisy squares — arrange 2 squares stacked vertically for front and 2 squares stacked vertically for back — each square is 4" wide — when stacked vertically with a small whip-stitch seam that takes about 0.5" total, the effective height is about 3.5" per square, so 2 stacked = about 7" tall
Front panel: stack 2 squares vertically — 4" wide × about 7" tall after seaming — join the middle edge where they meet with whip stitch using sage green yarn — front panel 4" wide ×7" tall
Back panel: stack remaining 2 squares vertically the same way — 4" wide ×7" tall after seaming — join middle edge with whip stitch — back panel 4" wide ×7" tall
Place front and back panels together with daisies facing outward — whip stitch bottom edge and side edges together — leave top open — stitch bottom edge 4" wide and side edges 7" tall — three sides closed, top open — pouch body about 4.5" wide ×7" tall after border — fits phone 3"×6" — pouch body formed
I join 4 daisy squares into pouch body using one consistent layout — 2 squares stacked vertically for front and 2 squares stacked vertically for back — each square is 4" wide — with a small whip-stitch seam that takes about 0.5" total, the effective height is about 3.5" per square, so 2 stacked gives about 7" tall — front panel 4" wide ×7" tall and back panel 4" wide ×7" tall — I place front and back panels together with daisies facing outward and whip stitch the bottom and side edges with sage green yarn, leaving the top open — three sides closed — pouch body about 4.5" wide ×7" tall after border — fits phone 3"×6" with case — front has daisies centered — like in your photo with daisy squares on pouch front.

Joining daisy squares — two sage green granny squares with white daisies yellow centers being joined side by side with needle on wooden table with yarn ball, hook, and gold scissors — real photo — squares 4" wide each — joining into pouch body.
Crochet border and flap with button loop
Border: join sage green at top edge of pouch — sc 28 around top opening — about 4.5" wide ×2 sides =9" but top only 4.5" wide — sc 18 across front top +18 across back top =36 sc around top opening — 1 round sc border — solid top edge — 36 sc
Flap: 5th daisy square — 4" wide — sew one edge of 5th square to back top edge of pouch — flap attached at back — flap folds over front — flap about 4" wide ×4" tall — covers top opening — like in your photo where flap with daisy folds over front
Button loop: on flap edge center — ch 8, sl st to same stitch — loop about 1" — button loop for wooden button — loop 1" — holds button 20mm
Strap: ch 40 — about 8" long wrist strap — 40 chains — sc in each chain — 40 sc — strap 8" long — attach to side of pouch with sl st — wrist loop
Border is sc 36 around top opening — 18 front +18 back — solid edge — then flap is 5th daisy square sewn to back top edge — flap 4" wide ×4" tall — folds over front — button loop ch8 sl st loop 1" on flap edge center for wooden button 20mm — strap ch40 8" long wrist loop attached to side — like in your photo with flap folding over with daisy and button on front and wrist strap on side.
Lining fabric and wrist strap and button closure
Lining: cut cream cotton fabric 8" wide ×12" tall — fold in half 8"×6" — sew sides with 0.25" seam — lining bag 7.5" wide ×5.75" tall — slightly smaller than crochet pouch — place inside crochet pouch — hand sew top edge of lining to top edge of pouch with needle and thread — lining inside — protects phone — like in your photo where cream lining shows inside pouch
Button: sew wooden button 20mm onto front center of pouch — about 1" below top edge — button 20mm light wood — sew with sage green yarn — 4 holes — secure — button on front
Button loop on flap goes over button — holds flap closed — pouch closure — button loop 1" over button 20mm
Strap 8" wrist loop — attach to side seam — loop for wrist — on-the-go
Lining is cream cotton fabric 8" wide ×12" tall — fold in half to 8"×6" — sew sides 0.25" seam — lining bag 7.5"×5.75" — slightly smaller than crochet pouch — place inside crochet pouch and hand sew top edge to top edge — protects phone from scratches — like in your photo where cream lining shows inside sage green pouch. Button wooden 20mm sewn on front center 1" below top edge — button loop ch8 1" on flap goes over button — holds closed — wrist strap 8" loop for on-the-go.

Sewing lining — sage green crochet pouch with cream fabric lining being hand sewn inside with needle and thread — hands sewing — on wooden table — real photo — lining 8"×12" fabric — pouch 4.5"×7".
Finished — daisy phone pouch with phone inside
And here it is — my sweet daisy phone pouch — about 4.5" wide ×7" tall — made from 5 daisy granny squares 4" wide each — 4 squares for body (2 front stacked, 2 back stacked) +1 square for flap — each square yellow center 1" 12 dc, white petals 12 petals 0.6" each daisy 2" wide, sage green square 4" wide — joined with whip stitch — border sc 36 around top — flap 4"×4" with button loop ch8 1" — wrist strap ch40 8" long — lining cream fabric 8"×12" folded 8"×6" sewn — wooden button 20mm on front — holds phone 3"×6" with case — like in your photo with sage green pouch, white daisies yellow centers, wooden button, wrist strap, cream lining, on beige linen with daisies and eucalyptus.

Finished — sage green daisy phone pouch — 4.5" wide ×7" tall — made from daisy granny squares 4" wide — white daisies with yellow centers — wooden button closure — cream lining — wrist strap — holding phone — on beige linen — easy, cute, beginner friendly — perfect for phone protection, on-the-go, small bags, tech lovers. 🌼💚
When I took it to the market next morning with my phone inside and wrist strap around my wrist, a lady said, "Did you make that daisy pouch? It's so cute!" I laughed and said, "I made it yesterday with sage green yarn and white and yellow daisies on my table." I hope you make yours on a soft spring morning too — maybe with daisies in a vase nearby — and use it for phone protection, on-the-go, small bags.

Thank you for making this sweet daisy phone pouch with me — I hope it keeps your phone cozy on sunny days. If you make one, tag me — I love seeing your daisy pouches. 🌼💚🤍