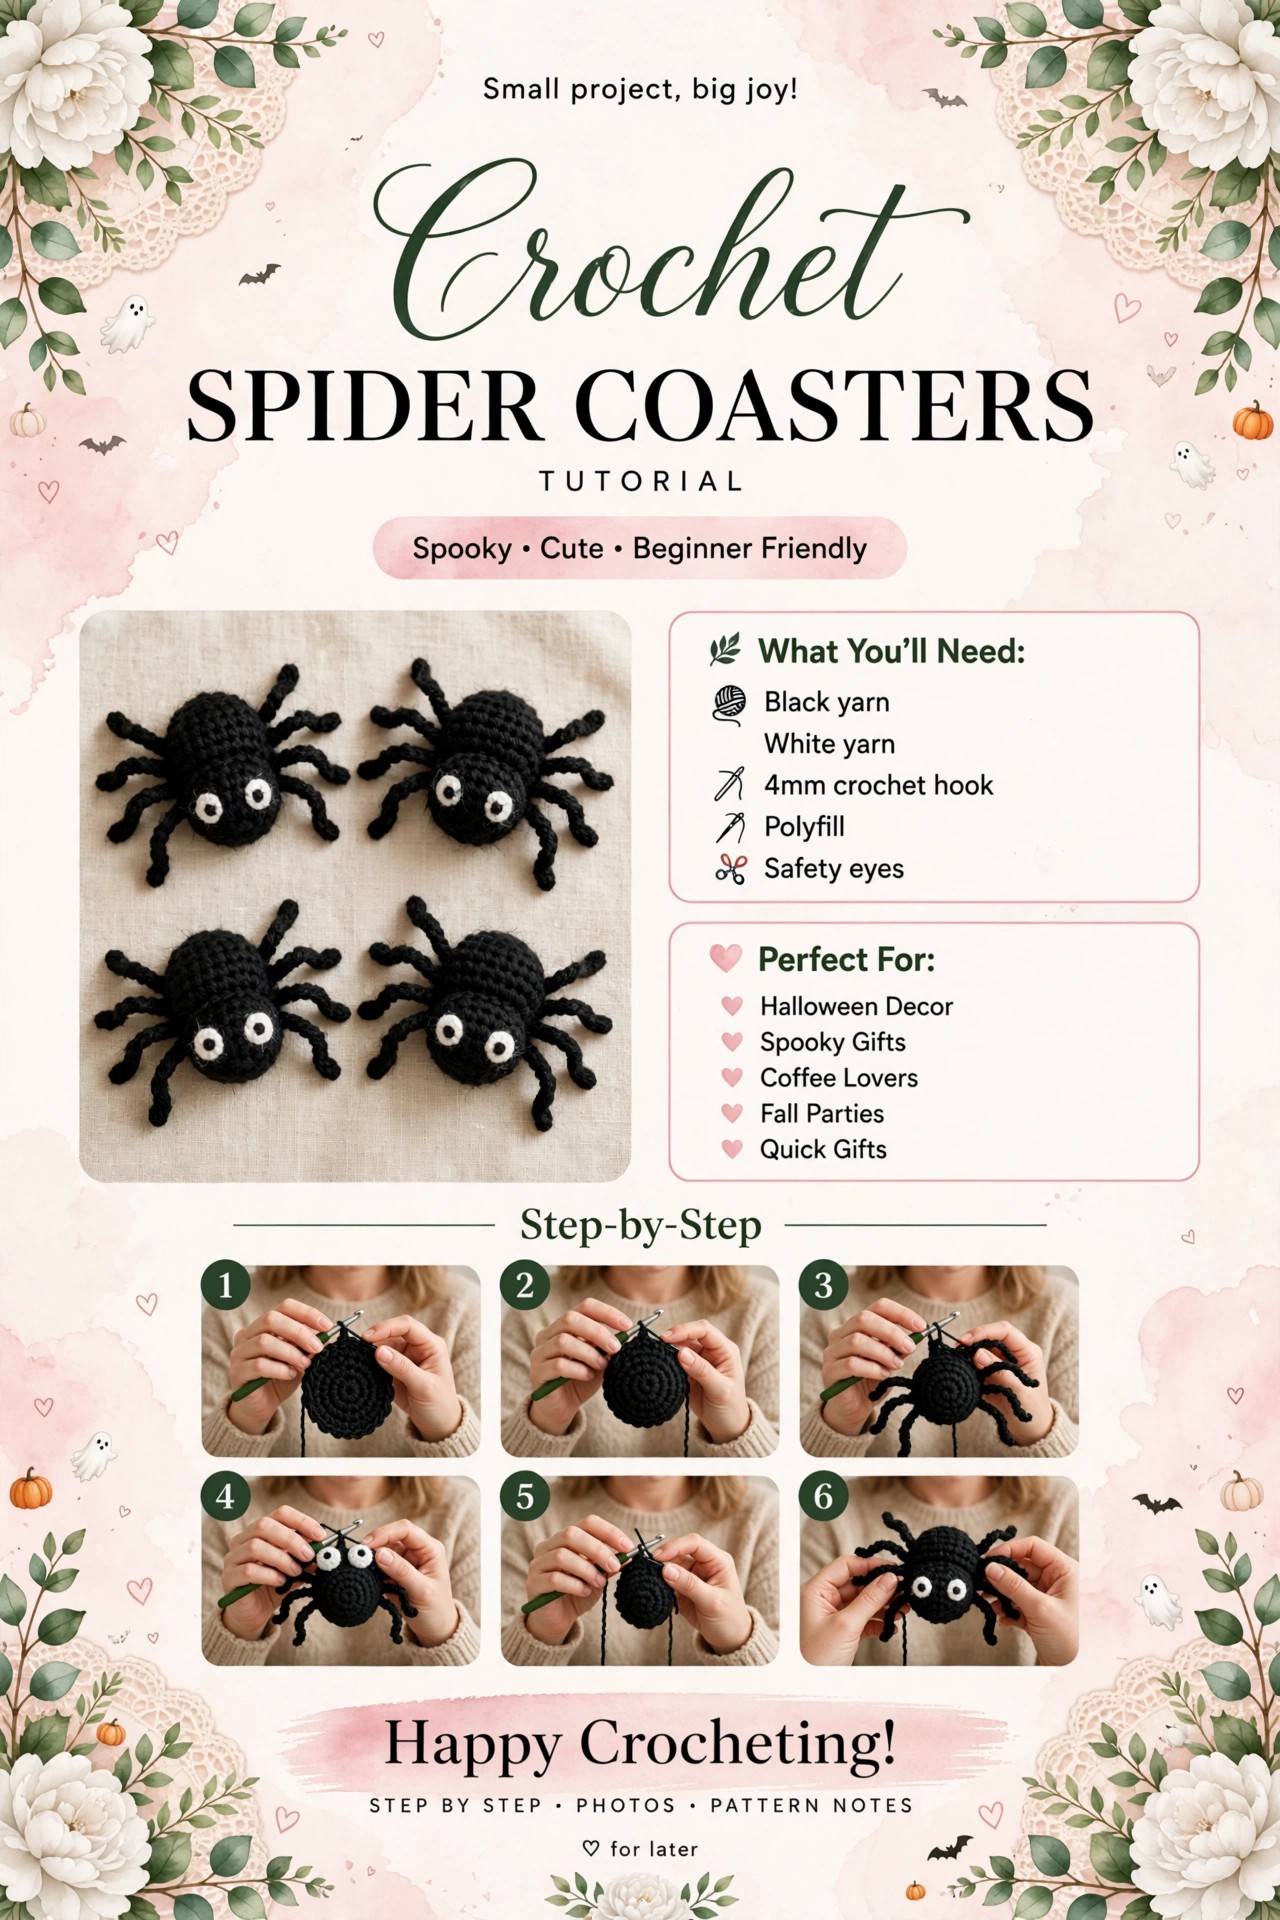
Inside this pattern
- Before you begin
- Materials
- Sizing & gauge
- Abbreviations
- Roadmap — 6 steps
- Step 1: Flat coaster base
- Step 2: Spider body — little ball
- Step 3: Eight legs with chains
- Step 4: Big googly eyes
- Step 5: Stuffing and closing
- Step 6: Attach spider to coaster
- Assembly and finishing
- Troubleshooting
- Ways to make it your own
Progress photos are AI-generated illustrations made to show each stage.
Before you begin
I love these spiders because they are not scary at all. They sit on your mug and look up at you with those big eyes. The coaster part protects the table, and the spider part makes people smile.
We will make a flat black circle for the coaster, about 4.6" across. Then we make a small black ball for the spider body, add eight chain legs, stuff lightly, and sew it to the center of the coaster. The eyes are big white circles with black safety eyes in the middle — that is what makes them cute instead of spooky.
We work in continuous rounds with a marker. Keep your tension relaxed with black yarn — it can be hard to see, so work near a window.
Materials
- Worsted weight yarn (medium 4) in Black — about 14 yards per spider coaster (about 10 yds for flat base + 4 yds for body + legs) — about 56 yards for set of 4
- Worsted in White — about 2 yards per coaster for eye patches
- 4mm (G-6) crochet hook
- 8mm black safety eyes — 2 per spider — safety note: safety eyes are a choking hazard for children under 3; embroider eyes with black yarn instead for babies and party favors for small children
- Polyester fiberfill — small pinch per spider, about 2 oz for 4
- Yarn needle, scissors, stitch marker
Yarn estimate from stitch count: flat coaster base R1-R12 = 390 sts total, spider body R1-R17 = about 318 sts total, 8 legs × (10 ch + 9 sc) = about 152 sts, white eyes 2 × 18 sts = 36 sts — about 896 sts total per coaster — at 20 sc = 4" (about 0.2" per st) about 8-10 yards black + 1-2 yards white + small amounts for sewing — I suggest about 14 yards black per coaster to be safe (about 56 yards for set of 4) — measure your own finished coaster for your most accurate number.
Sizing & gauge
Gauge: 20 sc x 24 rows = 4" x 4" in single crochet with 4mm hook and worsted yarn. Each stitch about 0.2" wide.
Coaster base diameter = sts × 0.2" ÷ 3.14
R6 (36 sts): 36 × 0.2 ÷ 3.14 = about 2.29"
R9 (54 sts): 54 × 0.2 ÷ 3.14 = about 3.44"
R12 (72 sts): 72 × 0.2 ÷ 3.14 = about 4.58" — main coaster size, about 4.6" across — perfect for mug
Spider body: R4 (24 sts): 24 × 0.2 ÷ 3.14 = about 1.53" diameter flat → about 1.8" wide stuffed, about 2" long with head + body
Abbreviations
ch — chain
sl st — slip stitch
sc — single crochet
inc — increase: 2 sc in same stitch
inv dec — invisible decrease: front loops of next 2 sts, yarn over pull through 2, yarn over pull through 2 — closes without bump, used only for spider body
FO — fasten off
[...] x6 — repeat 6 times
Roadmap — 6 steps
1. Flat black circle for coaster base
2. Small black ball for spider body
3. Eight chain legs
4. Big googly eyes
5. Stuff body
6. Sew spider to center of coaster
Step 1: Flat coaster base
This is just a flat circle. We increase by 6 each round to stay flat. If it starts to bowl, add a little more slack. If it waves, you have too many increases — count to 72 at the end.
R1: MR, 6 sc into ring (6)
R2: inc x6 (12)
R3: (sc 1, inc) x6 (18)
R4: (sc 2, inc) x6 (24)
R5: (sc 3, inc) x6 (30)
R6: (sc 4, inc) x6 (36) — about 2.29"
R7: (sc 5, inc) x6 (42) — about 2.67"
R8: (sc 6, inc) x6 (48) — about 3.05"
R9: (sc 7, inc) x6 (54) — about 3.44"
R10: (sc 8, inc) x6 (60) — about 3.82"
R11: (sc 9, inc) x6 (66) — about 4.20"
R12: (sc 10, inc) x6 (72) — about 4.58" — main coaster size
Sl st to first st, FO leaving 10" tail for weaving — no stuffing

Flat black circle, 72 stitches, about 4.6" across at R12, coaster base.
What it should look like now: Flat black disc about 4.6" across, 72 sts around, lies flat on table.
Step 2: Spider body — little ball
Now the spider itself. Two small balls — one slightly bigger for abdomen, one smaller for head — or one ball with two sections. I make it as one piece: bottom big, top smaller.
R1: MR, 6 sc (6)
R2: inc x6 (12)
R3: (sc 1, inc) x6 (18)
R4: (sc 2, inc) x6 (24) — about 1.53" diameter flat
R5-R8: sc around (24) — 4 rounds even — about 0.66" tall
R9: (sc 2, inv dec) x6 (18) — start closing abdomen
R10: (sc 1, inv dec) x6 (12) — stuff lightly here
R11: inc x12 (24) — double every stitch to start head — (24)
R12-R14: sc around (24) — 3 rounds for head
R15: (sc 2, inv dec) x6 (18)
R16: (sc 1, inv dec) x6 (12)
R17: inv dec x6 (6) — close, FO leaving 12" tail

Small black dome, first part of spider body, about 1.5" across before stuffing.
What it should look like now: Small figure-8 shape with bigger bottom and smaller top, about 2" long total, open at top before final close.
Step 3: Eight legs with chains
The legs are just chains that curl a little on their own. Make them all the same length — I use a piece of cardboard to measure.
Ch 10, sc in 2nd ch from hook and in each ch across (9) — about 2" leg — FO leaving 6" tail
Make 8 legs — 4 per side

Small black spider with eight chain legs attached, four per side, each about 2" long.
What it should look like now: Spider body with 8 legs sewn evenly around middle, 4 on each side, legs about 2" long, slight curl.
Step 4: Big googly eyes
The eyes are what make them cute. I crochet small white circles first, then add safety eyes in the middle.
R1: MR, 6 sc (6)
R2: inc x6 (12) — about 0.76" across
FO leaving 8" tail
Place 8mm safety eye through center of white patch, then place patches on head between R12-R13, about 4 sts apart — about 0.8" apart (4 × 0.2") — sew white patches to head
Or embroider black pupils with black yarn if not using safety eyes — required for children under 3

Placing large white eye patches with black safety eyes on black spider head, about 0.8" apart.
What it should look like now: Spider with two big white eyes with black centers, about 4 sts apart on head.
Step 5: Stuffing and closing
Stuff just the body lightly — not the coaster base. The coaster stays flat.
Stuff abdomen and head lightly — small pinch each — about grape size total
Close top with inv dec x6, weave tail inside

Hands crocheting and attaching legs to small black spider, chain legs about 2" long.
What it should look like now: Plump little spider about 2" long × 1.8" wide, lightly stuffed, 8 legs attached, big eyes on.
Step 6: Attach spider to coaster
Now we put it together. Sew the spider to the center of the flat coaster base with black yarn. Go through the bottom of spider and through coaster base several times.
Place spider body in center of coaster base (R12 72 sts coaster)
With black tail, sew through bottom of spider and through coaster base — 4-5 stitches — secure tightly
FO and weave all tails under coaster base
Finished coaster about 4.6" across with 2" spider on top

Finished small black crochet spider with big white eyes and eight legs, sitting on coaster base, about 4.6" coaster with 2" spider.
What it should look like now: Finished spider coaster — flat black coaster about 4.6" across with small 3D spider sewn in center, 8 legs splayed, cute googly eyes.
Assembly and finishing
- Make flat coaster base R1-R12 = 72 sts = about 4.6" across — no stuffing.
- Make spider body R1-R17 as figure-8 shape, stuff lightly between R10 and R15.
- Make 8 legs ch 10, sc 9 — sew 4 per side around middle of body at R9-R11.
- Make 2 white eye patches R1-R2 = 12 sts = about 0.76" across, insert safety eyes, sew to head 4 sts apart (0.8" apart).
- Sew spider to center of coaster base.
- Weave all tails under coaster base, trim.
Troubleshooting
Black yarn hard to see: Work near bright window or clip small light to project — count stitches by feel with marker every 12 sts.
Spider body too pointy: Missed increases — R4 should be 24 before straight section.
Legs different lengths: Ch 10 exactly for each — use same tension — count 9 sc per leg.
Eyes too far apart: Place 4 sts apart = 0.8" at this gauge — pin first to test.
Coaster not flat after sewing spider: Sew only through top loops of coaster base, not pulling tight — keep coaster flat.
Ways to make it your own
- Small 3.8" coaster: R1 6, R2 12, R3 18, R4 24, R5 30, R6 36, R7 42, R8 48, R9 54, R10 60 — about 3.82" across — use for espresso cups — about 8 yds black
- Main 4.6" coaster: R1 6, R2 12, R3 18, R4 24, R5 30, R6 36, R7 42, R8 48, R9 54, R10 60, R11 66, R12 72 — about 4.58" across — this pattern — about 10 yds black for base
- Large 5.7" coaster: R1 6, R2 12, R3 18, R4 24, R5 30, R6 36, R7 42, R8 48, R9 54, R10 60, R11 66, R12 72, R13 78 (sc 12, inc) x6, R14 84 (sc 13, inc) x6, R15 90 (sc 14, inc) x6 — about 5.73" across — about 14 yds
- Spider size: Tiny 1.5" spider — R1 6, R2 12, R3 18, R4 18 sc around 3 rounds, R5 (sc 1, dec) x6 (12), R6 dec x6 (6) — about 1.5" — ch 8 for legs (7 sc)
- Color: make purple spiders with green eyes for fun Halloween
- No safety eyes: embroider eyes with white and black yarn — required for children under 3

Thank you for making these spooky little spider coasters with me. I hope they make your coffee table a little cuter and your Halloween a little cozier. I test-crocheted this one straight from these instructions to make sure every count closes properly — if you make a set, I would love to see your colors.