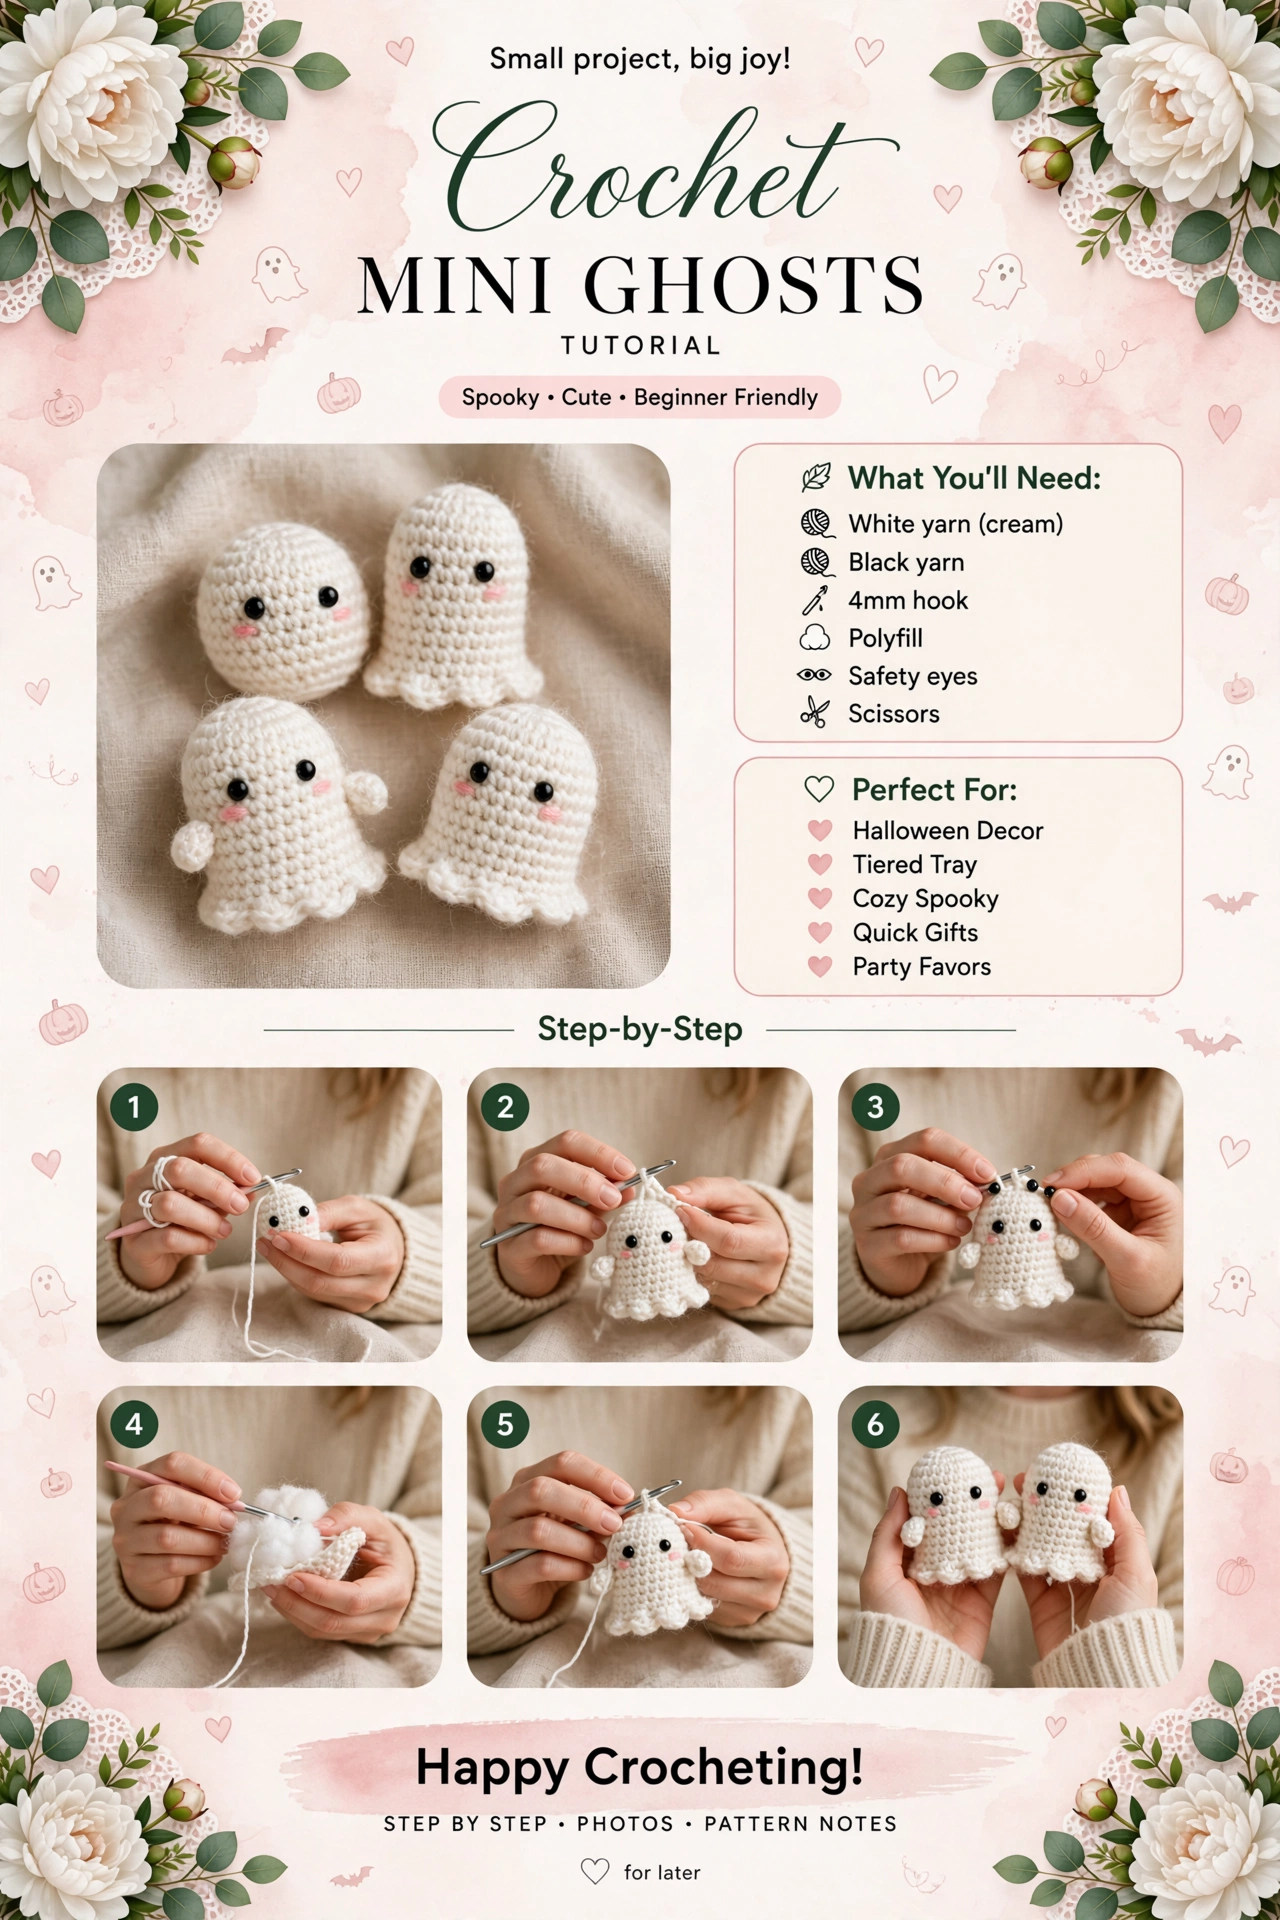
Inside this pattern
- Before you begin
- Materials I used
- Sizing & gauge
- Abbreviations
- Roadmap — 6 steps
- Step 1: The top of the head
- Step 2: Growing the body
- Step 3: Placing the eyes and cheeks
- Step 4: Stuffing
- Step 5: The wavy bottom edge — corrected count
- Step 6: Finishing and pair
- Assembly and finishing
- Troubleshooting
- Ways to make it your own — corrected math
Progress photos are AI-generated illustrations made to show each stage.
Before you begin
Hi friend, it's Sara here. I am so happy you are making these mini ghosts with me. When I made my first set, I wanted something that felt spooky but still sweet for my tiered tray — not scary, just cozy spooky.
These ghosts are all one piece. We start at the top of the head with a magic ring, grow to 24 stitches, then work straight down. The bottom gets a little ruffle in the front loops only — that is what makes the ghost look like it is floating. No sewing the body closed in a complicated way.
If you can make a magic ring and a single crochet, you can make this. Keep your tension soft and use a stitch marker in the first stitch of each round.
Materials I used
- Worsted weight yarn (medium 4) in Cream or White — about 8-10 yards per ghost (about 32-40 yards for 4) — tested from stitch count, each ghost is about 260 stitches total
- Worsted in Black — about 1 yard per ghost for embroidered smile
- Worsted in Soft Pink — about 1 yard per ghost for cheeks (or pink blush powder)
- 4mm (G-6) crochet hook
- 6mm black safety eyes — 2 per ghost — safety note: safety eyes are a choking hazard for children under 3; embroider eyes with black yarn instead for babies and party favors for small children
- Polyester fiberfill — small handful per ghost, about 3 oz for 4 ghosts
- Yarn needle, scissors, stitch marker, pins
Sizing & gauge
Gauge: 20 sc x 24 rows = 4" x 4" in single crochet with 4mm hook and worsted yarn. Each stitch is about 0.2" wide and each row about 0.166" tall.
R4 (24 sts): 24 × 0.2" = 4.8" circumference ÷ 3.14 = about 1.53" diameter flat — becomes about 1.8" wide stuffed
Height: R1-R4 = 4 rows + R5-R10 = 6 rows = 10 rows × 0.166" = about 1.66" tall before ruffle — plus ruffle 0.5" + light stuffing stretch = about 2.2"–2.5" tall finished
At 20 sc = 4", 24 sts makes a perfect mini ghost body for tiered trays
Abbreviations
ch — chain
sl st — slip stitch: insert hook, yarn over, pull through both loops
sc — single crochet: insert hook, yarn over pull up loop, yarn over pull through 2 loops
inc — increase: work 2 sc in same stitch. This grows the circle.
FLO — front loop only: work into only the front loop of stitch, leaving back loop free. Used for ruffle. The free loops left behind are the back loops of the round you are working into.
hdc — half double crochet: yarn over, insert, pull up loop, yarn over pull through 3 loops
dc — double crochet: yarn over, insert, pull up loop, yarn over pull through 2, yarn over pull through 2
FO — fasten off: cut yarn and pull through last loop
[...] x6 — repeat inside brackets 6 times
Roadmap — 6 steps
1. Magic ring top and first increases
2. Grow to 24 and work straight body
3. Place safety eyes and cheeks
4. Light stuffing
5. Wavy bottom edge in front loops — corrected to 12 repeats
6. Close and finish pair
Step 1: The top of the head
We start at the very top of the ghost's head. This is a tight magic ring with 6 stitches. If it feels fiddly, make your loop a little bigger — mine never looks pretty until I pull the tail.
R1: MR, 6 sc into ring (6)
R2: inc x6 (12)
R3: (sc 1, inc) x6 (18)
R4: (sc 2, inc) x6 (24)

Tiny white ghost head beginning, flat circle about 1.5" across at R4, magic ring closed.
What it should look like now: A small dome about 1.5" across, 24 stitches around, no hole at top.
Step 2: Growing the body
Now we just go around and around with no increases. This is the relaxing part. The ghost starts to cup into a little hat shape.
R5-R10: sc in each st around (24) — 6 rounds even — about 1" of height added — about 1.66" tall total before ruffle

Ghost body growing into a little dome shape, about 1.66" tall before ruffle, 24 stitches around.
What it should look like now: Little bell shape about 1.66" tall, open at bottom, 24 sts around.
Step 3: Placing the eyes and cheeks
I like to place eyes before stuffing — it is so much easier. Between rounds 7 and 8, about 5 stitches apart. That is about 1.0" apart at this gauge (5 × 0.2" = 1.0"), which looks sweet and not too wide.
Place 6mm safety eyes between R7 and R8, 5 sts apart — about 1.0" apart
With pink yarn, make tiny cheek: MR 4 sc, sl st closed — or use blush powder with cotton swab below eyes
Optional: embroider small smile with black yarn — one tiny V between eyes, about 2 sts below

Placing black safety eyes on white ghost, 5 stitches apart, about 1.0" apart.
What it should look like now: Ghost with two black eyes 5 sts apart and pink cheeks below, still unstuffed.
Step 4: Stuffing
Stuff lightly, like a soft cloud, not a baseball. I use just a pinch of polyfill — overstuffed ghosts lose their cute wobble.
Add small handful of polyfill — about the size of a large grape — fill top and middle lightly
Do not stuff bottom edge — leave last 0.5" empty so ruffle lays flat

Hands stuffing white fiberfill into small white ghost, opening about 1" wide.
What it should look like now: Soft plump ghost about 1.8" wide, lightly stuffed, bottom still open.
Step 5: The wavy bottom edge — corrected count
This is what makes it a ghost. We work in the front loops only and add a little extra stitches to make it wave. The free loops left behind are the back loops of R10 — the round we are working into. If you want to close the bottom slightly later, you will weave through those back loops of R10, not R11.
R11: FLO (sc 1, inc) x12 (36) — working in front loops only of R10 — creates ruffle base — 36 sts
R12: (sc 1, (hdc, dc, hdc) in next st, sc 1) x12 (60) — each repeat uses 3 sts and makes 5 sts: sc + 3 sts in one + sc = 5, so 12 repeats × 3 = 36 sts used, 12 × 5 = 60 sts produced — 12 small scallops around — about 2.2" wide at bottom
Sl st to first st, FO leaving 6" tail — if you want bottom slightly closed, weave tail through back loops of R10 (the free loops behind ruffle) to cinch slightly, leave small opening

Crocheting wavy scalloped bottom edge — 12 scallops — working in front loops only, now 60 stitches at outer edge.
What it should look like now: Ghost with wavy, scalloped bottom edge about 2.2" wide at bottom, 12 scallops, about 2.5" tall total. R12 has 60 sts at outer edge.
Step 6: Finishing and pair
I always make two at a time — they are cuter in pairs. Weave your ends inside and give them a little fluff.
Weave in top tail from MR through back of stitches
Weave bottom tail through back loops of R10 if you want bottom slightly closed — leave small opening, do not close fully
Add tiny arms optional: ch 4, sl st in 2nd ch, sc, sl st, FO — sew to side at R8 — about 0.5" arm

Two finished mini ghosts in cream white with black eyes and pink cheeks, about 2.5" tall each, 45 minutes each.
What it should look like now: Finished ghost about 2.5" tall × 1.8" wide, soft, wavy bottom with 12 scallops, sweet face. Make a second for a pair.
Assembly and finishing
- Make ghost body R1-R12 as above — corrected R12 is 60 sts outer edge.
- Place safety eyes between R7-R8 before stuffing, 5 sts apart (about 1.0" apart), secure washers inside — or embroider for children under 3.
- Stuff lightly — small handful only.
- Work wavy bottom R11-R12 in FLO of R10 — 12 scallops, 60 sts final.
- Weave all tails inside, hide. If closing bottom slightly, weave through back loops of R10.
- Add pink cheeks with small embroidered circles or blush powder.
- Optional arms: ch 4, sl st, sc, sl st — sew at side.
Troubleshooting
Ghost too pointy: Too few increases — R4 should be 24 sts.
Wavy sides, not just bottom: Extra increases in body — R5-R10 should be sc around (24), no inc.
Bottom ruffle too tight or doesn't close: Previous version used x9 which only covered 27 of 36 sts — now corrected to x12 to cover all 36 sts — R11 must be FLO only, keep tension loose — R12 produces 60 sts outer edge for full ruffle.
Stuffing shows: Stitches too loose or overstuffed — use 4mm hook, stuff lightly.
Eyes too high or too far apart: Place between R7-R8, 5 sts apart (about 1.0") — use pins first.
Loop confusion: With FLO ruffle, the free loops are the back loops of R10, the round you worked into — not R11 — weave tail through those if cinching.
Ways to make it your own — corrected math
- Tiny 1.8" ghost: R1 6, R2 12, R3 18, R4 (sc 5, inc) x3 (21) — corrected from (sc 2, inc) x7 which needs 21 sts to work — about 1.3" wide flat, R5-R7 sc 21 (21) — 3 rounds, R8 FLO (sc 1, inc) x10 + sc 1 (31), R9 scallop (sc 1, (hdc, dc, hdc) in next, sc 1) x10 + sc 1 — about 1.8" tall — about 5-6 yards
- Main 2.5" ghost: R1 6, R2 12, R3 18, R4 24, R5-R10 sc 24 (24), R11 FLO (sc 1, inc) x12 (36), R12 (sc 1, (hdc, dc, hdc) in next, sc 1) x12 (60) — this pattern — about 2.5" tall × 1.8" wide — about 8-10 yards
- Large 3.5" ghost: R1 6, R2 12, R3 18, R4 24, R5 30 (sc 3, inc) x6, R6 36 (sc 4, inc) x6, R7-R12 sc 36 (36) — 6 rounds even, R13 FLO (sc 2, inc) x12 (48), R14 (sc 1, (hdc, dc, dc, hdc) in next, sc 1) x12 (72) — about 3.5" tall × 2.3" wide — about 16-18 yards
- Color: make in light gray, sage green, or pale pink for pastel Halloween
- No safety eyes: embroider eyes with black yarn — small vertical lines 2 sts tall between R7-R8 — required for children under 3
- Garland: make 6 ghosts, ch 60, sc ghosts onto chain spaced 10 ch apart — about 18" garland

Thank you for making these little ghosts with me. I hope they make your tiered tray feel cozy and a little spooky in the sweetest way. I test-crocheted this one straight from these instructions to make sure every count works — if you make a set, I would love to see your pink cheeks and wavy bottoms.