Inside this pattern
- Before you begin
- Materials I used
- Sizing & what you'll need
- Abbreviations
- Full roadmap - 6 steps
- Step 1: Crochet the ghost body
- Step 2: Add safety eyes & smile
- Step 3: Mini pumpkin
- Step 4: Maple leaves & star
- Step 5: The hanging chains
- Step 6: Assemble the bag charm
- How I finish mine
- Ways to make it your own
Before you begin
I've been seeing ghost bag charms everywhere for Halloween 2026 — on tote bags, backpacks, even car mirrors — and I knew I had to make my own version. I wanted it spooky cute but still kawaii, not scary.
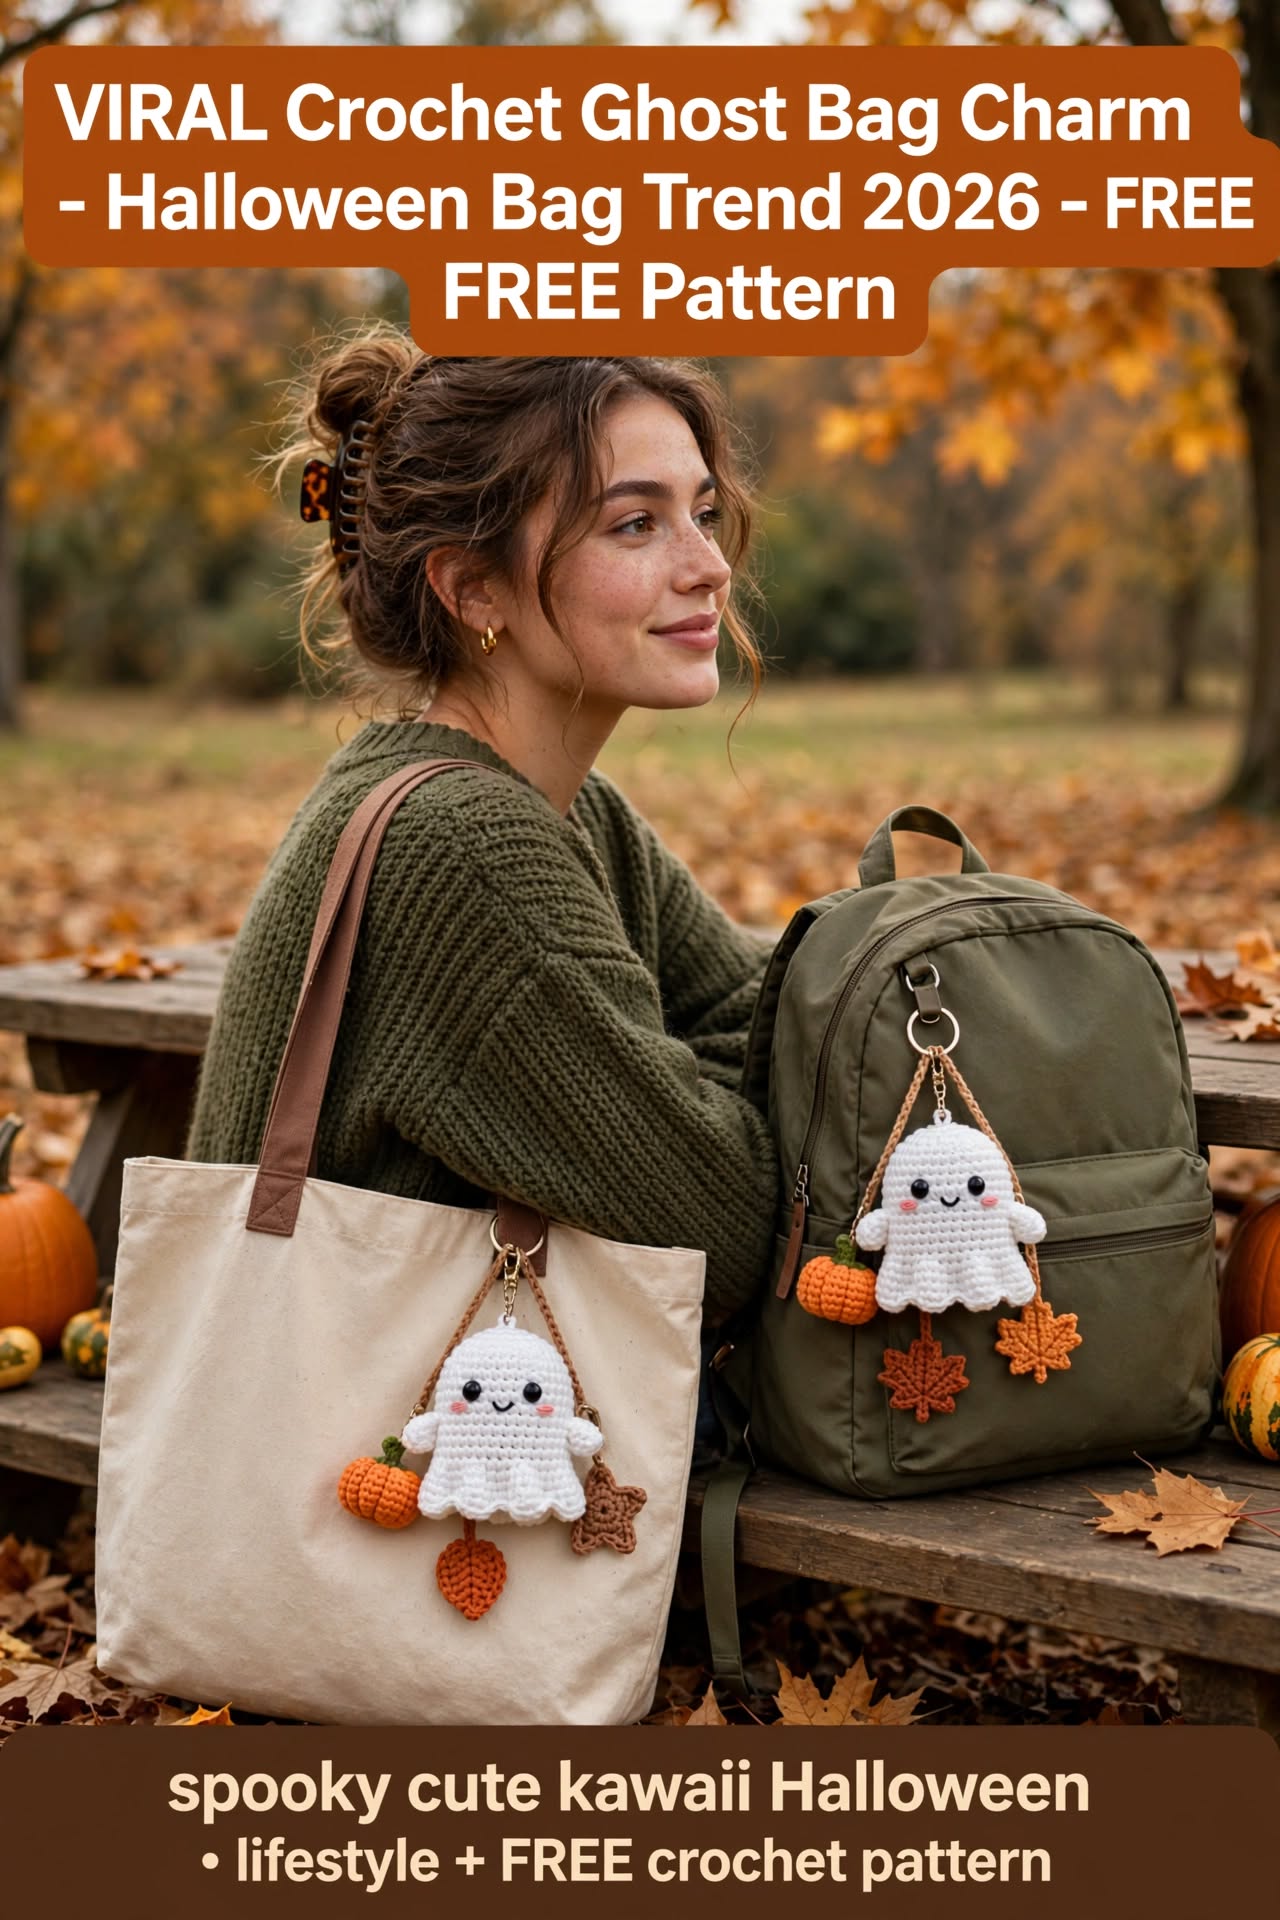
What I love about this pattern is it's mostly one piece. The ghost is crocheted top-down in one go — no sewing the body closed — we just add a little ruffled bottom edge for that wavy ghost look. The pumpkin and maple leaves are tiny 10-minute extras that make it look like the lifestyle pin you saw — with the tote bag and green backpack on the bench surrounded by fall leaves.
If you can do magic ring and single crochet, you can make this. I count out loud as I go so I don't get lost, and I use stitch markers for the increases.
Materials I used
- White yarn: Worsted cotton — I used Lily Sugar'n Cream white, about 25 yards for ghost. Cotton or acrylic both work, but cotton is cuter for bag charms.
- Orange yarn: Small amount — about 5 yards each for pumpkin (orange) and maple leaves / star (rust orange / burnt orange). I used rust and burnt orange like my fall beanie.
- Brown yarn: Tiny amount for leaf stems — about 1 yard.
- 3.5mm crochet hook: Keeps stitches tight so stuffing doesn't show.
- Safety eyes: 6mm black (2 pieces) — I add them between rounds 6-7, about 6 stitches apart.
- Key ring + lobster clasp: Gold like in the pin, plus 2 jump rings.
- BOO beads or wooden beads: Optional — I used wooden letter beads BOO in the first version.
- Stuffing: Polyfill — just a pinch.
- Tapeystry needle, scissors, stitch marker.
Abbreviations
MR = magic ring, sc = single crochet, inc = increase (2 sc in same st), dec = invisible decrease, sl st = slip stitch, ch = chain, FO = fasten off. We work in continuous rounds unless noted.
Full roadmap
1. Ghost body (18 rounds, top-down)
2. Eyes + smile embroidery
3. Mini pumpkin (2 mins)
4. Maple leaves x2 + star
5. Hanging chains (brown, 15-18 ch each)
6. Assemble to key ring — clip to tote / backpack
Step 1: Crochet the ghost body
I start with white — this is the top of the head. I keep my tail long for hanging loop later.
R1: MR, 6 sc (6)
R2: inc x6 (12)
R3: [sc, inc] x6 (18)
R4: [2 sc, inc] x6 (24)
R5-7: sc around (24) — 3 rounds straight
R8: [3 sc, inc] x6 (30)
R9-13: sc around (30) — 5 rounds, this is the chubby body
R14: [3 sc, dec] x6 (24) — start closing slightly
R15: sc around (24)
R16: [2 sc, dec] x6 (18) — stuff lightly here, I use tip of hook to push
R17: [sc, dec] x6 (12)
R18: FLO, [sc, inc, sc with picot] repeat around for ruffled bottom — I do (sc, ch 1, sl st in sc) for tiny wave
FO, weave in. Leave top loop.
Step 2: Add eyes & face
I add safety eyes between R6 and R7 — about 5-6 stitches apart. If you don't have safety eyes, I embroider with black yarn — two little French knots. For smile — I do a tiny V with black yarn, and two pink blush lines with pink yarn on sides — just one stitch horizontal like in the lifestyle photo.
Step 3: Mini pumpkin — 5 minute make
R1: MR, 6 sc (6)
R2: inc x6 (12)
R3: [sc, inc] x6 (18)
R4-5: sc around (18)
R6: [sc, dec] x6 (12) — stuff tiny pinch
R7: dec x6 (6), FO close.
Stem: With green, ch 2, 2 sc in 2nd ch from hook, sl st to top of pumpkin. Or embroider 2 green stitches.
My pumpkin in the pin is about 0.8 inch — I make it with orange worsted and a little green stem. You can make one pumpkin for tote, one for backpack like I did.
Step 4: Maple leaves & star
Ch 4, sc in 2nd ch from hook, hdc in next, (hdc, ch 1, hdc) in last ch for tip, working other side: hdc, sc.
Add small points: ch 2, sl st to side of leaf, repeat on other side. FO leave tail for sewing.
Simpler version: I sometimes just do: MR, [ch 3, dc, ch 3, sl st] x3 — makes 3-point leaf in 1 round. Star (brown/rust):
MR, [ch 2, dc, ch 2, sl st] x5 — 5-point star. FO.
In your lifestyle pin you saw — my tote had one pumpkin + one orange leaf + one brown star. My backpack had one pumpkin + two orange maple leaves. I mix and match — that's the viral look.
Step 5: The hanging chains
This is what makes it a bag charm, not just a plush.
With brown yarn, ch 18 for left side, FO leave long tail.
Ch 15 for right side, FO.
Ch 10 for middle bottom (for leaf). FO.
I use 3 strands — left chain holds pumpkin, middle holds leaf, right holds star/leaf. In pin, left is pumpkin, middle leaf, right star.
Step 6: Assemble — like in your pin
1. Thread ghost top loop through key ring.
2. Thread two brown chains through same key ring, on either side of ghost — so ghost hangs in middle.
3. Sew pumpkin to end of left chain, star to right chain, leaf to middle bottom chain (or as you like). I use tapestry needle, sew through chain end.
4. Add lobster clasp to key ring — now you can clip to tote bag handle or backpack zipper like in the photo with the girl on the bench with fall leaves.
5. Optional: add BOO wooden beads to a separate small chain — I thread 3 beads B-O-O with small wooden spacer beads.
How I finish mine
I weave all ends inside ghost or pumpkin — I go back and forth 2 times so it doesn't come loose in bag. I spray a tiny bit of fabric stiffener on maple leaves so they keep shape — optional. I test the key ring — give it a tug — because bags get tossed.
Ways to make it your own
- With pink bow: Like your first viral pin — add small pink bow on ghost head — ch 10, tie bow, sew.
- With BOO beads: Add wooden letter beads B-O-O on separate chain — super viral for Halloween 2026.
- Different colors: Make black ghost with orange bow, or orange ghost with black bow — 3 color variations like I made for your other pin.
- Backpack version: Make chains longer (ch 22) so ghost hangs lower on backpack — like green backpack in photo.
- Gift set: Make 2 — one for tote, one for backpack — sell as set — my bestseller at market.
Thanks for making with me
This ghost bag charm is exactly the viral Halloween bag trend for 2026 — spooky cute, kawaii, quick to make and perfect for totes and backpacks. I hope you love clipping it to your bag and seeing it swing when you walk through fall leaves.
If you make one, I'd love to see it on your tote or backpack — tag me, I keep all your photos in a little folder on my phone.
Happy crocheting!

Sara Rain Crochet · Handmade with love