Inside this pattern
- Before you begin
- Materials
- Sizing & gauge
- Abbreviations
- Roadmap — 6 steps
- Step 1: White tip — magic ring start
- Step 2: Orange middle — first color change
- Step 3: Yellow band — growing wider
- Step 4: White base and stuffing
- Step 5: Face with pink cheeks
- Step 6: Keyring attachment
- Assembly and finishing
- Troubleshooting
- Ways to make it your own
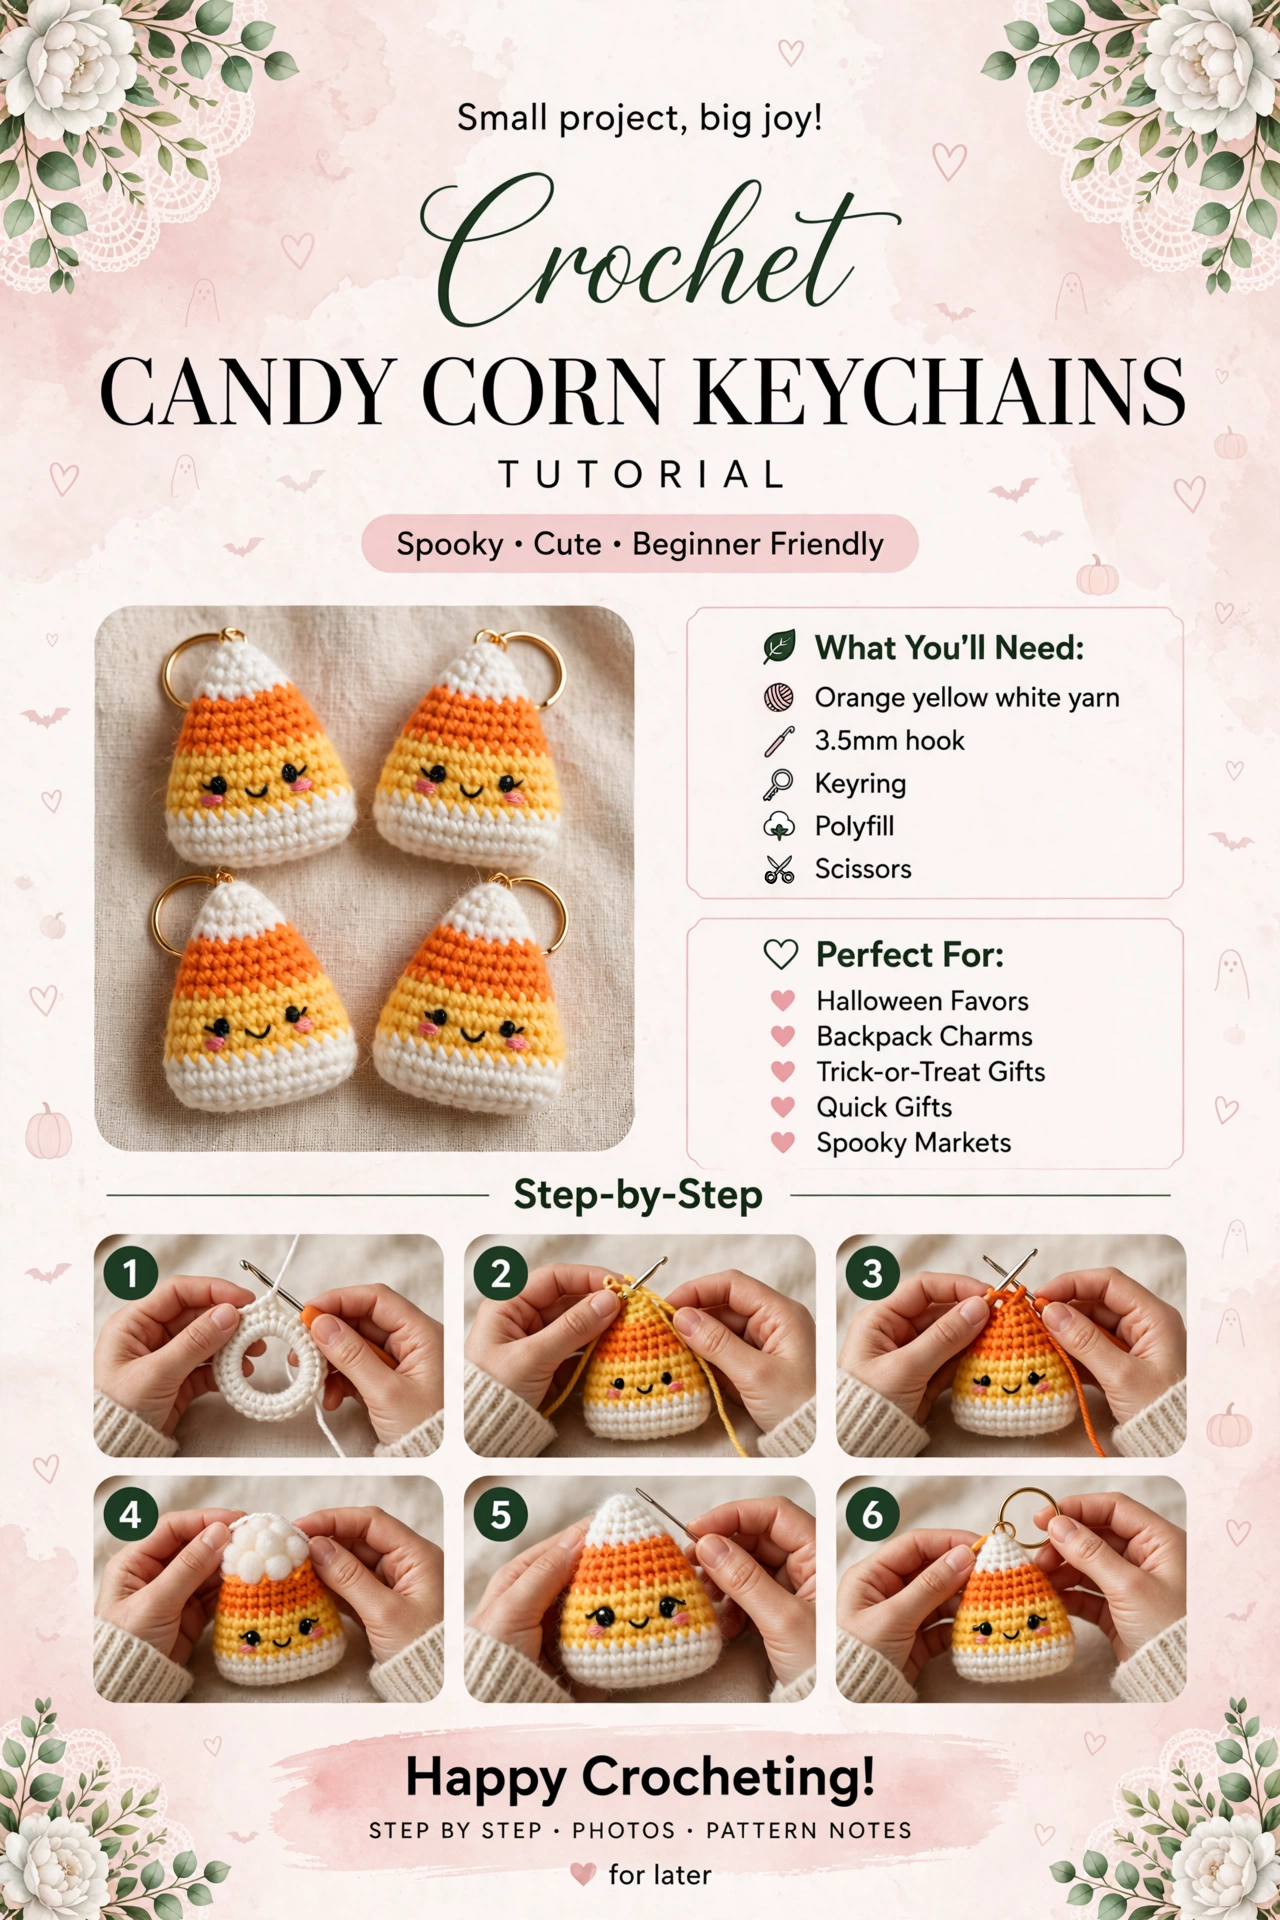
Progress photos are AI-generated illustrations made to show each stage.
Before you begin
I made four of these in one evening while watching a Halloween movie — they are that quick. Each candy corn starts at the white tip with a magic ring and grows wider toward the base, just like real candy corn. We change colors at the right rows: white, orange, yellow, white.
We work in continuous rounds, no turning, with a stitch marker in the first stitch. Color changes are done in the last yarn-over of the previous round — I will show you where. No complicated shaping, just (sc n, inc) x3 repeats that grow from 6 to 27 stitches.
Keep your tension soft — especially with the 3.5mm hook and worsted yarn, this gives a tight fabric so stuffing doesn't show.
Materials
- Worsted weight yarn (medium 4) in White — about 6 yards per keychain (3 yds tip + 3 yds base)
- Worsted in Orange — about 3 yards per keychain
- Worsted in Yellow / Mustard — about 3 yards per keychain
- Worsted in Black — about 1 yard for smile, Pink — about 1 yard for cheeks (or pink blush powder)
- 3.5mm (E-4) crochet hook
- Gold keyring / split ring — 1" diameter — 1 per keychain
- Polyester fiberfill — small pinch per keychain, about 2 oz for 4
- Yarn needle, scissors, stitch marker
Yarn estimate from actual stitch counts: R1-R5 white tip = 54 sts, R6-R9 orange = 66 sts, R10-R13 yellow = 90 sts, R14-R21 white base + closing = 135 sts — total about 345 sts per keychain — at 22 sc = 4" (0.18" per st) about 10-12 yards total. I suggest 12 yards per keychain to be safe.
Sizing & gauge
Gauge: 22 sc x 26 rows = 4" x 4" in single crochet with 3.5mm hook and worsted yarn. Each stitch about 0.18" wide and 0.153" tall.
Diameter = sts × 0.18" ÷ 3.14
R4 (12 sts): 12 × 0.18 ÷ 3.14 = about 0.69" diameter — tip
R8 (18 sts): 18 × 0.18 ÷ 3.14 = about 1.03" diameter — orange middle
R12 (24 sts): 24 × 0.18 ÷ 3.14 = about 1.37" diameter — yellow band
R14 (27 sts): 27 × 0.18 ÷ 3.14 = about 1.55" diameter flat — about 1.7" wide stuffed — main base
Height: 21 rounds × 0.153" = about 3.21" unstuffed, about 2.4" tall stuffed after shaping and closing
Abbreviations
ch — chain
sl st — slip stitch
sc — single crochet
inc — increase: 2 sc in same stitch — grows count
inv dec — invisible decrease: insert hook front loop next st, front loop following st, yarn over pull through 2, yarn over pull through 2 — closes without bump
FO — fasten off
[...] x3 — repeat 3 times — for this pattern we use x3 because candy corn is triangular, not round — each increase round adds 3 sts total
Roadmap — 6 steps
1. White tip — magic ring to 12 sts
2. Orange middle — color change to 18 sts
3. Yellow band — to 24 sts
4. White base and stuffing — to 27 sts then close
5. Face with pink cheeks and smile
6. Keyring attachment at tip
Step 1: White tip — magic ring start
We start at the tiny white tip. This is a tight magic ring with 6, then we grow slowly — only 3 increases per increase round so it stays pointy like candy corn, not round like a ball.
R1: MR, 6 sc into ring (6)
R2: (sc 1, inc) x3 (9) — uses 6 sts, makes 9
R3: sc around (9) — 1 round even
R4: (sc 2, inc) x3 (12) — uses 9 sts, makes 12
R5: sc around (12) — white tip about 0.69" wide

Small white magic ring start, 12 stitches around, about 0.69" wide at R5, tip of candy corn.
What it should look like now: Tiny white pointed tip, about 0.7" wide, 12 sts around, about 0.7" tall.
Step 2: Orange middle — first color change
Change to orange in the last yarn-over of R5. I like to cut white leaving 4" tail, pull orange through, then continue. We grow to 18 sts here.
R6: (sc 3, inc) x3 (15) — uses 12 sts, makes 15
R7: sc around (15) — 1 round even
R8: (sc 4, inc) x3 (18) — uses 15 sts, makes 18
R9: sc around (18) — orange band about 1.03" wide

Candy corn with white tip, orange middle, yellow lower band, cute face starting, about 1.3" tall.
What it should look like now: White tip + orange middle, about 1.3" tall, 18 sts around, 1.03" wide at orange.
Step 3: Yellow band — growing wider
Change to yellow in last yo of R9. This is the yellow band that sits above the white base — it grows to 24 sts.
R10: (sc 5, inc) x3 (21) — uses 18 sts, makes 21
R11: sc around (21)
R12: (sc 6, inc) x3 (24) — uses 21 sts, makes 24
R13: sc around (24) — yellow band about 1.37" wide

Crocheting orange middle section of candy corn, growing from 15 to 18 stitches, about 1" wide.
What it should look like now: White tip, orange middle, yellow band, about 1.8" tall, 24 sts around, 1.37" wide.
Step 4: White base and stuffing
Change back to white for the thick white base. This is where we get to 27 sts and make the bottom flat and wide. Stuff lightly after R18.
R14: (sc 7, inc) x3 (27) — uses 24 sts, makes 27
R15-R17: sc around (27) — 3 rounds even — white base about 1.55" wide flat, 1.7" stuffed
R18: (sc 7, inv dec) x3 (24) — uses 27 sts, makes 24
R19: (sc 2, inv dec) x6 (18) — uses 24 sts, makes 18 — stuff lightly here, grape size
R20: (sc 1, inv dec) x6 (12) — uses 18 sts, makes 12
R21: inv dec x6 (6) — uses 12 sts, makes 6 — close, FO leaving 8" tail, weave closed

Stuffing candy corn with white fiberfill, bottom open about 1" wide, three colors visible.
What it should look like now: Closed candy corn shape about 2.4" tall × 1.7" wide, lightly stuffed, white tip, orange, yellow, white base.
Step 5: Face with pink cheeks
The face is what makes them sell at markets. I place eyes between R11 and R12, about 5 sts apart — about 0.9" apart at this gauge (5 × 0.18").
Eyes: embroider with black yarn — small vertical lines 2 sts tall, or 6mm safety eyes if not for small children — place between R11-R12, 5 sts apart, about 0.9" apart — safety note: safety eyes are choking hazard for children under 3; embroider eyes instead for babies, backpack charms for small children, and trick-or-treat gifts
Cheeks: with pink yarn, small horizontal stitch 1 st wide below each eye, or pink blush powder with cotton swab
Smile: with black yarn, small U shape between eyes, 1 st below, about 2 sts wide

Embroidering cute smiling face on candy corn, black eyes with pink cheeks below, U-shaped smile.
What it should look like now: Candy corn with two black eyes 5 sts apart, pink cheeks, small smile, about 2.4" tall.
Step 6: Keyring attachment
The last step — add the keyring to the white tip so it hangs like real candy corn.
With white tail from R1 or new white yarn, insert hook through top of tip (R1), ch 4, sl st to form small loop, thread loop through keyring, sl st to secure, FO and weave tail inside
Or sew keyring directly to tip with 3-4 stitches through ring and tip, secure tightly

Attaching gold keyring to white tip of candy corn keychain, small loop at top, about 2.4" tall finished.
What it should look like now: Finished candy corn keychain about 2.4" tall × 1.7" wide, white-orange-yellow-white stripes, cute face, gold keyring on tip, ready for backpack.
Assembly and finishing
- Make candy corn body R1-R21 as above: white tip 6→12, orange 12→18, yellow 18→24, white base 24→27→24→18→12→6.
- Stuff lightly at R19 — grape size, not baseball — leave bottom able to close flat.
- Close bottom R21 to 6 sts, weave tail through front loops and pull closed, hide tail inside.
- Embroider eyes between R11-R12, 5 sts apart (0.9" apart) — safety eyes only for ages 3+.
- Add pink cheeks 1 st below eyes, 1 st wide, and black U smile 2 sts wide between.
- Attach keyring to tip with small chain loop or sewn stitches.
- Weave all tails inside, trim.
Troubleshooting
Not pointy, too round: Too many increases early — we use only x3 inc per inc round (adds 3 sts, not 6) to keep it triangular — check R2 9, R4 12, R6 15, R8 18, R10 21, R12 24, R14 27.
Color jog visible: Change color in last yo of previous round, not first st of new round — carry unused color loosely inside if needed.
Stuffing shows: Stitches too loose or overstuffed — use 3.5mm hook, keep tension tight, stuff lightly.
Bottom not flat: R15-R17 should be sc around 27 sts even, then decrease — if wavy, too many sts, if cupping, too few.
Keyring pulls out: Sew through ring 3-4 times, not just once — use strong white yarn doubled.
Ways to make it your own
- Tiny 1.7" charm: R1 6, R2 (sc 1, inc) x3 (9), R3 sc 9, R4 (sc 2, inc) x3 (12), R5 sc 12 orange, R6 (sc 3, inc) x3 (15), R7 sc 15 yellow, R8 (sc 4, inc) x3 (18), R9-R10 sc 18 white, R11 (sc 1, dec) x6 (12), R12 dec x6 (6) — about 1.7" tall × 1.2" wide — about 6-7 yards total
- Main 2.4" keychain: R1 6, R2 9, R3 9, R4 12, R5 12, R6 15, R7 15, R8 18, R9 18, R10 21, R11 21, R12 24, R13 24, R14 27, R15-R17 27, R18 24, R19 18, R20 12, R21 6 — this pattern — about 2.4" tall × 1.7" wide — about 10-12 yards total
- Large 3.5" plush: R1 6, R2 9, R3 9, R4 12, R5 12, R6 15, R7 15, R8 18, R9 18, R10 21, R11 21, R12 24, R13 24, R14 27, R15 27, R16 30 (sc 8, inc) x3, R17 30, R18 33 (sc 9, inc) x3, R19-R21 33 white, R22 (sc 9, dec) x3 (30), R23 (sc 3, dec) x6 (24), R24 (sc 2, dec) x6 (18), R25 (sc 1, dec) x6 (12), R26 dec x6 (6) — about 3.5" tall × 2.2" wide — about 18-20 yards
- Color: make pastel candy corn — pink tip, lavender middle, mint base — for spring markets
- No keyring: make as ornament — ch 20 loop at tip instead of keyring

Thank you for making these candy corn keychains with me. I hope they make your backpacks and market tables a little sweeter this Halloween. I test-crocheted this one straight from these instructions — 6 to 27 stitches, every round counted — if you make a set, I would love to see your colors.